Hardware installation, Lceiling mount with supplied bracket – Toshiba IK-WB16A-W User Manual
Page 15
15
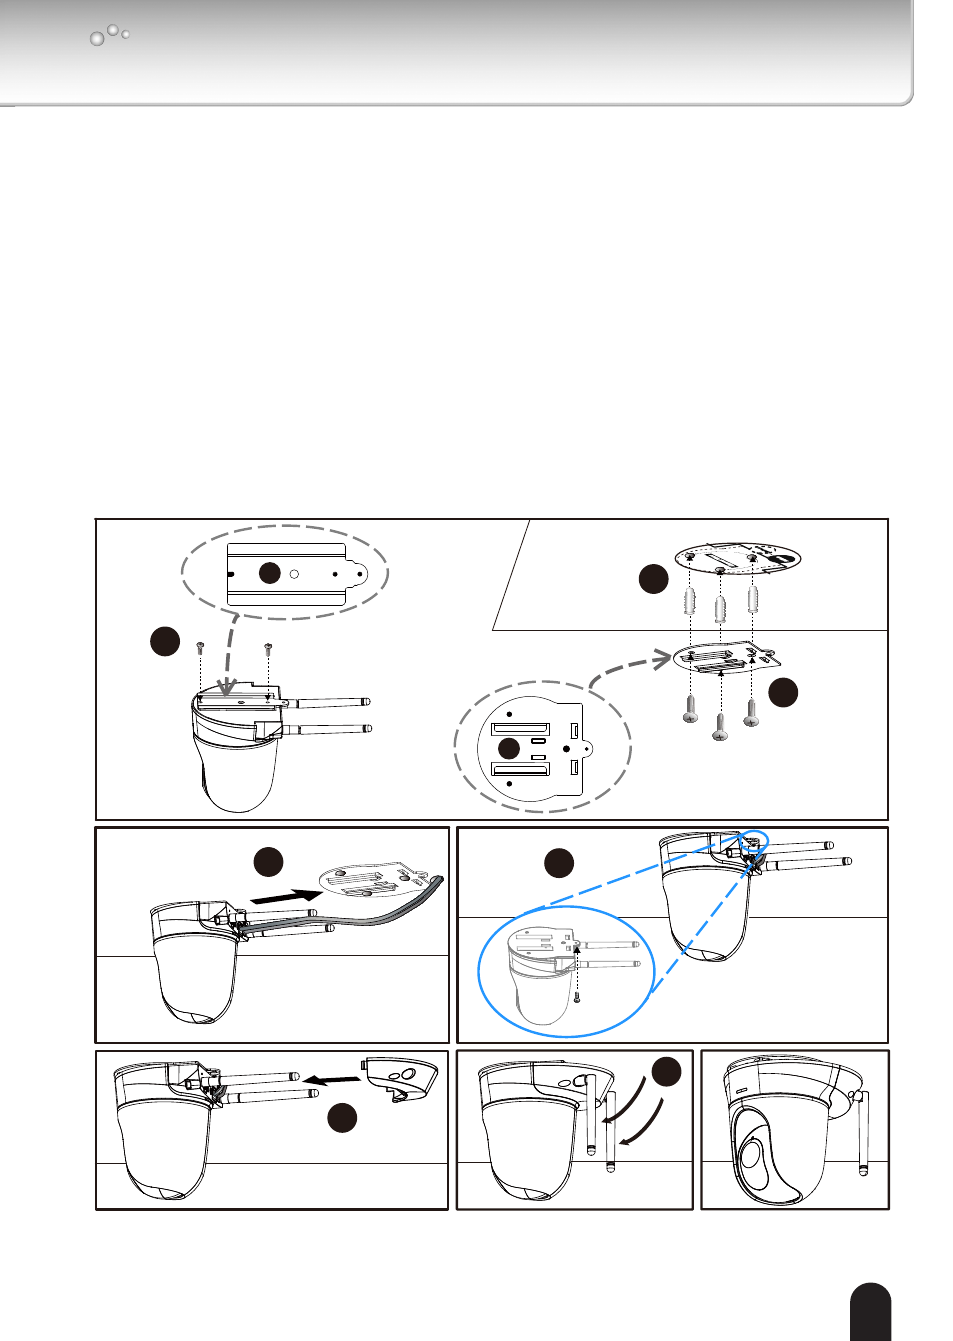
Hardware Installation
1. Attach ceiling mount bracket A to the Network Camera and secure it with two small
screws.
2. Attach the supplied alignment sticker to the ceiling. Drill a hole in the ceiling to feed
the cables. And drill three pilot holes into the ceiling; then hammer the plastic anchors
into the holes.
3. Fasten ceiling mount bracket B to the ceiling with three screws. And connect the
cables to the camera.
4. Slide the Network Camera into ceiling mount bracket B.
5. Secure ceiling mount bracket A and B with a small screw.
6. Attach the back cover and fasten with two screws.
7. Adjust the antenna to the appropriate position.(IK-WB16A-W only).
l
Ceiling mount with supplied bracket
2
3
1
A
B
4
5
6
7
Drill h
ole
Drill hol
e
Alignment St
icker
Drill hole
( Drill
hol
e)
IK-WB1
6A / IK-W
B16A-W