Installation – Tripp Lite NetCommander B072-008-1 User Manual
Page 8
8
Installation
(continued)
Rackmount Considerations
Rackmounting the NetCommander KVM
The B070-016-19 is designed for mounting in a 1U rack system. For convenience, a rack
mounting kit is included with your B070-016-19 for quick installation. The various mounting
options are explained in the sections that follow.
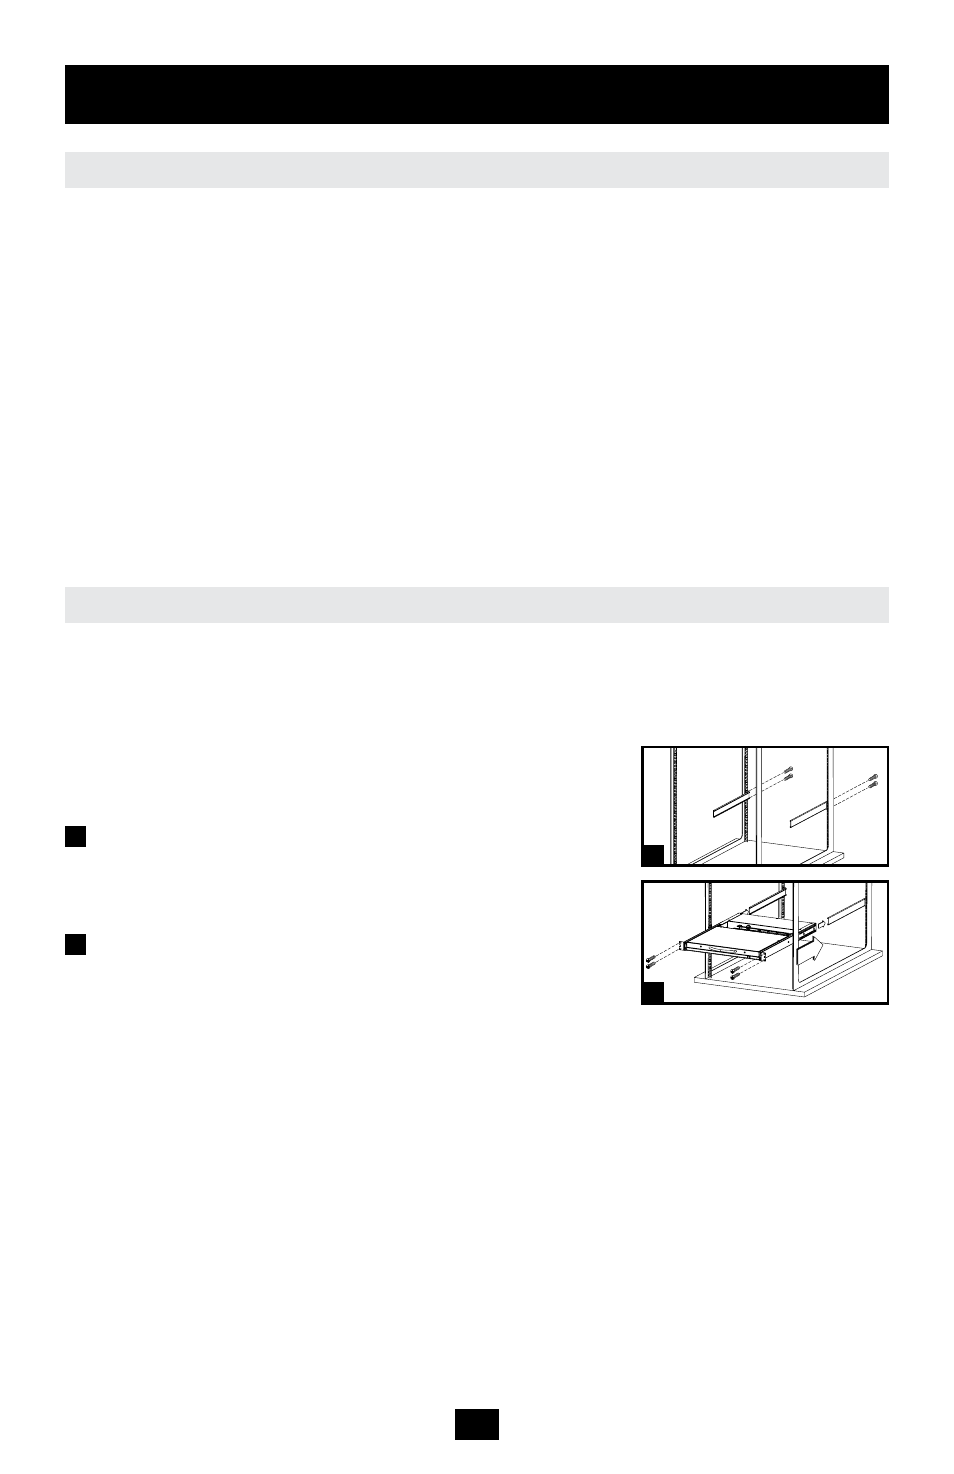
Standard Rackmounting
The standard rackmounting brackets that come attached to the
B070-016-19 allow the unit to be installed in standard 1U racks
by a single individual.
Slide out the rear mounting brackets from the console
and mount both brackets (separate from the console) to the
inside rear of a standard 1U rack system using user-supplied
screws.
Take the console and gently slide it into the two rear-
mounted brackets in the rack and secure the console in place
by inserting user-supplied screws.
Ambient Operating Temperature
The ambient operating temperature in the rack may be an issue and is dependent upon the
rack load and ventilation. When installing in a closed or multi-unit rack assembly, make sure
that the temperature will not exceed the maximum rated ambient temperature. (32º to 104º F)
Airflow
Ensure that the airflow within the rack is not compromised.
Circuit Overloading
When connecting the equipment to the supply circuit, consider the effect that overloading of
circuits might have on over-current protection and supply wiring.
Reliable grounding of rack-mounted equipment should be maintained.
To protect against circuit overloading you should connect your B070-016-19 Console KVM
and attached computers/servers to a Tripp Lite SmartPro
®
or SmartOnline
®
UPS System.
1
2
1
2
2-Post Rackmounting
The B070-016-19 can also be mounted in a 2-post rack installation using the optional 2-Post
Rackmount Kit (model #: B019-000). The mounting hardware allows for the console to be
opened with the drawer in any position. Heavy-duty 14-gauge steel provides stability and
prevents the console frame from twisting. See the B019-000 instructional manual for detailed
mounting instructions.