Rack mount ing, Rack mount ing a sin gle base sta tion, Rack mount ing two base sta tions side-by-side – Telex RADIOCOM TR-1 User Manual
Page 15
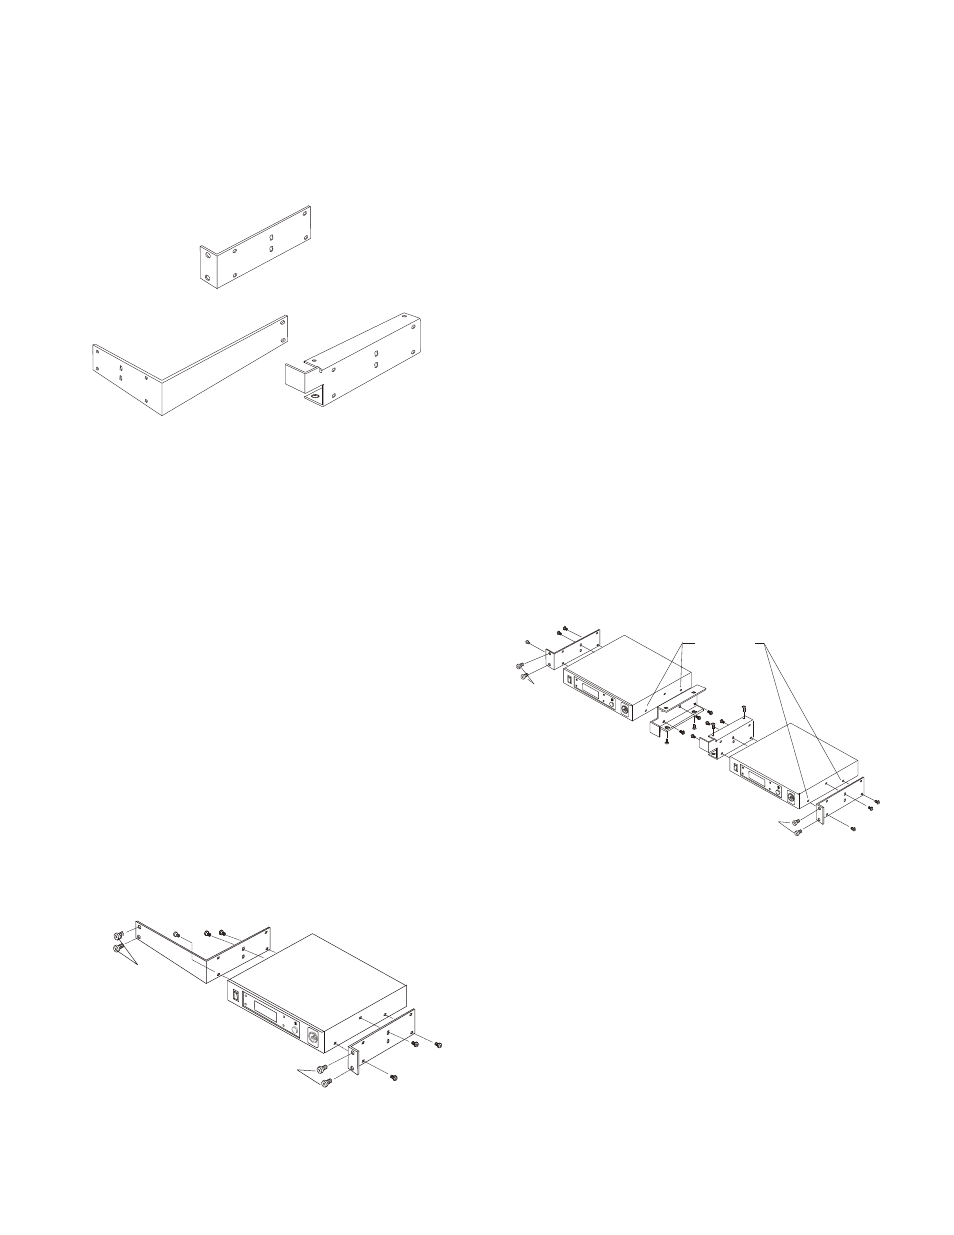
Rack Mount ing
The rack mount ing brack ets come with each BTR-1. These
brack ets may be used to mount a sin gle base sta tion in a 19"
wide rack or mount two base sta tions side by side in a rack.
Fig ure 5-1 shows the three brack ets that come with a base sta -
tion.
Rack Mount ing a Sin gle Base Sta tion
1. Re move the four pan head screws (two on each side) clos -
est to the front panel.
2. Place the dou ble unit side bracket on the side of the base
sta tion you wish clos est to the edge of the rack.
3. Re place the two pan head screws and use a third pan head
screw (2 sup plied with base station) to screw into the up -
per mid dle lo ca tion of the bracket.
4. Place the sin gle unit rack mount bracket on the other side
of the base sta tion.
5. Re place the two pan head screws and the other pan head
screw that came with the base to se cure the bracket. Screw
the third screw into the up per mid dle hole of the bracket.
6. Use the rack mount screws (not sup plied) to se cure the
unit to the rack.
Fig ure 5-2
Rack Mounting of a Sin gle Unit
Rack Mount ing Two Base Sta tions
Side-by-Side
1. Re
move the four pan head screws (two on each side)
closes to the front panel.
2. Place the dou ble unit side brack ets on the sides of the base
sta tions you wish clos est to the edge of the rack.
3. Re place the two pan head screws and use a third pan head
screw (2 sup plied with base sta tion) to screw into the up -
per mid dle lo ca tion of the rack mount middle bracket.
4. Place the dual bracket on the other sides of the base sta -
tions. Make sure the bracket is flipped so the front bend is
to ward the front of the base sta tion. As you face the rack,
the right base station will have the mid dle bracket front
bend high and left base station will have the bend low.
5. Re place the two pan head screws and the other pan head
screw into the up per mid dle hole of each bracket.
6. Use the four flat head screws (2 sup plied with base sta -
tion) to se cure the top and bot tom of the mid dle brack ets
to gether.
7. Use rack mount screws (not sup plied) to se cure the unit to
the rack.
Fig ure 5-3
Rack Mount ing Two Base Units Side-by-Side
5-2
SINGLE UNIT RACK MOUNT BRACKET
DOUBLE UNIT RACK MOUNT BRACKET
RACK MOUNT MIDDLE BRACKET
Fig ure 5-1
Rack Mount Brack ets
NOT
SUPPLIED
NOT
SUPPLIED
REMOVE SCREWS
(TYPICAL 4 SIDES)
NOT
SUPPLIED
NOT
SUPPLIED