Con trols and con nec tions - rear panel, Rts units telex units – Telex RADIOCOM TR-1 User Manual
Page 11
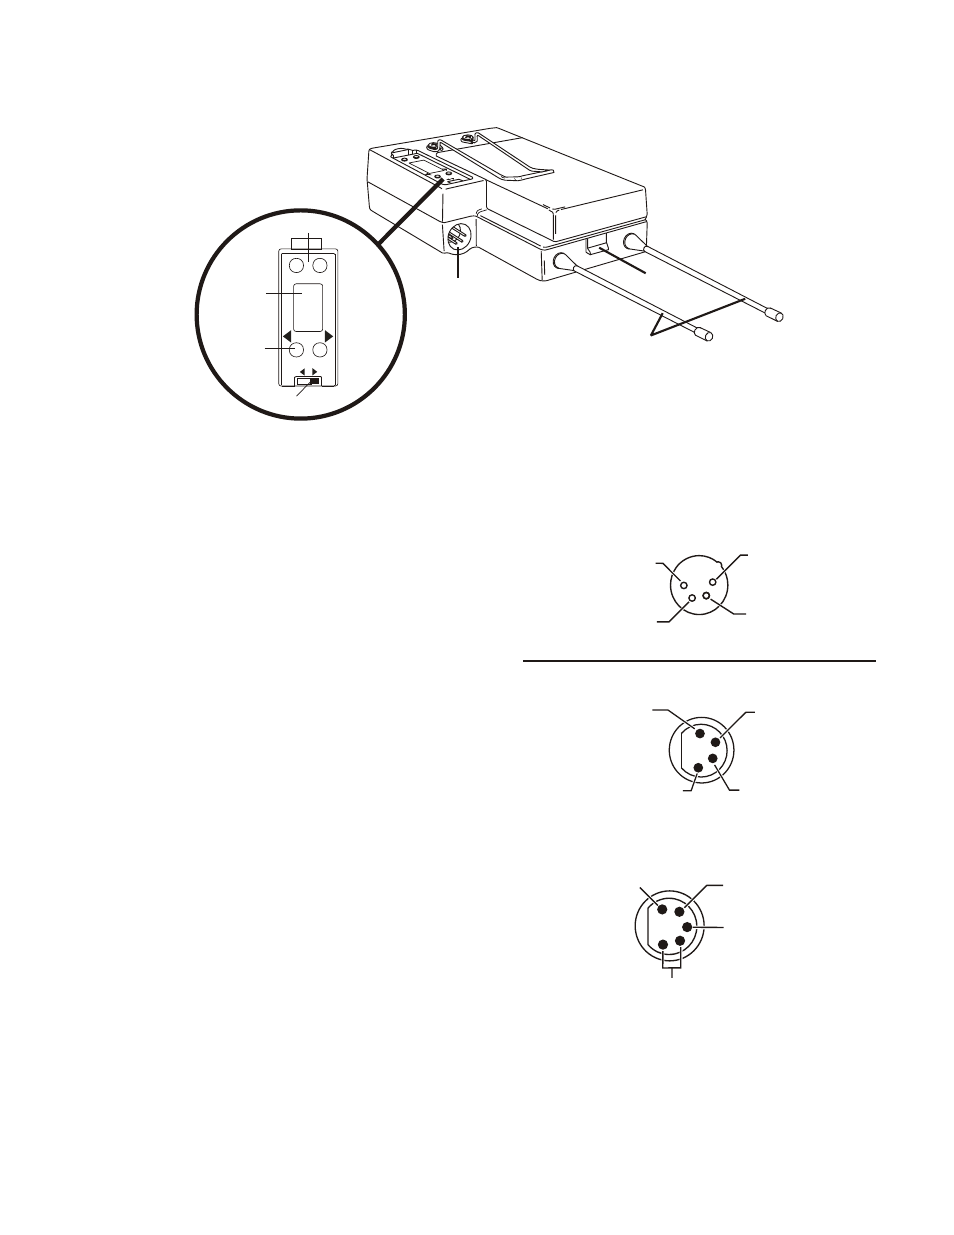
Con trols and Con nec tions - Rear Panel
Fig ure 3-2
TR-1 Rear Panel/Con nec tor/An ten nas
9. [MENU] and [SET] but tons: Used to se lect menus and
set op tions on the LCD.
10. LCD (Liq uid Crys tal Dis play)
11. [UP] and [DOWN] but tons: Used to se lect beltpack op -
tions on the LCD.
12. Push-to-Talk/Push-to-Transmit Switch:
Push-to-Talk (PT TALK): The trans mit ter is al ways
on. No au dio is sent un less the talk but ton is ac tive.
Rec om mended po si tion.
Push-to-Trans mit (PT TX): The trans mit ter and au -
dio paths are off ex cept when the talk but ton is ac tive.
13. Head set Con nec tor: Male XLR con
nec
tor for Telex
units, Fe male XLR con nec tor for RTS units.
14. Bat tery Latch: Press down to en able the bat tery pack to
be re leased. While the latch is held down, slide the bat tery
pack about 1/8 inch back, to ward the latch, un til it stops,
then lift out.
15. Re ceive and Trans mit An tennas: The an ten nas are screw
type, ¼ wave, re place able an ten nas. The color dot on the
screw end of the an tenna must match color dot on an tenna
re cep ta cle.
Fig ure 3-3
Head set Jack Wir ing
3-2
(1) Microphone
Shield
(2) Microphone
Audio
(4) Headphone
Low (-)
(3) Headphone
High (+)
(1) Microphone
Shield
(4) Headphone
Low
(3) Headphone
High (+)
(2) Microphone
Audio (+)
RTS Units
Telex Units
13
15
14
M
E
N
U
S
E
T
PT
TX
PT
TALK
10
9
11
12
(1) Microphone
Shield
(5) (4) Headphone
Low
(3) Headphone
High (+)
(2) Microphone
Audio (+)