Step 4: installing anti-tip device – Thermador PRDS304 User Manual
Page 13
STEP 4: INSTALLING ANTI-TIP DEVICE
Parts Required for Installation of Anti-Tip Device:
PRG304 and PRG36 All Gas Ranges (Figures 9 and 10)
15-10-948 (2 Each)
15-10-910 (1 Each)
15-10-911 (2 Each)
15-10-771 (1 Each)
15-10-916 (4 Each)
15-10-772 (1 Each)
15-10-909 (1 Each)
Mounting Bracket
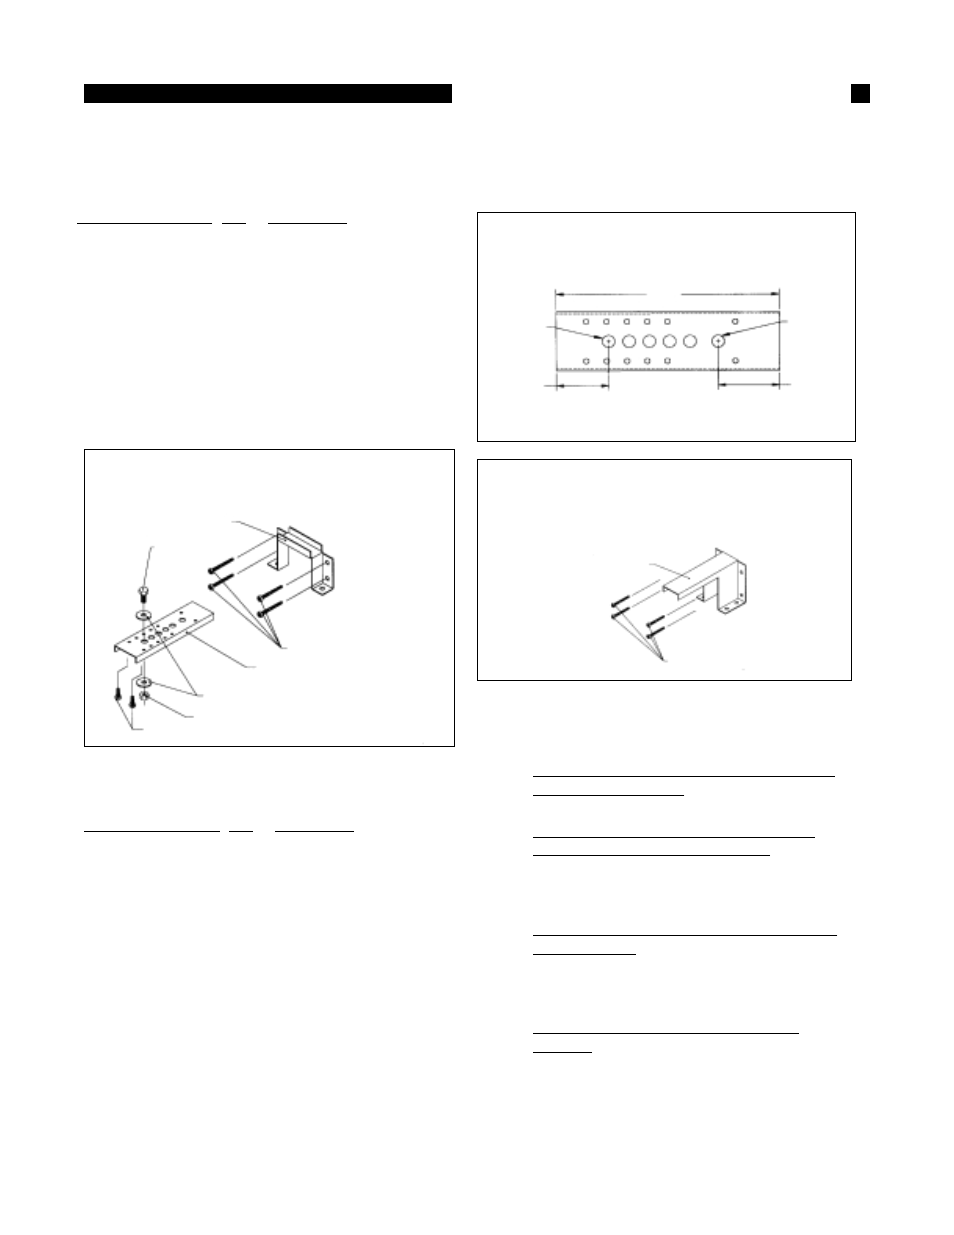
FIG. 9 Mounting Kit for PRG304 and PRG36
All-Gas Ranges
PRDS304 and PRDS36 Dual
Fuel Ranges (Figure 11)
Thermador Part No. Qty Description
15-10-916
4
Screw, Phillips,#10 x 1-1/2"
15-10-770
1
Anti-Tip Channel, Adjustable,
IMPORTANT INSTALLATION INFORMA-
TION:
•
The anti-tip bracket may be attached to a
solid wood cabinet having a minimum wall
thickness of 3/4".
•
The thickness of the wall or floor may
require use of longer screws, available at
your local hardware store.
•
In all cases, at least two (2) of the bracket
mounting screws must be fastened to solid
wood or metal.
•
Use appropriate anchors when fastening the
mounting bracket to any material other
Thermador Part No. Qty Description
15-10-916
4
Screw, Phillips,#10 x 1-1/2"
15-10-771
1
Anti-Tip Channel, Adjust
able, PRG
15-10-772
1
Mounting Bracket, PRG
15-10-909
1
Bolt, Hex Head, 1/4"-20 x
1/2"
15-10-910
1
Nut, Hex, 1/4-20
15-10-911
2
Washer, Flat, 1/4-20
15-10-948
2
Screw, Phillips, #10 x 1/2"
1-17/32"
1-9/32"
5-1/2"
This Hole
For Flush
Mount of
PRG36
This Hole
For Flush
Mount of
PRG304
FIG. 10 Adjustable Anti-Tip Channel PRG304
and PRG36 All-Gas Ranges
FIG. 11 Mounting Kit for PRDS304 and PRDS36
Dual Fuel Ranges
15-10-770 (1 Each)
15-10-916 (4 Each)
than hardwood or metal.
•
Prepare holes at fastener locations as
identified below:
-
For walls, wall studs, or floors composed
of solid wood or metal, drill 1/8" pilot
holes.
-
For walls or floors composed of drywall,
sheet-rock or other soft materials, drill 3/
16" holes to a minimum depth of 1-3/4",
then tap plastic anchors into each of the
holes using a hammer.
-
For walls or floors composed of concrete or
concrete block, drill 3/16" holes to a
minimum depth of 1-3/4", then tap con
crete anchors into each of the holes using
a hammer.
-
For walls or floors having ceramic tile
covering, drill 3/16" holes through the tile
only, then drill into the material behind
the tile as indicated immediately above.
•
If the range is moved to a new location, the
Anti-Tip Device must be removed and rein-
stalled.
Page 11