C. setting up file sharing on your pc, Resetting the network address 1, Compatible operating systems – Toshiba Integrated High Definition DLP 50HMX96 User Manual
Page 61: Setting up file sharing on a pc with microsoft, Windows, Xp service pack 1 or service pack 2 1
61
HMX96 (E/F) Web 213:276
Chapter 7: Using the THINC
™
home network feature
6
The Basic Network Setup menu appears.
Press B or b to highlight the IP Address field, and then
use the Number buttons on the remote control to input the
IP address.
7
Press b to highlight the Subnet Mask field, and then use
the Number buttons to input the Subnet Mask.
8
Press b to highlight the Gateway (Router) field, and
then use the Number buttons to input the Gateway
(Router) address.
9
Press b to highlight the DNS (Domain Name Server)
field, and then use the Number buttons to input the DNS
address.
10
When finished, highlight Done and press
T.
The Basic Network Setup menu closes and the
Network menu appears.
11
Go to section C, “Setting up file sharing on your PC.”
Resetting the network address
1
Press
Y and open the Setup menu.
2
Highlight Installation and press
T. The Installation
menu appears.
3
Open the Network menu.
4
Highlight Basic Network Setup and press
T.
5
The message “Your Basic Network Setup is complete.
Would you like to start over?” will appear.
To continue, highlight Yes and press
T.
To return to the Network menu, highlight No and press
T.
6
If you selected Yes in step 5, the message “Obtain
network address automatically?” will appear.
To obtain the network address automatically, go to step 5
under “Automatically setting up the network address”
(- page 59).
To manually enter the network address, go to “Manually
setting up the network address”.
C. Setting up file sharing on your PC
Compatible operating systems
The following operating systems are compatible for file
sharing with the TV:
•
Microsoft
®
Windows
®
XP Service Pack 2
(Home Edition and Professional) [See setup details below]
•
Microsoft
®
Windows
®
XP Service Pack 1
(Home Edition and Professional) [See setup details below]
•
Microsoft
®
Windows
®
2000 [See setup details on page 62]
No other operating systems are compatible with the TV.
Note:
• The name of any directory/folder on your PC that you are
setting up for file sharing with the TV can have a maximum
of 12 characters and cannot contain any special characters.
• See “Media specifications” (
- page 64) for details on
compatible JPEG and MP3 files.
• The network (NETBIOS) name of your PC that you are setting
up for file sharing must be 15 characters or less.
To determine which operating system and service
pack (if applicable) are on your PC:
1
On your PC, click the “Start” button.
2
Click “Settings | Control Panel”.
3
In the Control Panel, double-click “System”.
4
Select the “General” tab, which will display your PC’s
current operating system and service pack.
Setting up file sharing on a PC with
Microsoft
®
Windows
®
XP Service Pack 1 or
Service Pack 2
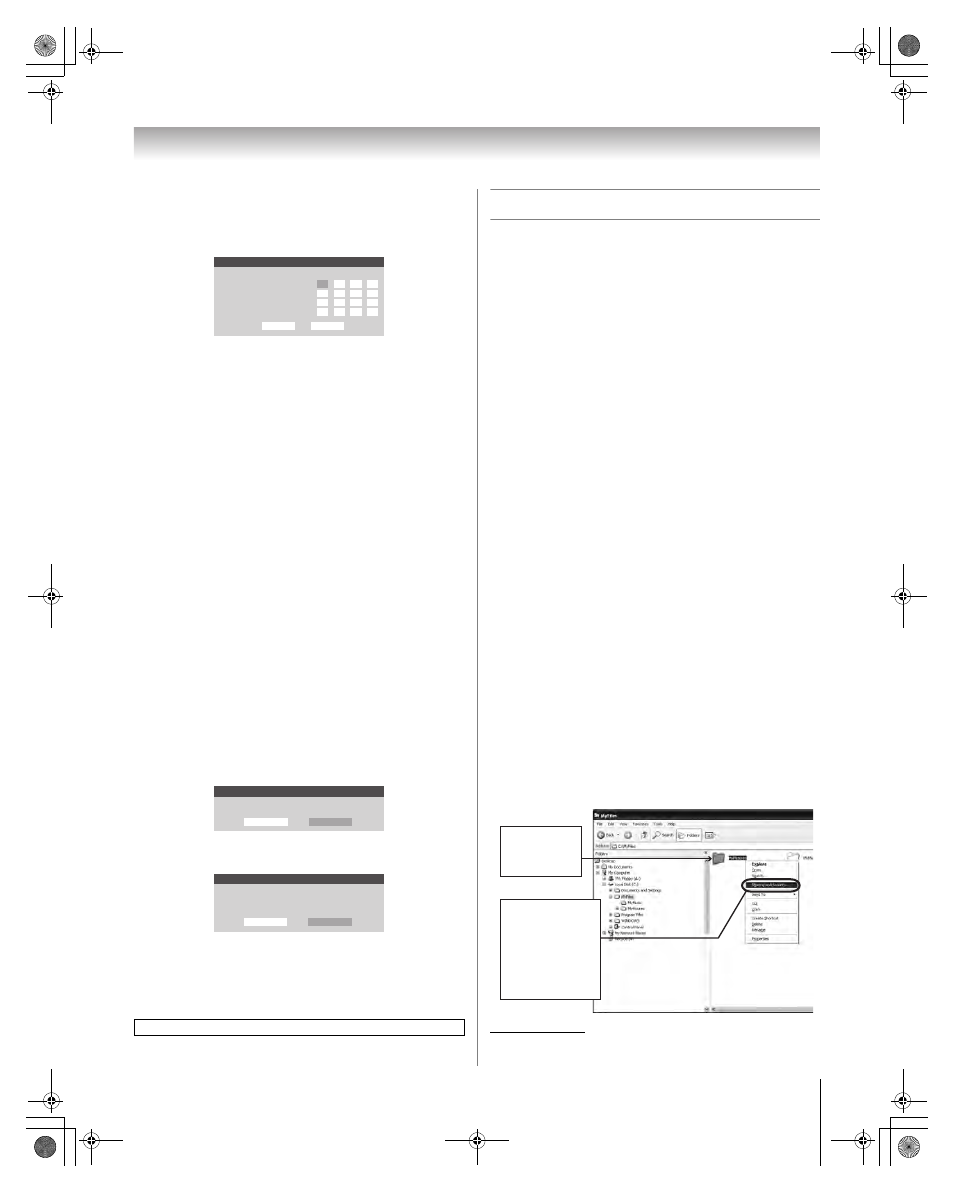
1
On your PC:
*
Microsoft product screen shot(s) reprinted with permission from
Microsoft Corporation.
For home network troubleshooting tips, see Chapter 8.
Basic Network Setup
Please enter your Network Address Information
IP Address
Subnet Mask
Gateway (Router)
DNS (Domain Name Saver)
0
0
0
0
0
0
0
0
0
0
0
0
225
225
225
0
Cancel
Done
Basic Network Setup
Your Basic Network Setup is complete. Would you like to start over?
Yes
No
Basic Network Setup
Obtain network address automatically?
Yes
No
b) Click “Sharing
and
Security...”
(which will open
the
Properties
window for the
selected
folder.)
a) Right-click
the folder
to be shared.
(continued)
HMX96_EN.book Page 61 Friday, April 28, 2006 12:03 PM