Toshiba B-450-HS-QQ User Manual
Page 20
8-5
EO1-330019
8. LOADING THE PAPER
8. LOADING THE PAPER
■
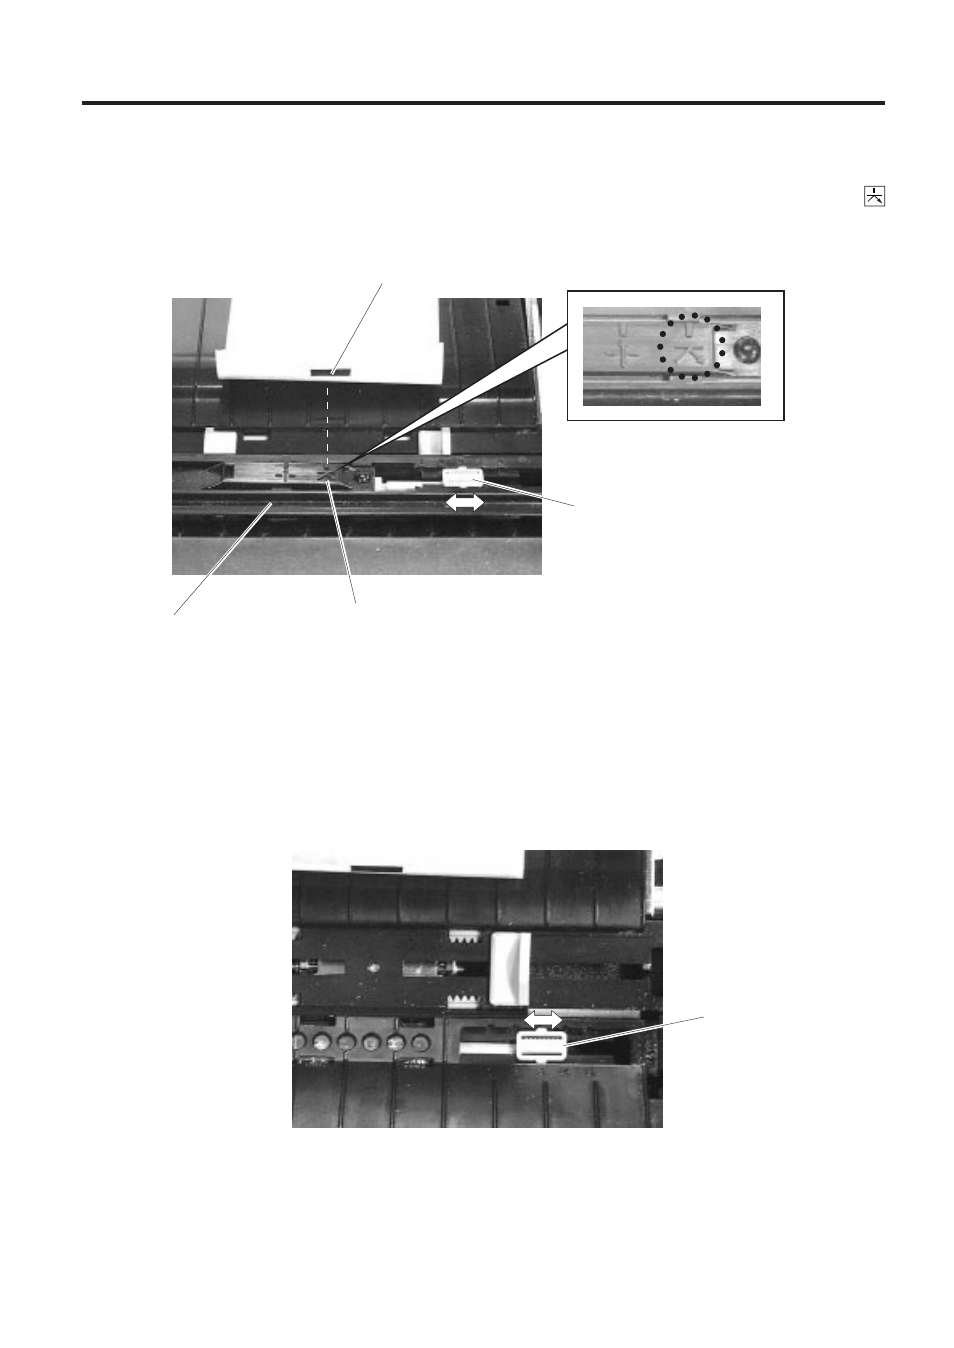
Setting the black mark sensor position
1
Fold over the end of the label. Then, move sensor knob A in a the horizontal direction so that the
mark on the sensor cover aligns with the black mark. Remember the number that centre of the sensor
knob A is positioned at. Set the sensor knob B to the same position number.
2
Release the lock lever in the direction indicated by the arrow, and gently lift the sensor cover.
NOTE: Lift the sensor cover gently so that it does not touch the ribbon.
3
Set sensor knob B to the same position number as the sensor knob A.
NOTE: The sensor knobs A and B are set to the position #3 where the black mark is centred in the label
width as a default. Do not change the position of sensor knobs A and B except when changing
the sensor detecting position. Be sure to set sensor knobs A and B to the same position #. Failure
to do this may cause a paper feed error and paper end detecting error.
Fig. 8-12
Sensor Cover
Black Mark Sensor Position
Sensor knob A
Black Mark
1 2 3 4 5
Fig. 8-13
Sensor Knob B
1 2 3 4 5
4
Draw the label onto the platen. Close the sensor cover and return the lock lever to lock the sensor cover
tight.