Quick installation, Plug your equipment into the ups, Turn the ups on – Tripp Lite 700DV User Manual
Page 3
3
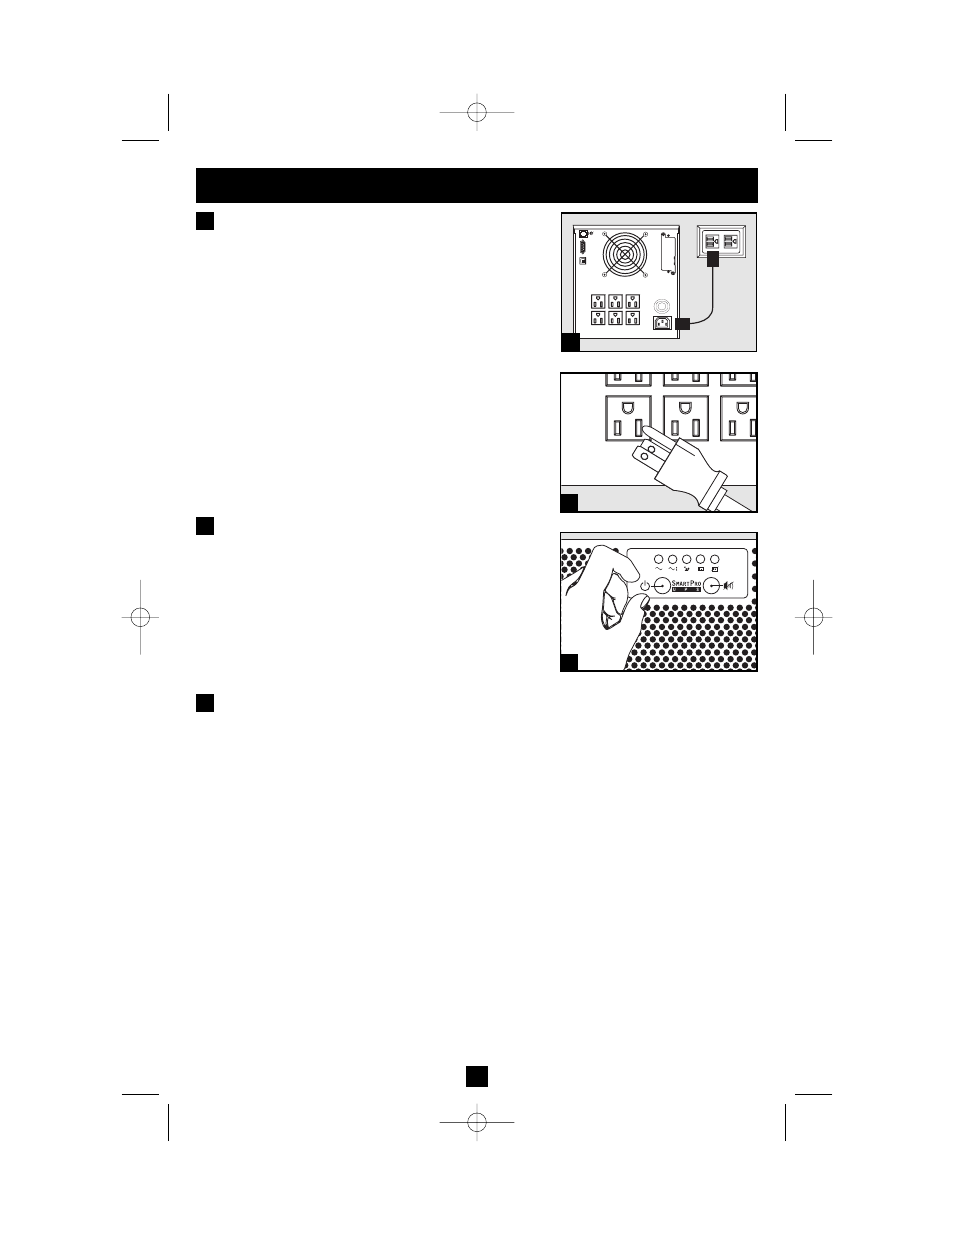
Quick Installation
Plug the UPS into a wall outlet
supplying either 120V or 230V
(nominal) AC power.
Use the included detachable power cord. The IEC-320
end connects to the AC input receptacle on the rear of
the UPS; the NEMA 5-15 end connects to the wall
outlet.
To plug the UPS into a wall outlet that does not accept
a NEMA 5-15 plug, simply replace the included
power cord with a detachable cord from another piece
of equipment, such as a computer. Then, use the includ-
ed power cord to connect the equipment to the UPS.
NOTE! After you plug the UPS into a live AC outlet,
the UPS (in “Standby” mode) will automatically
charge its batteries,* but will not supply power to
its outlets until it is turned ON (see Step 3 below).
* The BATTERY CHARGE LED will be the only LED illuminated.
Plug your equipment into the UPS.
NOTE! Your UPS is designed to support only elec-
tronic equipment. You will overload the UPS if the
total VA ratings for all the equipment you connect
exceeds the UPS's Output Capacity (700VA). To find
your equipment's VA ratings, look on their name-
plates. If the equipment is listed in amps, multiply
the number of amps by 120 to determine VA.
(Example: 1 amp × 120 = 120 VA). If you are unsure if you have overloaded
the UPS's outlets, see “OUTPUT LOAD LEVEL” LED description.
Turn the UPS ON.
Press and hold the “ON/OFF/STANDBY” button for
one second. The alarm will beep once briefly after one
second has passed. Release the button.
1
2
1
2
3
3
200511135 93-2513 SMART700DV OM.qxd 1/12/2006 3:28 PM Page 3