Programming checklist, Connecting your fax machine – Oki 5600 Plus User Manual
Page 6
Programming Checklist
See your handbook for instructions for how to enter:
❒ Your fax number and identification—required by
law: Page 23
❒ Your voice telephone number: Page 23
❒ Date and time—required by law: Page 21
❒ Fax mode: Page 22
❒ One Touch dial keys: Page 30
OKIFAX 5300 Plus: 15 available
OKIFAX 5600 Plus: 30 available
❒ Auto Dial numbers: Page 32
OKIFAX 5300 Plus: 64 available
OKIFAX 5600 Plus: 99 available
❒ Groups of programmed numbers: Page 53
OKIFAX 5300 Plus: 10 available
OKIFAX 5600 Plus: 20 available
6
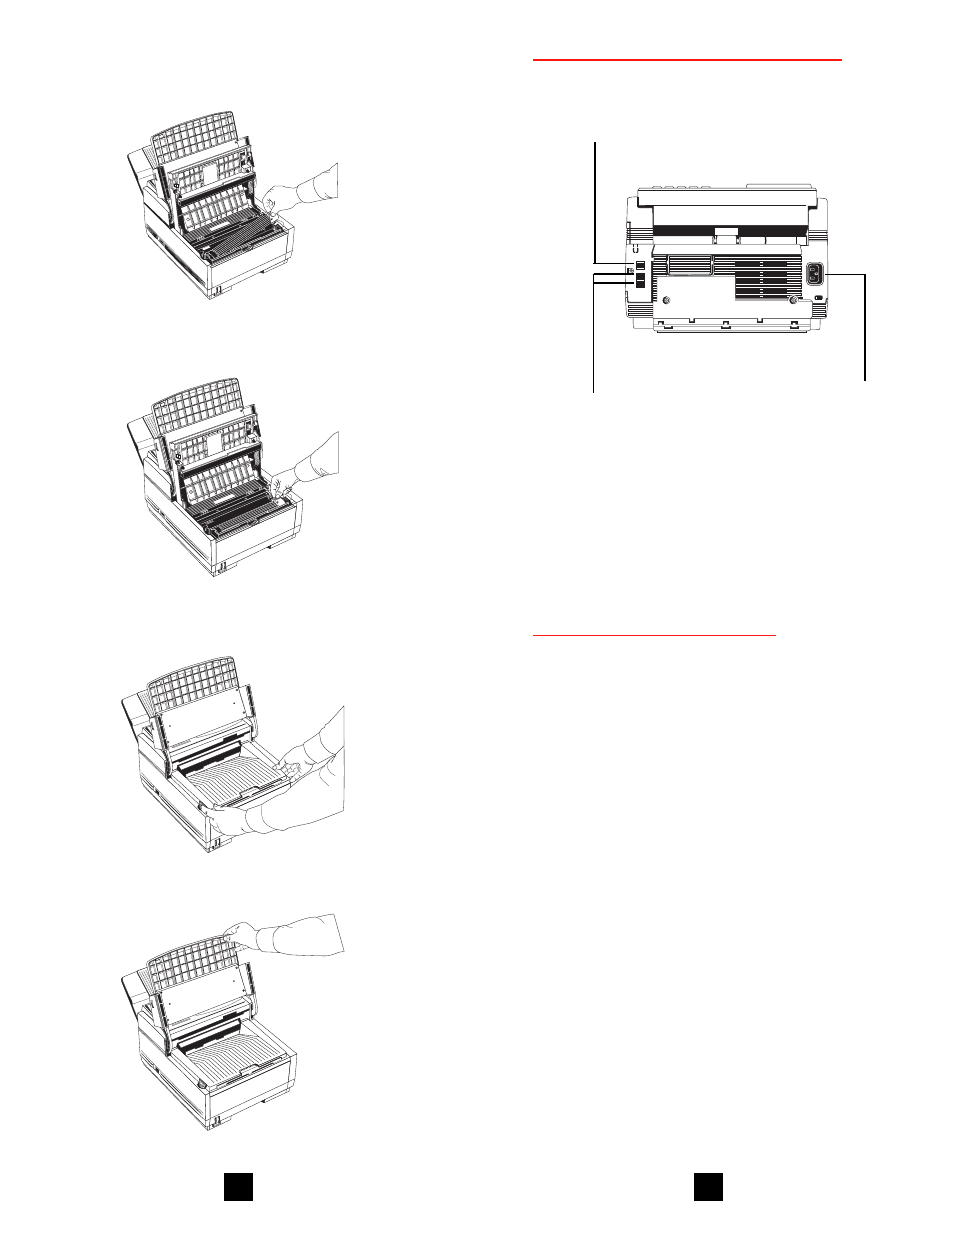
3. With the ridged side facing up and the blue lever
on your right, insert the toner cartridge into the
image drum unit, left end first.
1
AB
C
2
DE
F
3
GH
I
4
JK
L
5
MN
6
PR
S
7
TU
V
8
W
XY
9
*
OQ
Z
0
#
AUTO REC
SEARCH
SELECT
FUNCTION
AUTO DIAL
HYPHEN
REDIAL
COPY
HOOK
V. REQUEST
PHOTO
EX FINE
FINE
STD
LIGHT
NORMAL
DARK
ALARM
STOP
STAR
T
4. Push the lever forward to secure the cartridge.
1
ABC
2
DEF
3
GHI
4
JKL
5
MN
6
PRS
7
TUV
8
WXY
9
*
OQZ
0
#
AUTO
REC
SEARCH
SELECT
FUNCTION
AUTO DIAL
HYPHEN
REDIAL
CO
PY
HOOK
V. REQ
UEST
PHO
TO
EX FINE
FINE
STD
LIGHT
NO
RM
AL
DARK
ALARM
STO
P
STAR
T
5. Close the copy stacker—push down until you hear
both sides click into place.
1
ABC
2
DEF
3
GHI
4
JKL
5
MN
6
PRS
7
TUV
8
WXY
9
*
OQZ
0
#
AU
TO
REC
SEAR
CH
SELECT
FUNCTION
AU
TO
DIAL
HYPH
EN
RED
IAL
CO
PY
HO
OK
V. REQ
UEST
PH
OTO
EX FINE
FIN
E
STD
LIG
HT
NO
RM
AL
DAR
K
ALARM
STO
P
STAR
T
6. Close the document table.
1
ABC
2
DEF
3
GHI
4
JKL
5
MN
6
PRS
7
TUV
8
W
XY
9
*
OQZ
0
#
AUTO REC
SEARCH
SEL
EC
T
FU
NC
TIO
N
AUTO DIAL
HYPHEN
REDIAL
COPY
HOOK
V. REQUEST
PHOTO
EX FINE
FINE
STD
LIGHT
NORMAL
DARK
ALARM
STOP
STAR
T
5
Connecting Your Fax Machine
LINE: Connect to
phone line.
TEL 1, TEL 2: Connect
to optional handset or
to answering machine.
POWER: Connect
power cord to
OKIFAX first, then
to grounded outlet.