Onkyo TA-RW544 User Manual
Page 9
9
Procedure for recording
1. Prepare for recording.
(See page 8.)
Note:
With TA-RW544, when recording to
Deck A only, do not insert a cassette in
Deck B. In the “ b ” mode, recording
in Deck B may start consecutively.
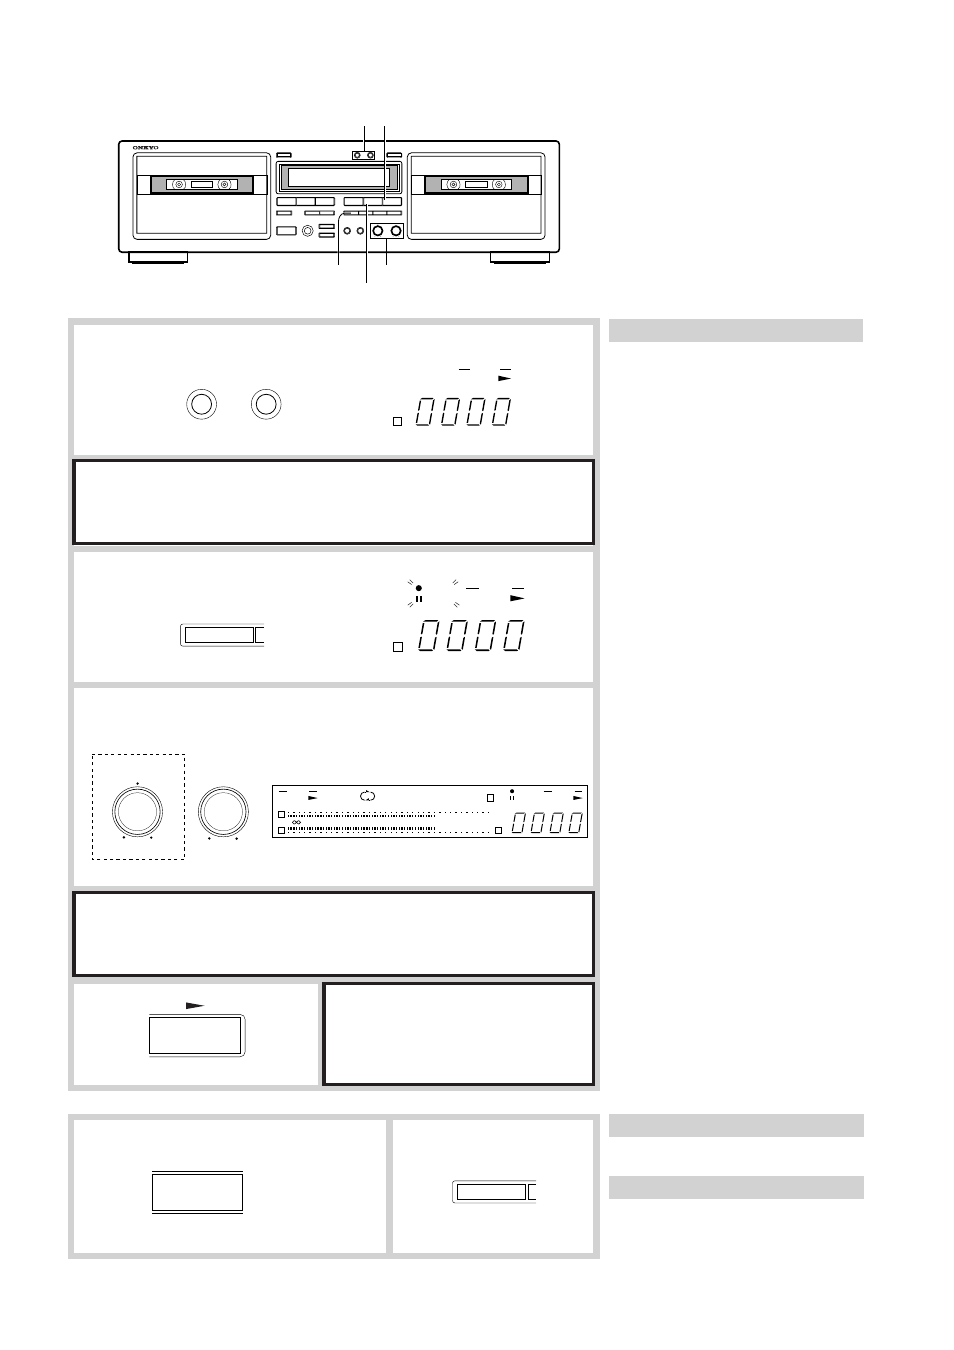
2. Press the DECK A/B button to
select the appropriate Deck A or
B, and press the RESET button
to return the tape counter to
[0000].
3. Begin playing the source compo-
nent.
4. Press the t button.
5. While observing the peak level
indicators, adjust the recording
level and balance.
• Use the REC LEVEL knob to adjust the
recording level.
• With TA-RW544, adjust the REC
BALANCE knob so that the left and
right channels have approximately the
same levels. This knob is normally at
the center position.
• When using metal cassettes, the REC
LEVEL knob should be adjusted so that
+3 dB indicators light periodically.
When using other kinds of tapes, the 0
dB indicator should light periodically.
(See “Making Good Sound Record-
ings” on page 13.)
6. Put the source component into
recording standby status.
• Temporarily stop CD (or LP) play.
• Rewind the tape to the portion you wish
to start playback.
7. Press the s button on this unit
and begin playing the source
component.
You can also use the CD Synchro
Recording function if this unit is
properly connected to an ONKYO
CD player bearing the
z symbol.
(See page 14.)
(A) Recording on a single cassette using Deck A or Deck B
Stopping recording
Press the e DUBB.STOP button.
Interrupting recording briefly
Press the t button.
The following explanation assumes that
Deck B is being used.
4
5
3
2
s
B
DECK-B
B
REC
PAUSE
DECK-B
DECK A/B
RESET
t
e
DUBB. STOP
t
7
6
e
s
DECK-A
-
-20
-10
-6
-3
0
+3
+6
B
C
DOLBY NR
REC
PAUSE
DECK-B
L
R
dB
REC BALANCE
REC LEVEL
L
R
MIN
MAX
(TA-RW544 only)
2 7
e
DUBB. STOP
4
5