Tape dubbing – Onkyo TA-RW544 User Manual
Page 12
12
Tape Dubbing
• The recording level will be fairly close to that of the tape in Deck A.
• The Dolby NR System of Deck A is automatically used to record the tape in Deck B. If you wish to monitor the signal from a Dolby
NR encoded tape during normal-speed dubbing, be sure to set the Dolby NR to match the type of Dolby NR with which the cassette
was recorded.
• During high-speed dubbing, decrease the sound level from the amplifier (or receiver) using the volume control and unplug the
headphones from the headphone jack.
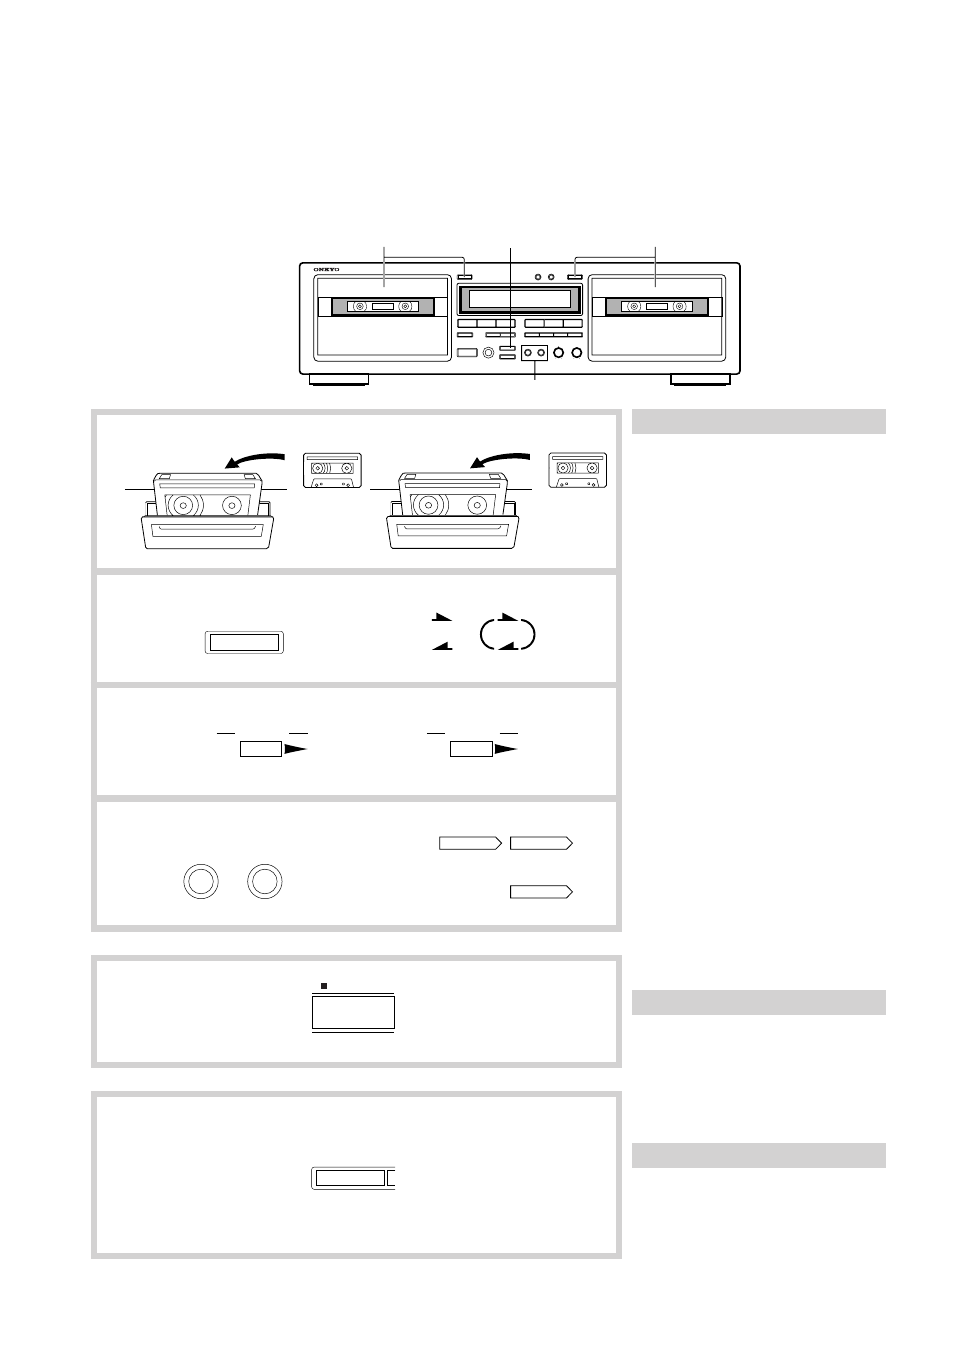
Tape dubbing
1. Insert the prerecorded cassette
into Deck A , and insert the
cassette to be recorded into Deck
B.
2. Set the Reverse Mode by press-
ing the REVERSE MODE button
repeatedly until the desired
mode is displayed.
(
v
) one side: Only one side of the
tape is copied.
(
b
) repeat: Both sides of the tape are
copied.
3. Check the Deck A and Deck B
direction indicators to ensure
that the tape transport will start
in the desired direction.
• To dub an entire tape, be sure to select
the forward (
s
) direction on both
Decks.
To change the setting of the direction
indicator, press the a or s button,
then the e button
4. Begin dubbing by pressing the
NORMAL or HIGH button.
[NORMAL] : Normal-speed dubbing
will begin.
[HIGH] : High-speed dubbing about
1
2
3
4
half the time normally required
will begin.
Stopping dubbing
Press the Deck B
e DUBB.STOP
button.
Briefly interrupting dubbing
Press the t button. (Deck B)
In this case, you can change the cassette in
Deck A or search the desired portion by
using the buttons for Deck A. To resume
dubbing, press the NORMAL or HIGH
button again.
DECK-A
PLAY
DECK-B
PLAY
HI-SPEED
DUBBING
DUBBING
HIGH
NORMAL
REVERSE MODE
DUBBING
NORMAL
HIGH
DUBB. STOP
t
1
4
1
2