Appendices, Ceiling mount installation – Optoma TSFN-IR01 User Manual
Page 56
Appendices
Please note that dam-
age resulting from
incorrect installation
will invalidate the war-
ranty.
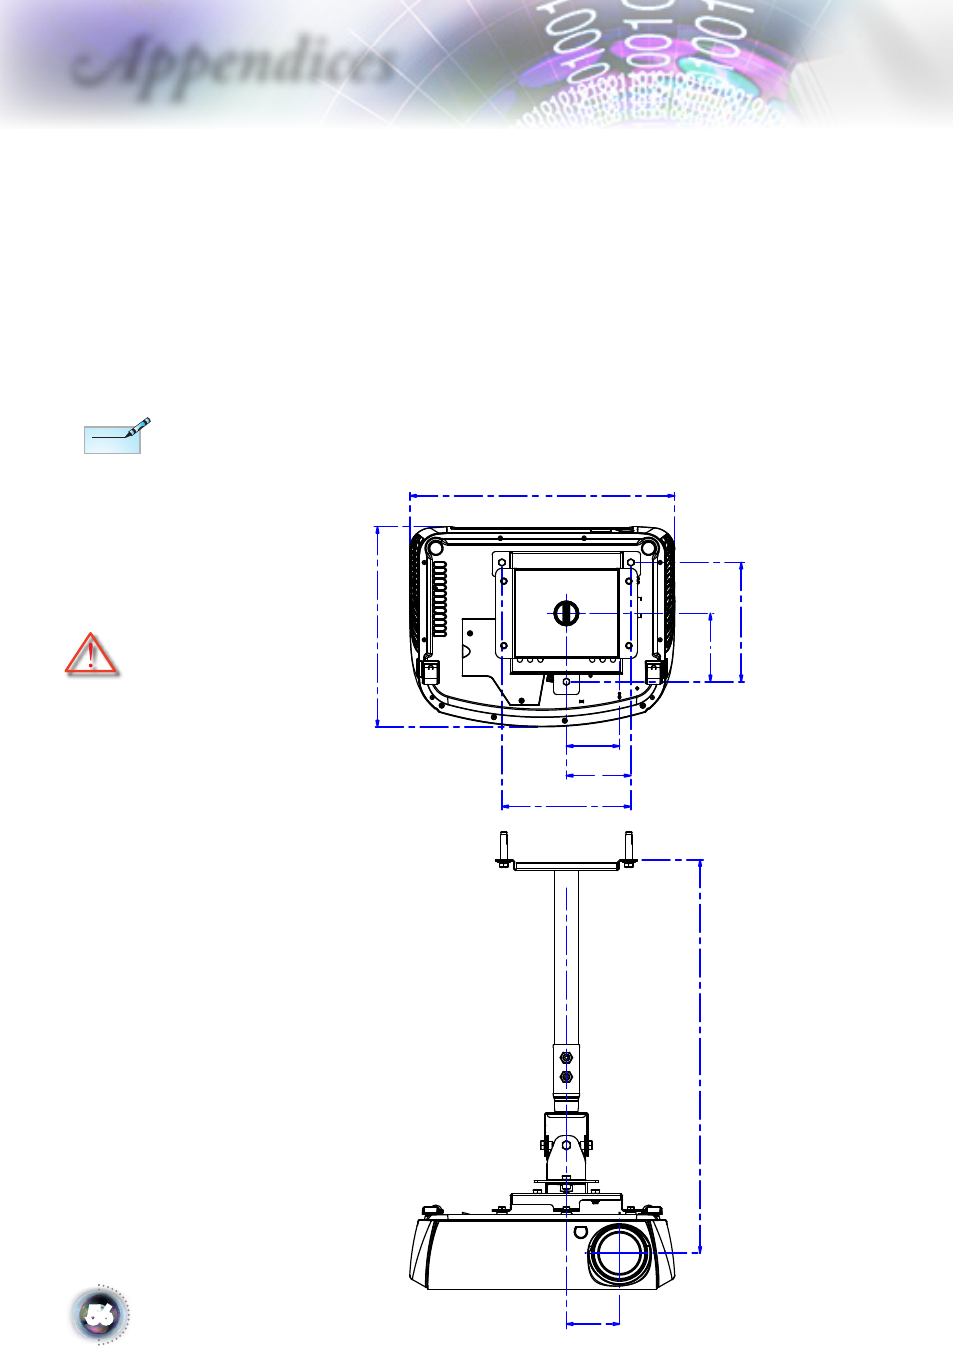
Ceiling Mount Installation
1. To prevent damage to your projector, please use the Op-
toma ceiling mount..
2. If you wish to use a third party ceiling mount kit, please
ensure the screws used to attached a mount to the projec-
tor met the following specifications:
Screw type: M4
Maximum screw length: 10mm
Minimum screw length: 8mm
Warning:
1. If you buy ceiling
mount from other
company, please be
sure to use the cor-
rect screw size. Screw
size will be different
on different mounts.
It depends on the
plate thickness.
2. Be sure to keep
at least 10cm gap
between the ceiling
and the bottom of the
projector.
3. Avoid installing the
projector near a heat
source.
Min.
610.60mm (24.04")
/ Max.
850.60mm (33.49")
410.99mm
(16.18")
185.00mm (7.28")
106.00mm (4.17")
310.62mm (12.23")
200.00mm
(7.87")
100.00mm
(3.94")
82.50mm
(3.25")
(3.25")
82.50mm
N
ote
N
ote