2 basic transmission – Oce North America OP1030 User Manual
Page 18
Page 2-5
6. Perform all of the desired settings under the FAX Setting tab, such as the original size setting, and then click on the OK
button.
* Refer to “2-3 FAX Setting Tab” on page 2-6 for more detailed information on the settings in that tab.
7. The print dialogue box for the application that you are using will be displayed once again. Click on the OK button. The TX
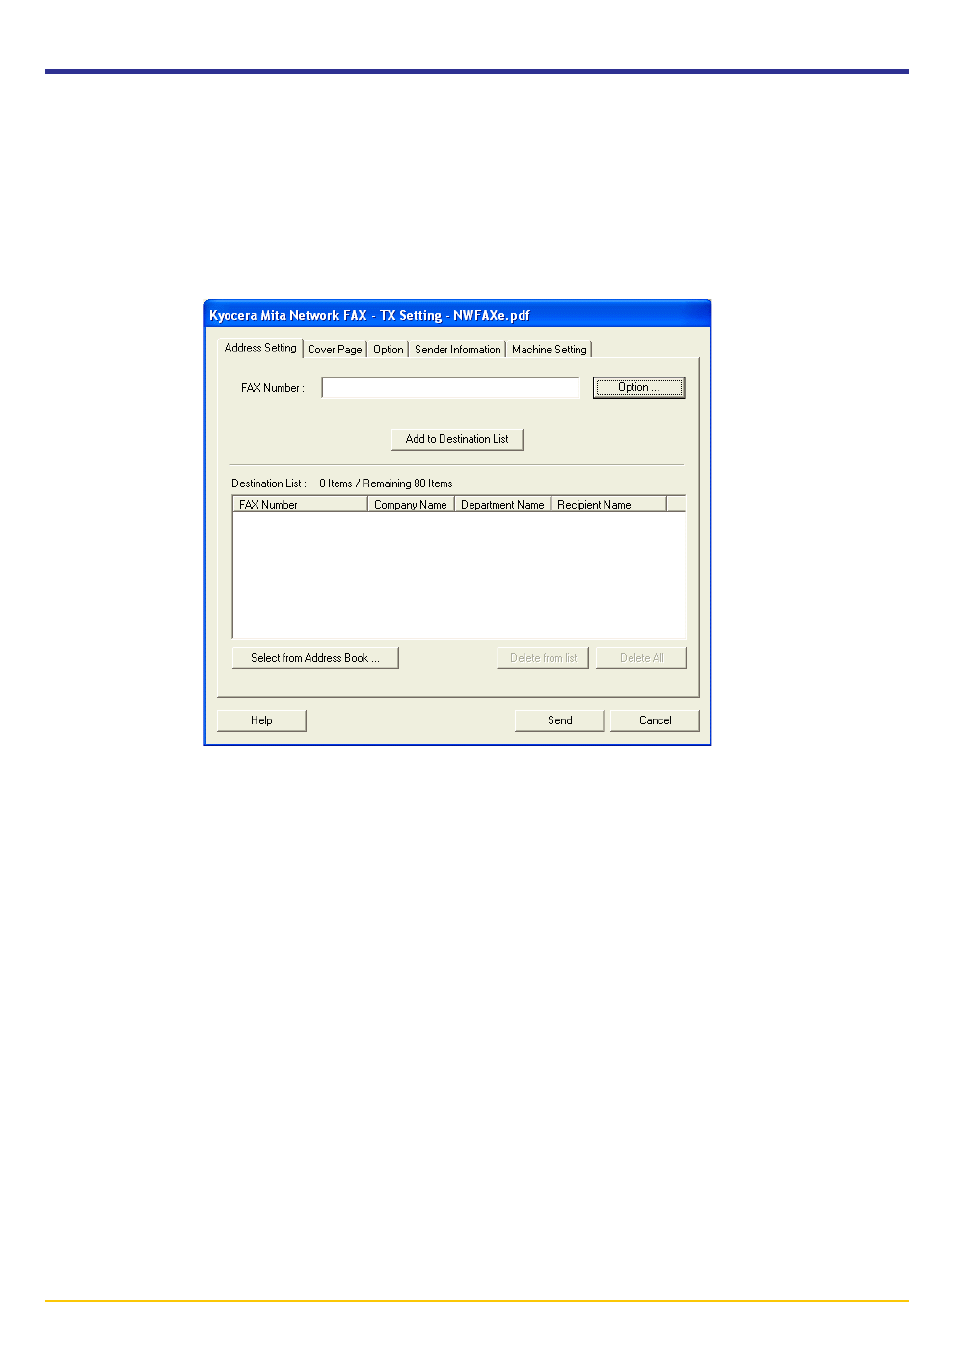
Setting dialogue box will appear.
* Refer to “2-5 Various Settings in the TX Setting Dialogue Box” on page 2-12 for more detailed information on the
settings in that dialogue box.
8. Use the keyboard to enter the phone number of the destination fax in the FAX Number field. If you want to use the
Address Book to enter this information, refer to “(1) Selecting a Destination from the Address Book” on page 2-12.
• Maximum number of characters that can be entered: 32
• Characters that can be entered: 0 – 9, #, *, -, and a space (a hyphen or space can NOT be entered as the first character)
10. Click on the Add to Destination List button. The entered destination information will be displayed under the Destination
List area.
If you want to send the same documents to more than one destination, repeat steps 8 and 9 as required. (Up to 80
destinations can be registered.)
* If you want to delete a destination from the Destination List area, select that destination and then click on the Delete
from list button. If you want to delete all of the currently registered destinations, click on the Delete All button.
11. Click on the Send button to initiate the fax transmission operation.
2-2 Basic Transmission