Installation – Regency IG35-ULPG User Manual
Page 11
11
Regency IG35 Gas Inbuilt Fireplace
Conversion Kit #486-967 for NG to ULPG
THIS CONVERSION MUST BE DONE BY A QUALIFIED GAS FITTER IF IN DOUBT DO NOT DO THIS CONVERSION !!
Conversion Kit 486-967 Contains:
Qty. Part # Description
1 904-345 Burner Orifi ce #53
1 918-273 Red "ULPG" label
1 918-272 Label "Converted to ULPG"
1 918-542 Instruction Sheet
1) Shut off the gas supply and unplug the power
cord.
2) Remove the front door.
3) Remove logs.
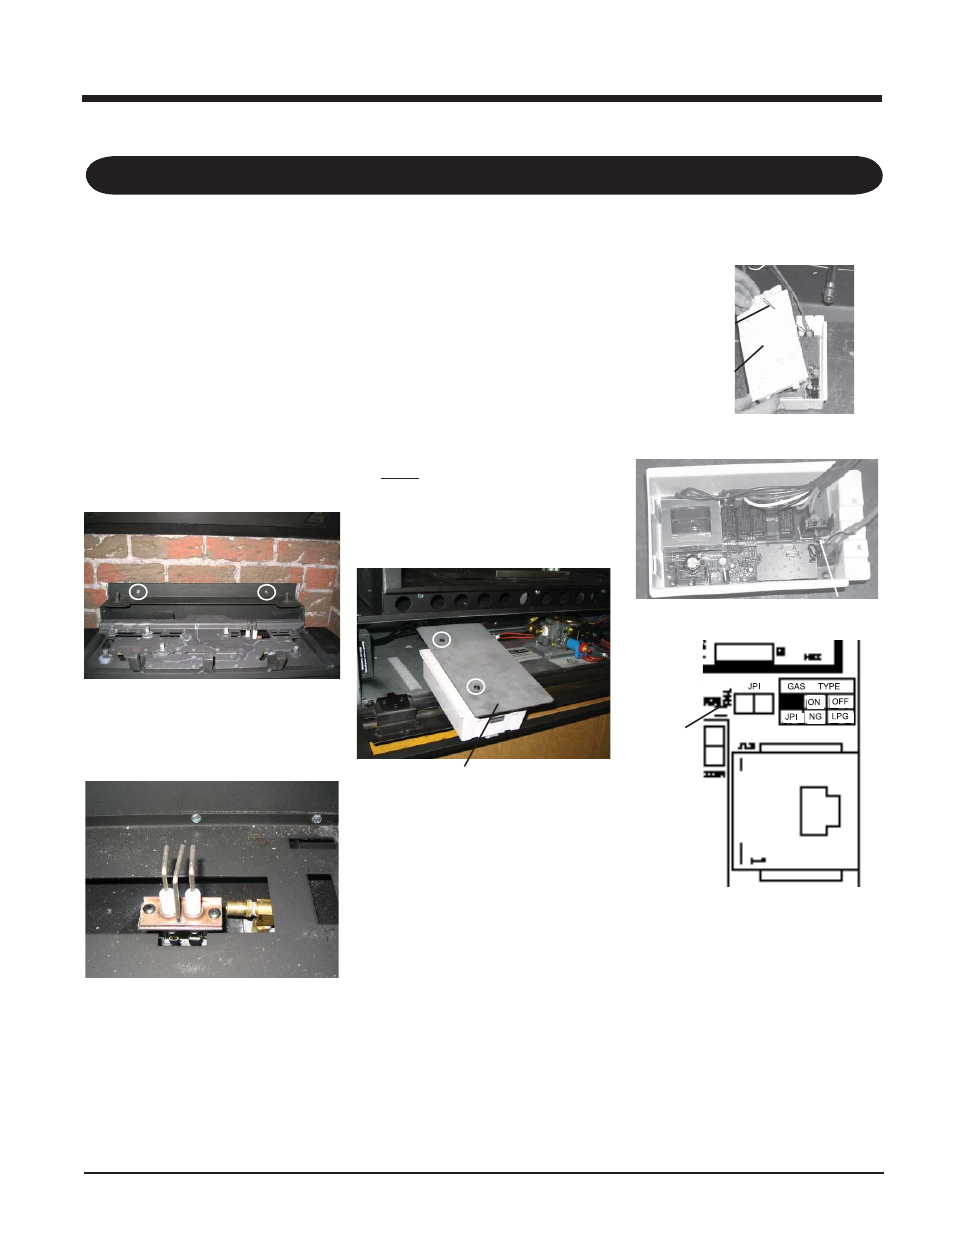
4) Remove the rear log tray by removing the 2
screws. (Log tray must be rotated to clear
the burner.)
Control Box
Cover
Antenna
13) Remove the control box cover by undoing the
3 screws. Maneuver through antenna.
Jumper Location
Jumper
14) Remove the jumper using a plier.
5) Remove the grate.
6) Remove the burner and adjust the aeration
setting to 15 mm fully open.
7) Remove burner orifi ce with a 1/2" wrench
and discard. Use a wrench to hold on to the
elbow behind the orifi ce.
8) Reinstall new burner orifi ce ULPG stamped
#53 and tighten.
9) Stick the conversion label "This unit has
been converted to ULPG" over top of the
serial number decal.
10) Replace the yellow "NG" label with the red
"ULPG" label.
11) Carefully pull out the control box.
NOTE: The control box is held in place with
velcro.
12) Remove the heat shield from the control
box by removing the 2 screws.
15) Reverse steps 13, 12, 11, 6, 5, 4, 3 & 2.
Heat Shield
INSTALLATION