Adjustments, Warning, Squaring front table – RIDGID EB44241 User Manual
Page 20: Aligning belt to miter gauge slot
0
REMOVE
DRIVE DRUM - Sandi
ng drums mo
unt here.
TRACKING/ID
LER DRUM -
Not recomm
ended for sa
nding.
B E L T
R O
T A T I
O N
WARNING:
Before performing any adjustment, make sure
the tool is unplugged from the power supply and
the switch is in the OFF ( O ) position. Failure to
heed this warning could result in serious personal
injury.
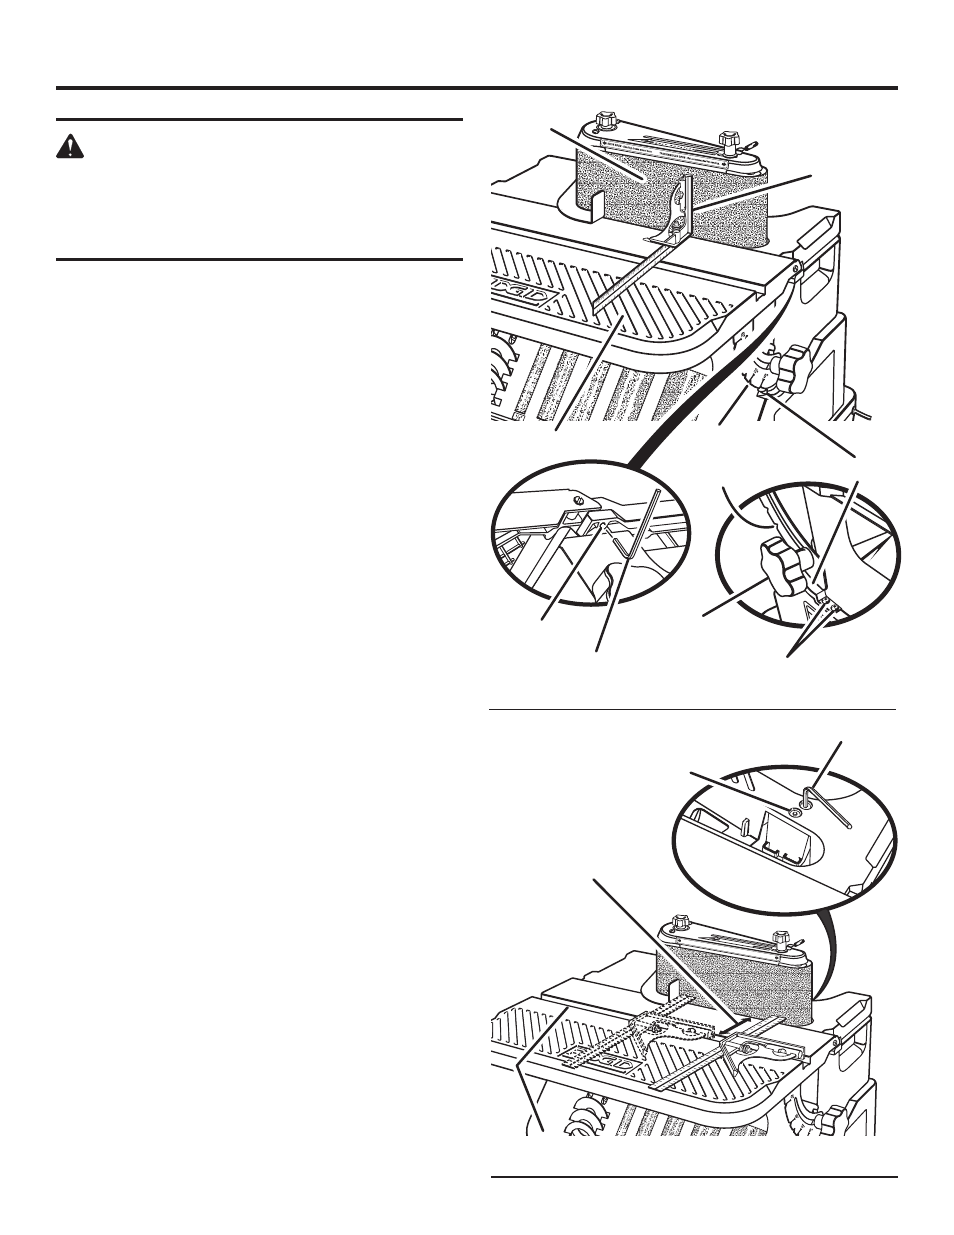
SqUARING FRONT TABLE
See Figure 22.
NOTE: Use a combination square to check the angle of the
front table with the sanding belt.
If the front table is not 90° to the sanding belt:
Use the hex key provided and “back out” both set screws
located on each side of the table.
Loosen the front table lock knob and adjust the front table
90° to the sanding belt.
Tighten the front table lock knob.
Adjust both set screws to contact the front table.
Adjust detent if necessary
Loosen the two pan head screws that secure the detent.
Adjust detent so that it engages the notches in the bracket
table lock.
Tighten the two pan head screws.
ALIGNING BELT TO MITER GAUGE SLOT
See Figure 23.
The sanding belt is installed at the factory; however, check
and make sure the belt is parallel to the miter gauge
groove:
Use a combination square to check the distance from the
miter gauge groove to the belt assembly as shown.
If adjustment is required, use a 5/3 in. hex key provided
with unit to loosen the two flat head socket recess screws
on the table.
Adjust the worktable as needed to make it parallel or
same distance to the miter gauge slot.
Tighten two screws.
ADJUSTMENTS
hex key
set sCrew
table
loCk
knob
REMOVE
Combination
sQuare
sandinG
belt
miter GauGe
Groove
hex key
adjust worktable
Parallel miter
GauGe slot
soCket reCess
sCrews
front table
detent
notChes in
braCket table
loCk
Pan head
sCrews
Fig.
Fig. 3