Operation – RIDGID EB44241 User Manual
Page 19
19
REMOVE
REMOVE
OPERATION
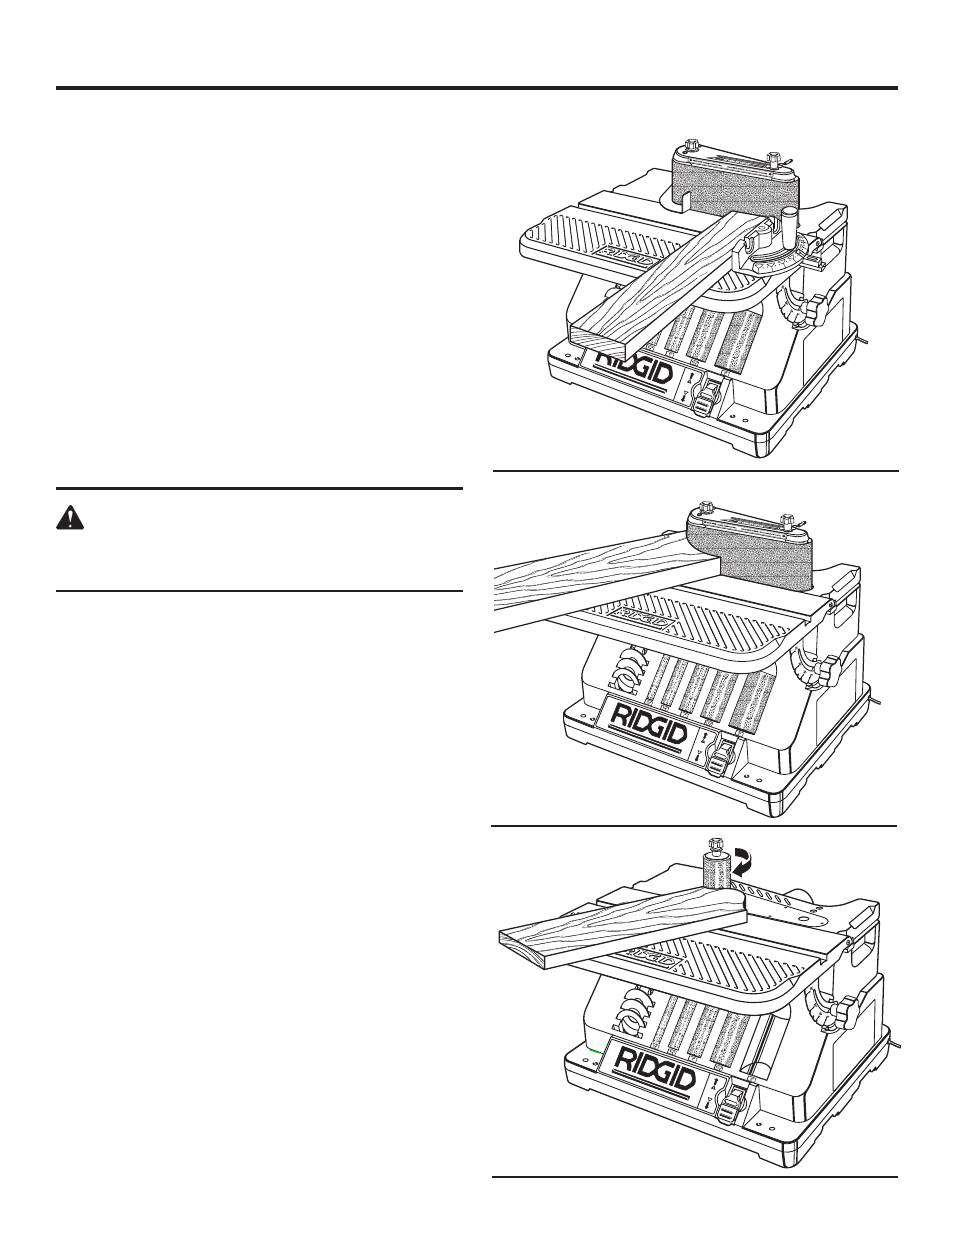
END SANDING ON THE SANDING BELT
See Figure 19.
Move the work evenly across the sanding belt. For
accuracy, use a miter gauge accessory (not included).
SANDING CURVED EDGES
See Figure 20.
Inside curves are best sanded with the sander assembled
in the spindle mode. However, inside curves larger than
1-1/ in. may be sanded on the drive drum when in the belt
sander mode.
Although it is possible to lightly sand on the idler drum end of
the belt sanding assembly, it is not recommended. The idler
drum is an integral part of the belt tracking mechanism. It
is spring loaded to maintain proper tension. Use of the idler
drum to sand curves may cause belt to track improperly.
FEED DIRECTION
See Figure 21.
WARNING:
To prevent thrown workpiece, feed workpiece
against sanding sleeve from left to right as
shown.
The sanding sleeve rotates clockwise. Feed the workpiece
against the sanding sleeve from left to right as shown. When
fed from left to right, the rotation of the sanding sleeve sands
against the workpiece. If fed in the opposite direction, the
rotation forces of the spinning sanding sleeve will tend to
throw or bounce the workpiece away from the sanding
sleeve. This could cause loss of control of workpiece or
possible injury.
Fig. 19
Fig. 1
Fig. 0
REMOVE
end sandinG
Curved edGe sandinG
feed direCtion