Ricoh DIGITAL CAMERA CX5 User Manual
Page 121
120
8
Dir
ec
t Printing
3
Select an item and push the ADJ./OK button F to view the
options available.
• When [Connecting…] is displayed, the connection to the
printer is not yet established. When a connection is established,
[Connecting…] disappears and [Direct Print] appears. Proceed with
this step after the connection is established.
• The following items can be selected. Each item is available only
when supported by the printer connected to the camera.
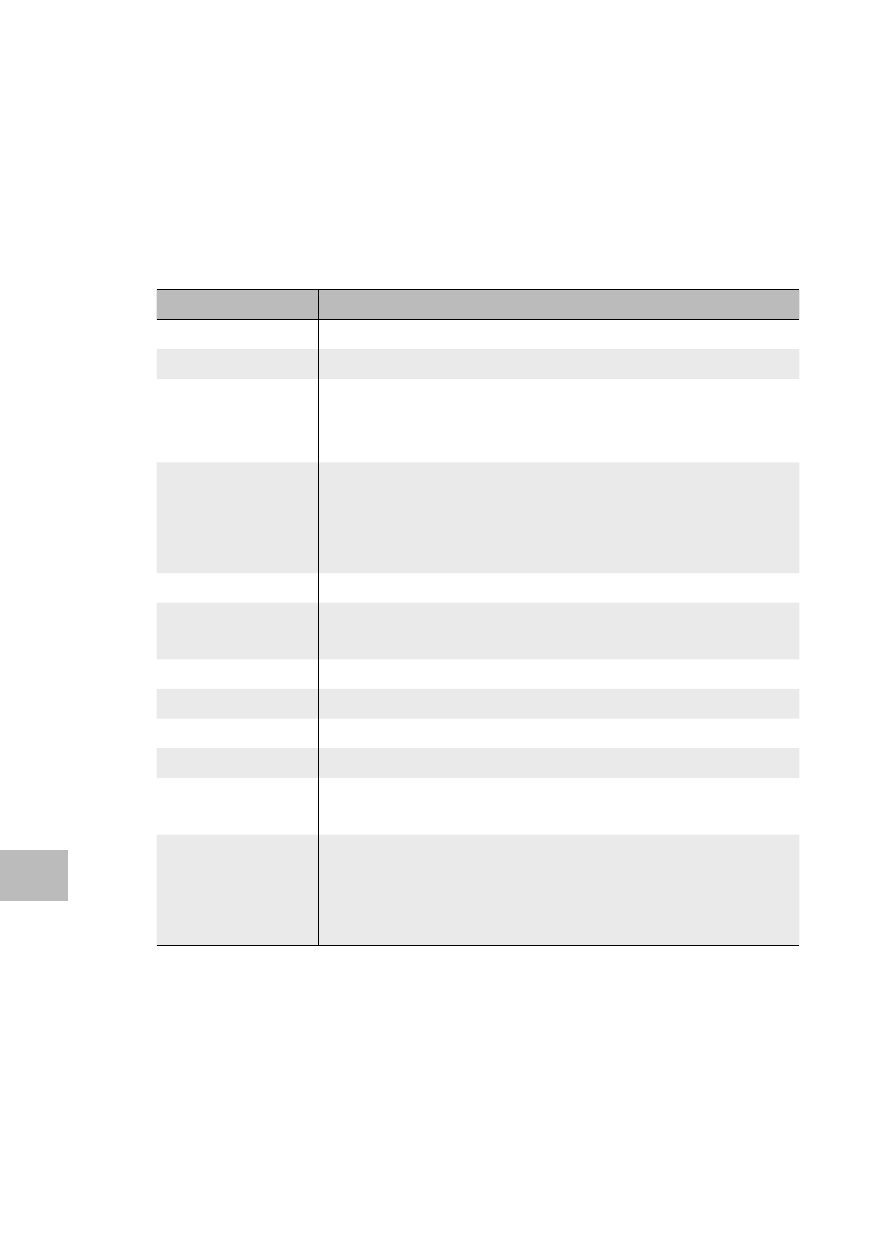
Item Name
Description
Paper Size
Sets the paper size.
Paper Type
Sets the paper type.
Layout
Sets the number of images printed on a sheet of paper.
The number of images that can be laid out on a sheet of
paper varies depending on the connected printer.
Date Print
Selects whether to print the date (shooting date). The
date format can be set using the date/time option in the
setup menu. If the picture was taken using [Date Imprint]
(GP.84), only the imprinted date will be printed.
File Name Print
Selects whether to print the file name.
Optimize Image
Selects whether to optimize the image data (still image)
prior to printing on the printer.
Print Size
Sets the print image size.
Print Quality
Sets the print quality.
Report Print*
Prints on forms.
Printing Quantity
Sets the print quantity.
Toner Saving*
Selects whether to conserve toner by using less ink
during printing.
1-Side/2-Sides*
Selects whether to print on both sides of the paper.
During duplex printing, one copy is printed for each still
image. Only one copy is printed even if you selected
more than one copy to print in Step 3 on P.122.
* Each item is available only when supported by the Ricoh printer connected
to the camera.