Level compensation, Playback men u, Correcting images automatically – Ricoh DIGITAL CAMERA CX5 User Manual
Page 101: Correcting images manually, Control points, Black point mid-point white point
100
6
Playback Men
u
Level Compensation
Create copies that have been processed to adjust brightness and
contrast.
Correcting Images Automatically
Select [Auto] and push the ADJ./OK
button F. A preview will be displayed
with the original image at upper left and
the corrected copy on the right.
Press the ADJ./OK button to copy the
image.
Level Compensation [Auto]
Level Compensation [Auto]
Level Compensation [Auto]
Level Compensation [Auto]
Cancel
Cancel
Cancel
Cancel
Ok
Ok
Ok
Ok
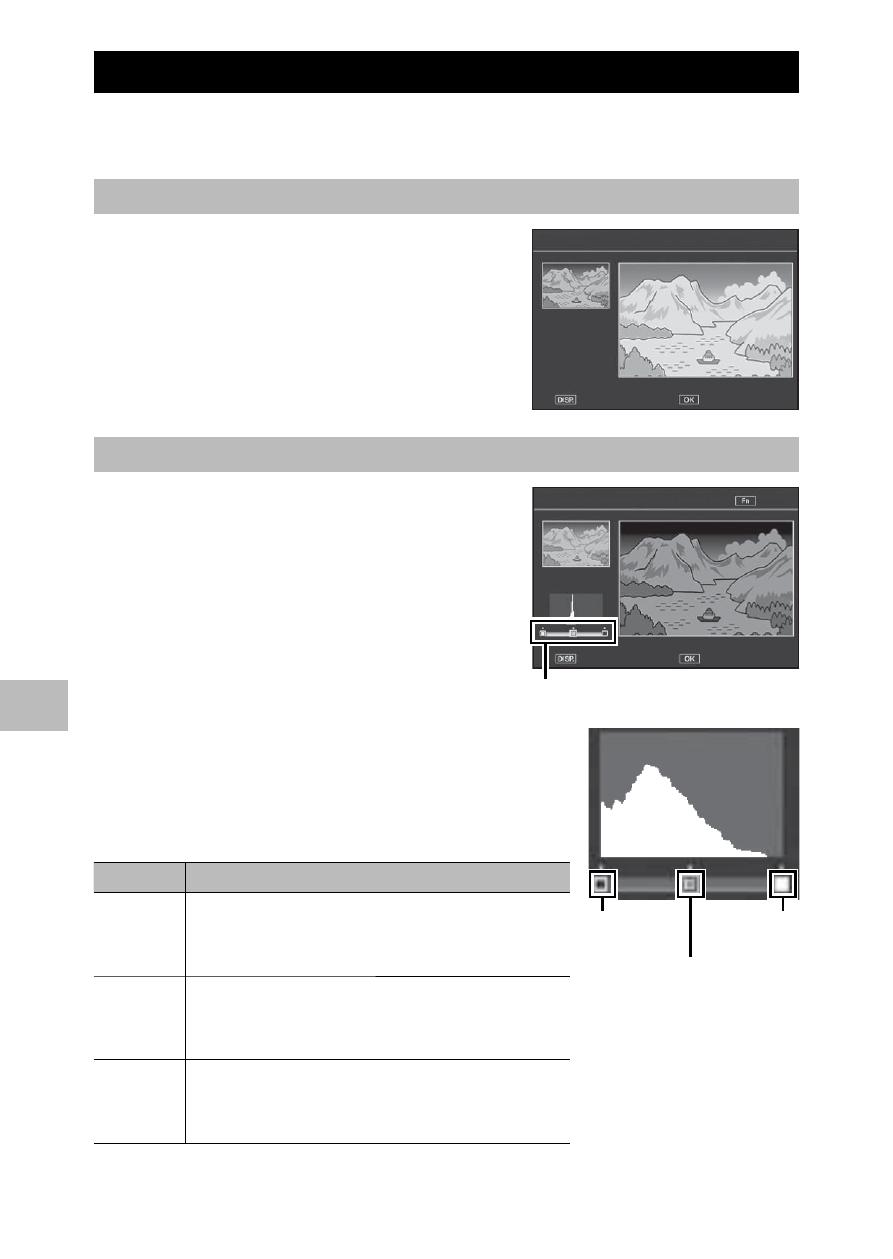
Correcting Images Manually
Select [Manual] and push the ADJ./OK
button F. A preview will be displayed
with the original image at upper left, a
histogram and black-, mid-, and white-
point controls at lower left, and the
corrected copy on the right.
Level Compensation [Manual]
Level Compensation [Manual]
Level Compensation [Manual]
Level Compensation [Manual]
Cancel
Cancel
Cancel
Cancel
MEN
MENU :
Chng. Points
Chng. Points
MENU :
Chng. Points
MENU :
Chng. Points
Help
Help
Help
Help
Ok
Ok
Ok
Ok
Control points
Press MENU to cycle through the control points
and push the ADJ./OK button NF to position
the selected point for enhanced brightness and
contrast as described below.
Point
Effect
Black
point
If the image is overexposed, move the black
point to the right until it lines up with the
darkest pixel in the histogram.
Mid-
point
To make the image brighter, move the mid-
point to the right. Moving the mid-point to
the left makes the image darker.
White
point
If the image is underexposed, move the
white point to the left until it lines up with
the brightest pixel.
Black
point
Mid-point
White
point