Maintenance, Removing valve, Installing valve – Regency B36X User Manual
Page 57
57
Regency Bellavista™ B36X Gas Fireplace
MAINTENANCE
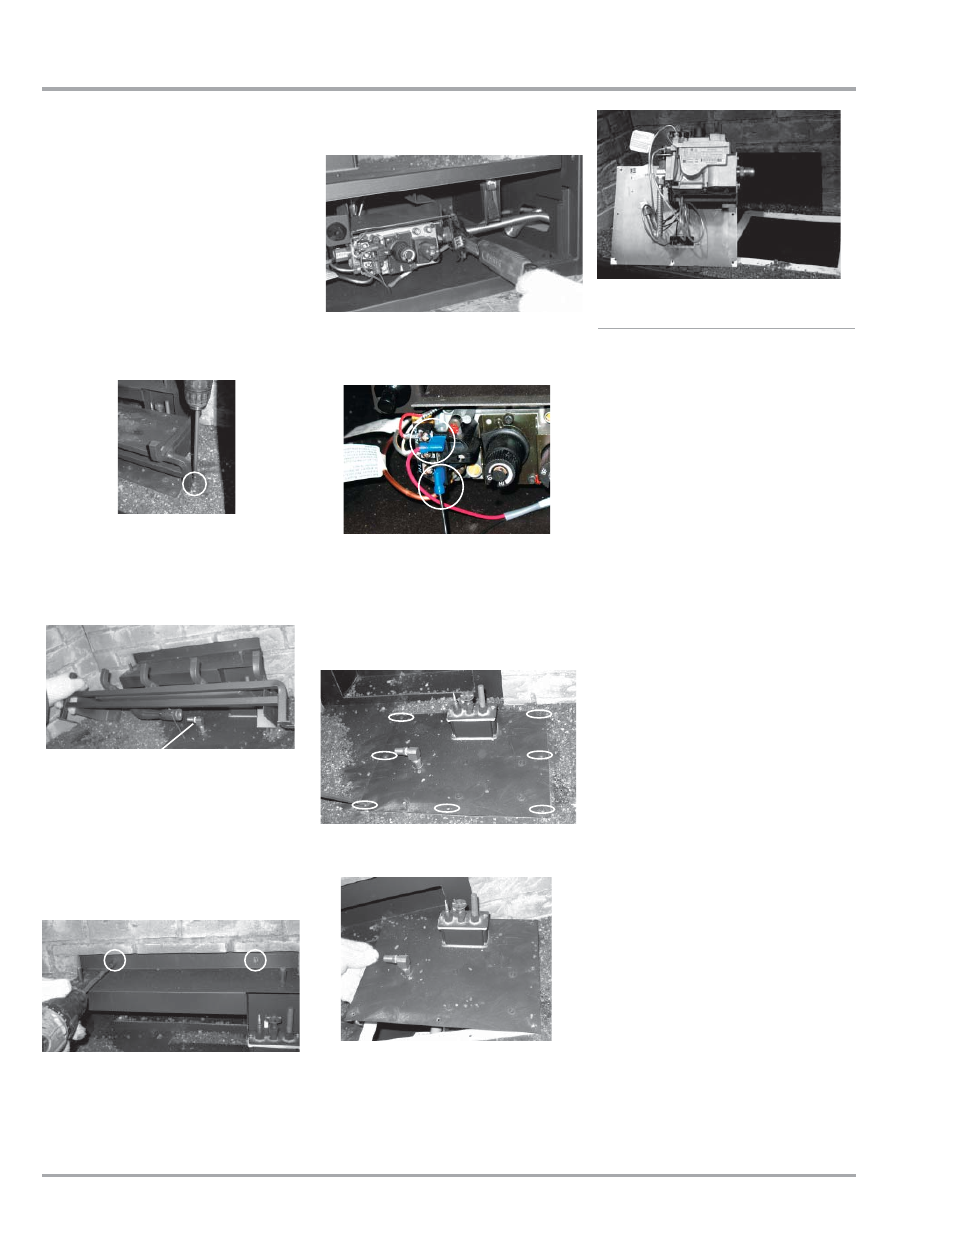
REMOVING VALVE
10) Remove the 8 Phillips head screws securing
the valve tray assembly in place (Diagram
6) and then lift the entire assembly out
(Diagram 7).
1) Shut off the gas supply.
2) Remove the louvers
3) Open the fl ush door and remove the door.
(See Pg. 47 for instructions)
4) Remove the logs.
5) Remove the burner/grate assembly by
removing the 2 Phillips head screws.
Diagram 1: Remove the left and right screws.
Diagram 2: Slide burner assembly to the left
and then remove.
7) Remove the 2 screws securing the rear log
tray and lift out. Diagram 3
Orifi ce
9) Disconnect the wall switch wires from the
valve. (see Diagram 5)
Diagram 4
Diagram 3
Diagram 5
Diagram 6
Diagram 8
Diagram 7
INSTALLING VALVE
1) Place new valve tray into position
2) Reinstall the 8 hold down screws.
3) Hook up the 2 TP and 2 TH wires to the ap-
propriate connections on the valve.
4) Reinstall the rear log tray.
5) Install Burner/grate assembly
6) Hook up the gas line and check for gas leaks
with a soap and water solution or a gas leak
detector. (Do not use open fl ame for leak
testing.)
7) Fire up the unit temporarily
8) Check the manifold pressure.
9) Reinstall the logs and brick panels as
needed.
10) Reinstall the door and replace the louvers.
11) Fire up the unit again and check for proper
fl ame appearance and glow on logs.
6) Slide the burner assembly to the left to release
it from the orifi ce, then lift it out.
8) Disconnect the inlet gas line.
(see Diagram 4)