Projector exterior view, Front / upper side, Rear / bottom side – Runco CL-510LT User Manual
Page 7: Front / upper side rear / bottom side
1. Overview
Runco CL-510/ CL-510LT User’s Manual
4
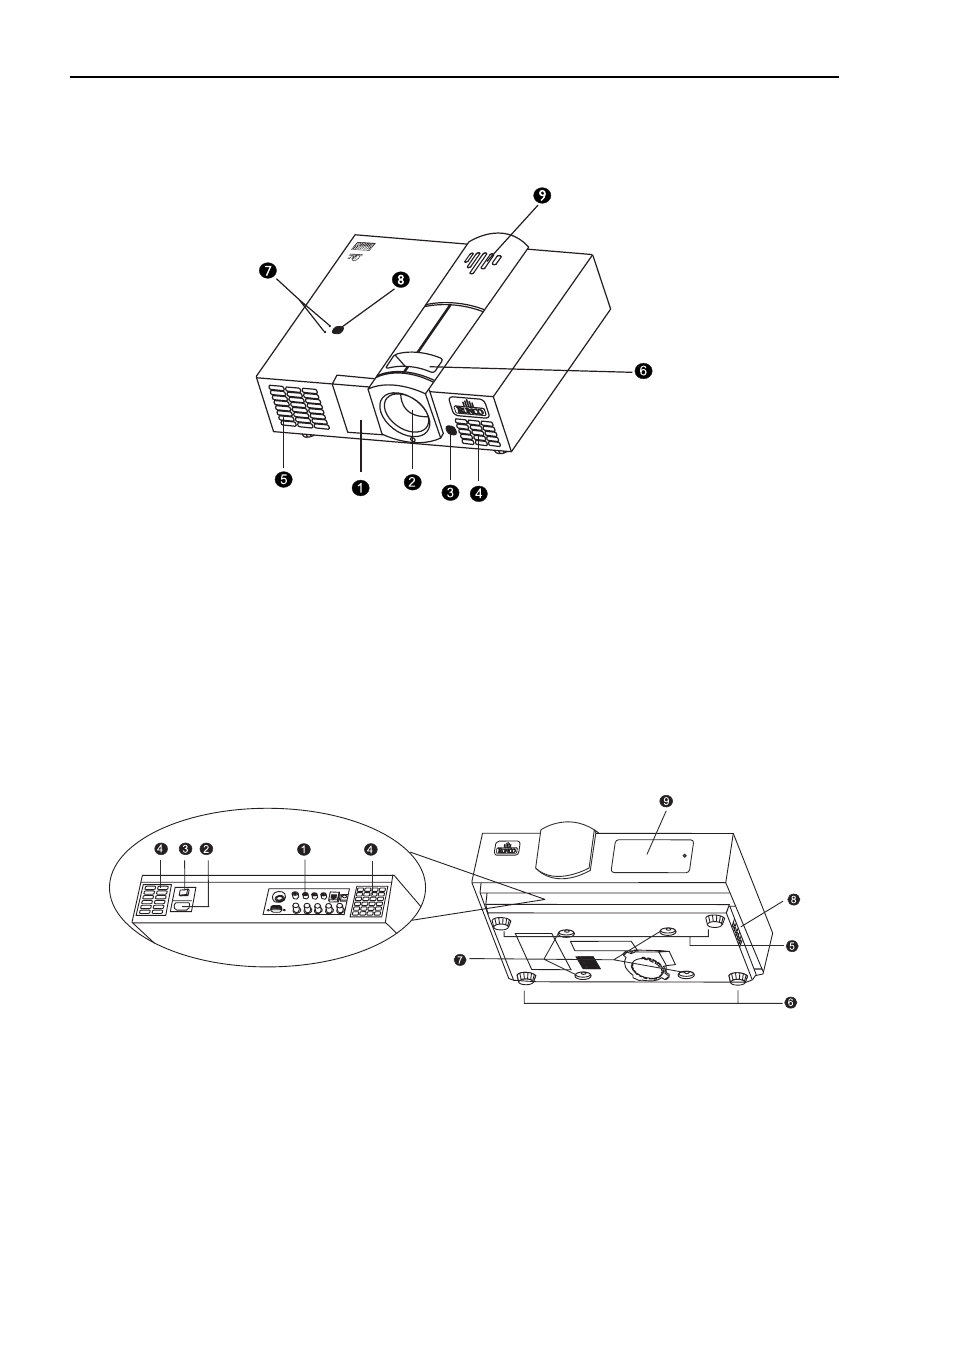
Projector Exterior View
❚
Front / Upper Side
❚
Rear / Bottom Side
1. Front Lamp Cover
Remove this cover when replacing the lamp. (See
page 27.)
2. Projection Lens
3. Front IR Sensor
4. Ventilation Holes (intake)
5. Ventilation Holes (exhaust)
6. Focus Ring and Zoom Ring Access
Adjusts the focus and zoom of image.
7. Power LED and Lamp LED
Show the status of power and lamp.
For more details, see "Control Panel" on page 5.
8. Top IR Sensor
9. Runco Logo (Can be turned off, see "Options"
1. Connector Panel
For more details, see "Connector Panel" on page 6.
2. AC Power IN Socket
3. AC Power Switch
AC main power switch
4. Ventilation Holes (intake)
5. Rear Adjusters
Adjust the height or projection angle
6. Front Adjusters
Adjust the height or projection angle
7. Ceiling Mount Holes
The connecting holes for ceiling mounting
device.
8. Ventilation Holes (exhaust)
9. Cable Access Cover