RIDGID Table Saw User Manual
Page 25
25
Adjusting Rip Fence Guide Bars
Aligning Rip Fence Guide Bars
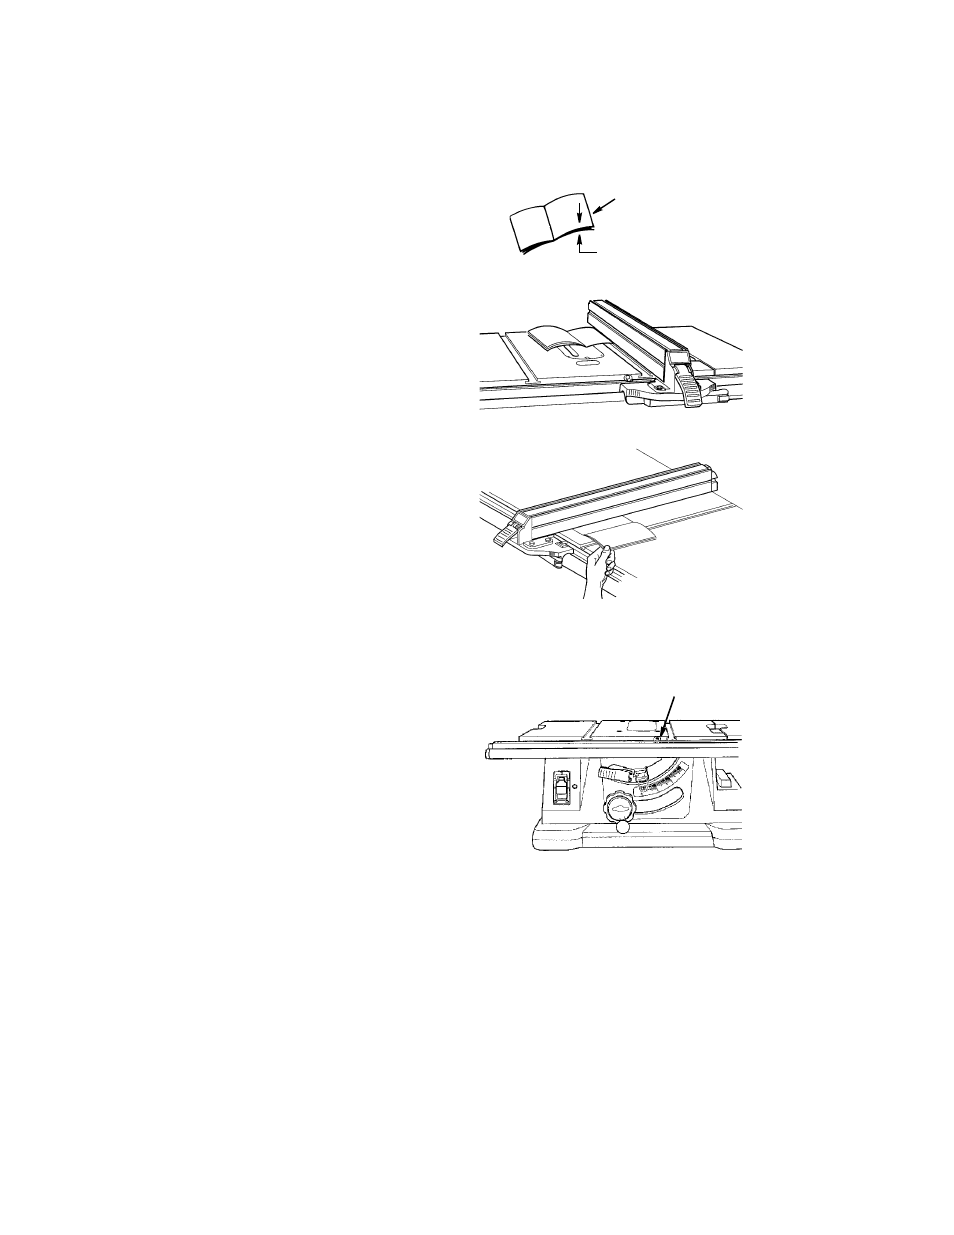
1. Position rip fence over right end of main
table. While holding up rear of rip fence
engage front end of rip fence onto the
front guide bar. Now lower rip fence
down onto table.
2. Open owners manual so that 8 pages
are separated from the rest of the book.
Use these pages like a feeler gage to
set the spacing between the bottom of
the fence and the table top.
3. Rip fence should clear saw table sur-
face just enough to allow eight pages to
slide back and forth under rip fence. If
rip fence is too high or too low, loosen
the four nuts under the table and the
screw that secures rip scale at front of
main table. Release table lock, position
fence inside table extension lock lever.
Adjust front bar up and down as
required. Wrench tighten front right nut
only.
4. Adjust rear guide bar, as noted above.
Wrench tighten rear right nut.
5. Reposition fence over left end main table.
6. Adjust front guide bar up or down as
needed so the rip fence clears the saw
table surface just enough to allow the 8
pages of the owners manual to slide
back and forth underneath the rip
fence. Wrench tighten the front left nut
first and then the other remaining two
nuts at the front of the main table.
7. Adjust rear guide bar, as noted above.
Wrench tighten the rear left nut first
then the other two nuts at the rear of
the main table.
8. Slide fence left and right over main
table to insure clearance.
9. Tighten rip scale hold down screw.
Owners Manual
8 Pages
Rip Scale
Hold Down