Alignment (continued) – RIDGID Table Saw User Manual
Page 24
24
Alignment (continued)
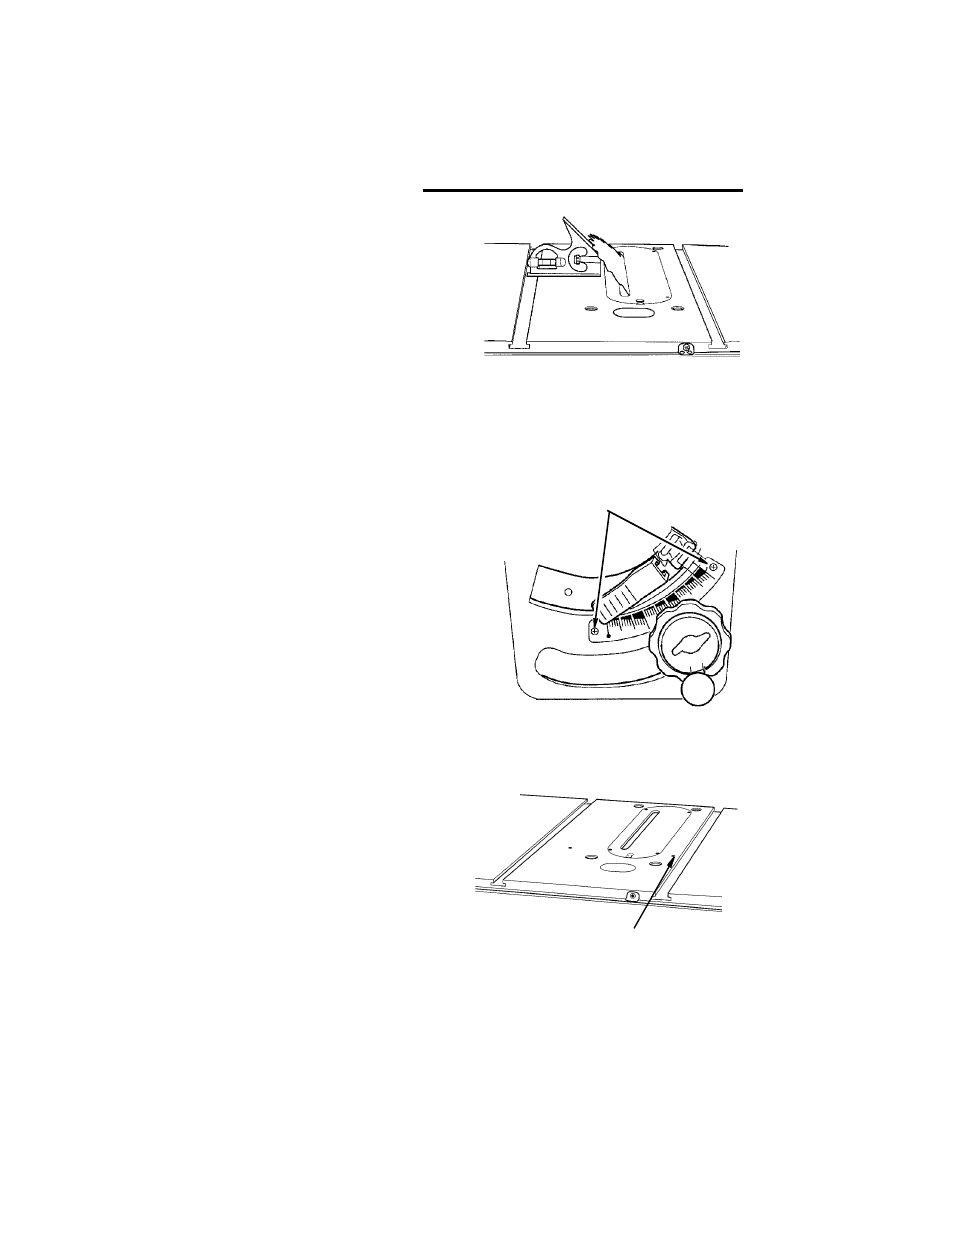
To check for alignment, 45° Position
1. Loosen the blade tilt lock lever and
push elevation wheel in and to the right
as far as possible and tighten the blade
tilt lock lever.
2. Place an accurate square against blade.
Make sure square is not touching the tip
of one of the saw teeth.
A. If blade is 45° to table;
1. Check pointer. If pointer does not
point to the 45° mark on the scale,
the scale must be adjusted.
2. Loosen two screws on scale and
adjust scale up or down until
pointer points to 45° mark.
B. If blade is not 45° to table, stop
screw and scale must be adjusted.
1. Loosen 45° stop screw three to
four turns using 5/32 inch set-
screw wrench.
2. Loosen blade tilt lock lever. Turn
handwheel until blade is 45° to the
table. Tighten blade tilt lock lever.
3. Screw 45° stop screw in until it
stops. Check once again and
readjust screw, if necessary.
4. Check pointer as described in step
A above.
Scale Screws
45°
Stopscrew