Testing the connections, Removing the shipping screw – Radio Shack AM/FM Stereo Cassette User Manual
Page 11
11
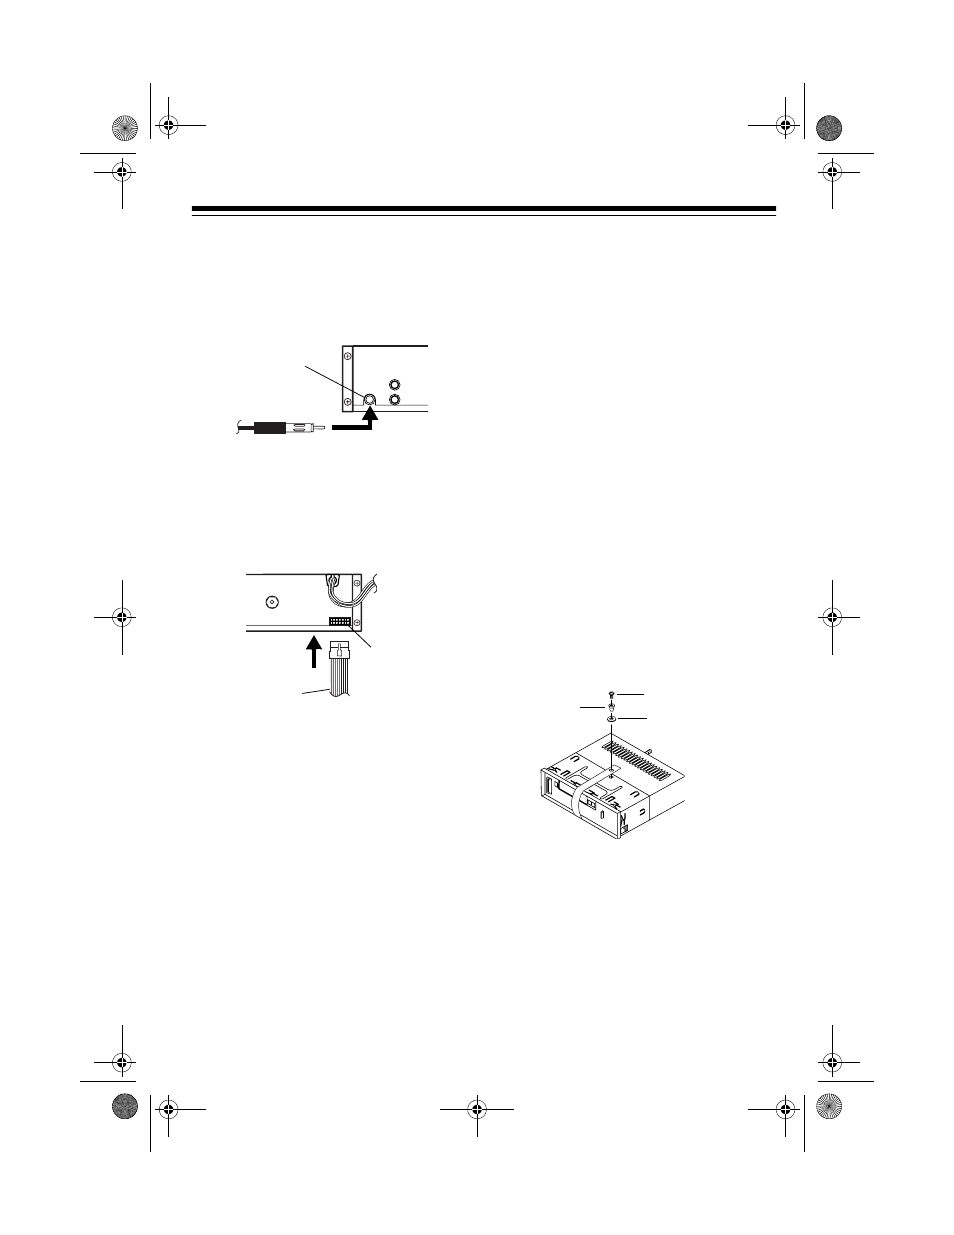
Connecting the Antenna
Connect the vehicle’s antenna cable to
the stereo’s antenna socket.
Completing the Connections
After you have securely made all connec-
tions, plug the wiring harness’ connector
into the stereo’s 14-pin wiring socket.
Then reconnect the cable to the vehicle’s
negative battery terminal.
TESTING THE
CONNECTIONS
Turn on your vehicle’s ignition and in-
stall your stereo’s control panel (see
“Replacing the Control Panel” on Page
15). Press
PWR
to turn on the stereo.
The display should light and the cur-
rently set time (or
12:00
) should ap-
pear.
If the stereo does not work, immediate-
ly turn off your vehicle’s ignition and
disconnect the wiring harness’ con-
nector. Then recheck your connections.
After you verify that the display lights,
follow the instructions in “Removing the
Shipping Screw.”
REMOVING THE SHIPPING
SCREW
The shipping screw helps protect the ste-
reo’s cassette player from being dam-
aged during shipment.
Before you mount the stereo, use a Phil-
lips screwdriver to remove the screw,
spacer, and rubber washer from the top
of the stereo. This will allow you to re-
move the mounting sleeve from the ste-
reo when you mount it.
Note: Save the screw, spacer, and rub-
ber washer, and replace them if you ship
the stereo. You can store them by taping
them to the back of the stereo.
Back of Stereo
Vehicle’s Antenna
Antenna
Socket
14-Pin
Socket
Wiring
Harness
Screw
Spacer
Rubber Washer
12-2115a.fm Page 11 Wednesday, January 12, 2000 11:18 AM