Model nm, Wh page – NuTone Nm100WH User Manual
Page 3
model Nm
100
WH
Page
removiNg tHe old system
Prior to removing the existing intercom system make sure all power
is turned off at the intercom location. Remove the screws from
the intercom master and while removing the intercom, make sure
to carefully label each wire with its corresponding room location.
Disconnect all the remote station and door station wires from
the master. Then carefully remove the existing wall housing and
transformers.
If the existing system was not working prior to replacement, check
each wire run between the remote stations and master for shorts
and wiring integrity. If one of these remote station to master wire
runs has a short, re-run that wire prior to installing the NM100.
When replacing NuTone 3 wire cable runs, use NuTone IWA3 cable.
When replacing NuTone or M&S 4 wire cable runs, use NuTone
NW4S cable.
Note: if you encounter 120VAC running through the existing rough-
in, have a qualified electrician reroute the 120VAC around the
rough-in.
If you encounter a remote transformer, an additional electrical run
may have to be made by a qualified electrician to power the master
station and/or optional CD player. Also check to make sure that the
area around the housing is clear of any additional 120VAC runs or
other obstructions.
iNstalliNg tHe rougH-iN
The NWH300 and NWH300C rough-ins are designed for 16” on
center studs. In retrofit applications you may encounter stud spacing
that varies from this standard. Use the NWH300 rough-in when you
are replacing an existing system with an intercom only system. The
NWH300C rough-in is used for combination systems only that use
the NM100 master and the optional NC300 6-disc CD player.
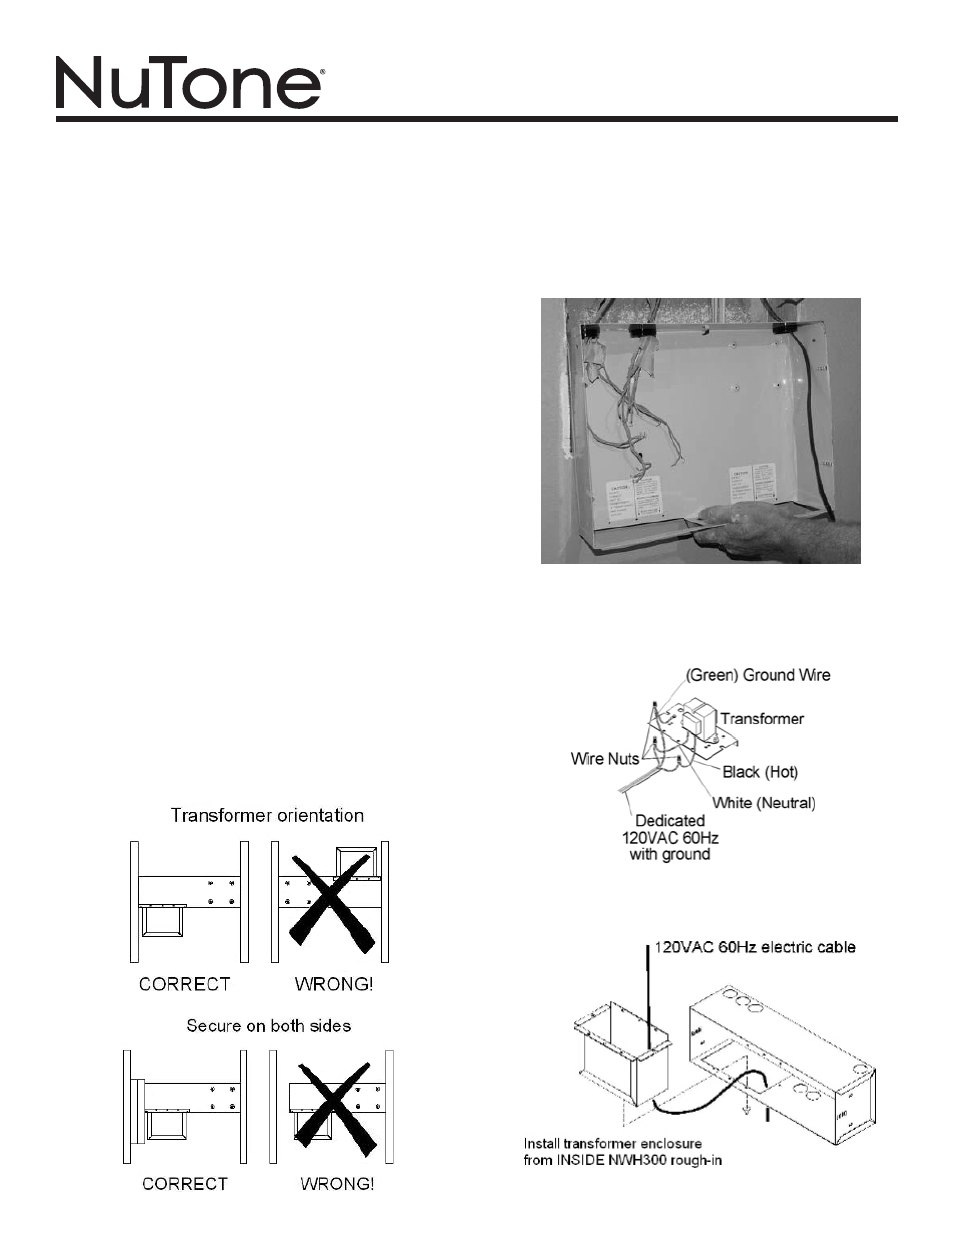
Locate the NWH300 or the NWH300C rough-ins. The rough-in must
be positioned so that the transformers are on the bottom of the
rough-in as shown in the figure below.
If you are replacing the existing master only system with a
combination NM100 master and NC300 CD changer you will have
to cut the rough-in opening larger to accommodate the larger rough-
in. Prior to making the cutout check the stud cavity for obstructions
or items in the wall that may prevent the transformers from fitting in
the wall. The NWH300 and NWH300C transformers drop in from the
bottom of the rough-in. Please refer to the next figure for rough-in
placement.
Connect the existing, dedicated 120VAC/60Hz line with ground
connection from the power panel to the rough-in as shown below.
The NM100 requires a dedicated power source to assure no
interference from other equipment caused by looped power circuits.
The ground is necessary for proper radio reception.
Place transformer enclosure from the inside of the wall housing into
the transformer enclosure opening at the bottom of the rough-in as
shown below. Do not run the 120VAC through the rough-in.