Novell eBook Reader User Manual
Page 27
Creating a Liberty IDP Site
23
Manual
3/17/03
103
Novell Confidential
03createidp.fm last saved 4/14/03
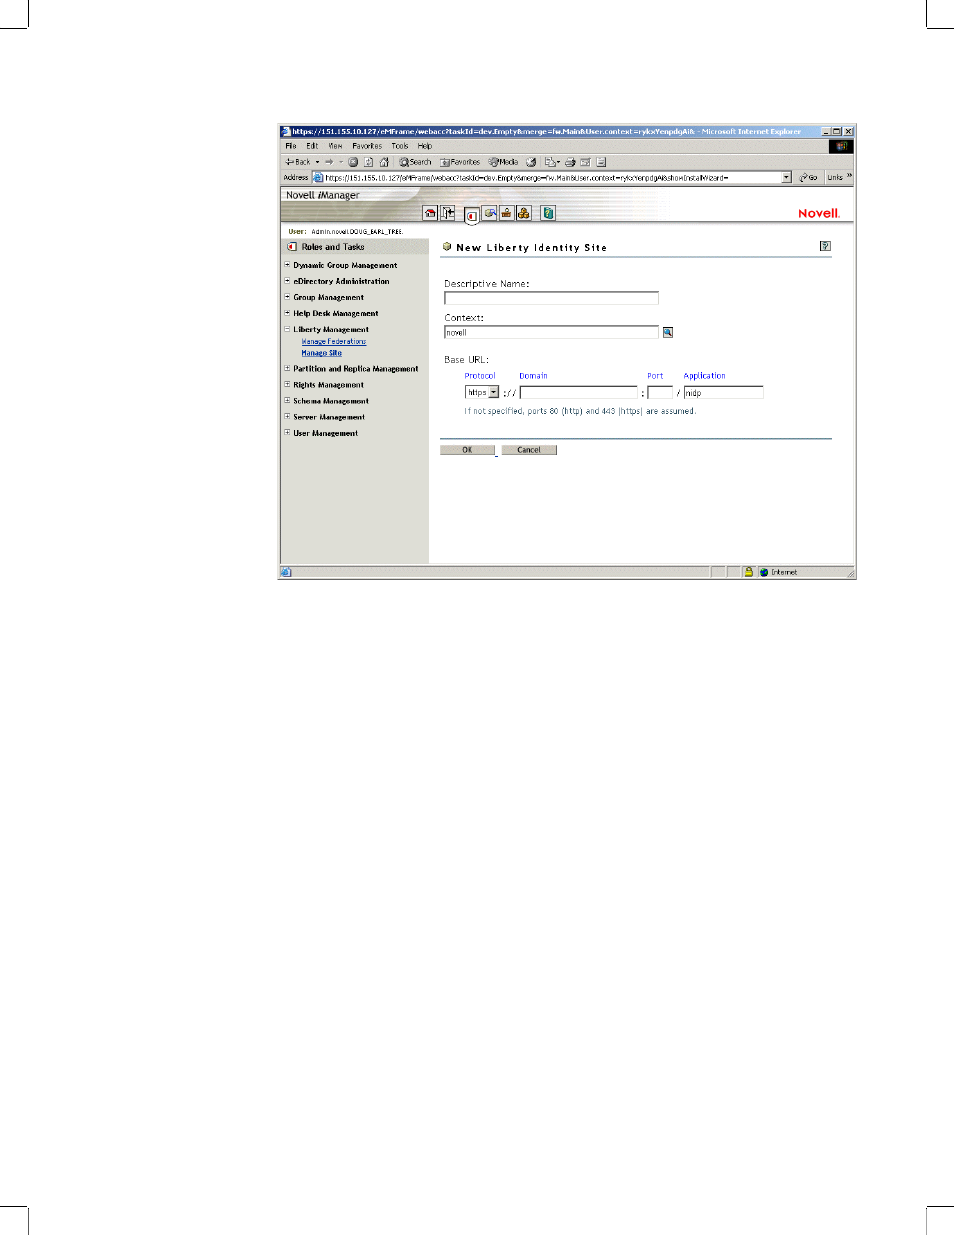
Figure 17
New Liberty Identity Site Page
4
Enter a Descriptive Name for your site. (The name you choose is primarily for your own
reference.)
5
Enter the context for this site.
The context identifies where you want to store this site object in the directory. (The default is
located at the root, but you can choose the location you want.)
6
Enter the Protocol and Base URL information.
There are defaults you can use on the application, but if you defined this information during
the product installation, you should verify that the information you used during the installation
matches the information entered at this screen.
To enter the Protocol and Base URL information:
6a
Change the Protocol to HTTP.
You should only use HTTP when Liberty is in test mode. (By default, that is how it is
installed.)
IMPORTANT:
Before you put your Liberty identity provider into a production environment, you need
to change to HTTPS, however, we recommend that you get your IDP working with HTTP before
switching to HTTPS. Once you are successfully running in HTTP mode, see
Your Liberty Identity Provider to Run in SSL Mode,” on page 29
for information on how to convert to
HTTPS.
6b
Enter the Domain and Port.
The Domain should be a name, but it can be the IP address of the Web server where you
installed the IDP.