Speed dial, Edit, Save – Polycom IP 500 User Manual
Page 15: Exit
12
Speed Dial
Pre-assigned numbers can be associated
with line keys for rapid automated dialing.
Speed Dial entries are placed consecu-
tively underneath assigned line keys on the
telephone.
Example: To assign Joe to a Speed Dial
key:
1. Press
Hold
Del
Sel
Conference
1
3
DEF
5
JKL
4
GHI
6
MNO
8
TUV
7
PQRS
9
WXYZ
0
OPER
*
#
2
ABC
Hold
Del
Sel
Directories
Services
Call Lists
Buddy Status
My Status
Redial
Menu
Messages
Do Not Disturb
ABC
2
1
DEF
3
5
4
MNO
JKL
GHI
6
TUV
8
7
WXYZ
9
OPER
PQRS
0
and select Contact
Directories
.
2. Press
More and then Add soft keys
to enter Joe’s contact details (first
name, last name, and contact num-
ber).
3. Enter Speed Dial Index as “1”. This
assigns Joe to the first available line
key on the display.
4. Press
Submit to confirm and Exit or
Hold
Del
Sel
Conference
1
3
DEF
5
JKL
4
GHI
6
MNO
8
TUV
7
PQRS
9
WXYZ
0
OPER
*
#
2
ABC
Hold
Del
Sel
Directories
Services
Call Lists
Buddy Status
My Status
Redial
Menu
Messages
Do Not Disturb
ABC
2
1
DEF
3
5
4
MNO
JKL
GHI
6
TUV
8
7
WXYZ
9
OPER
PQRS
0
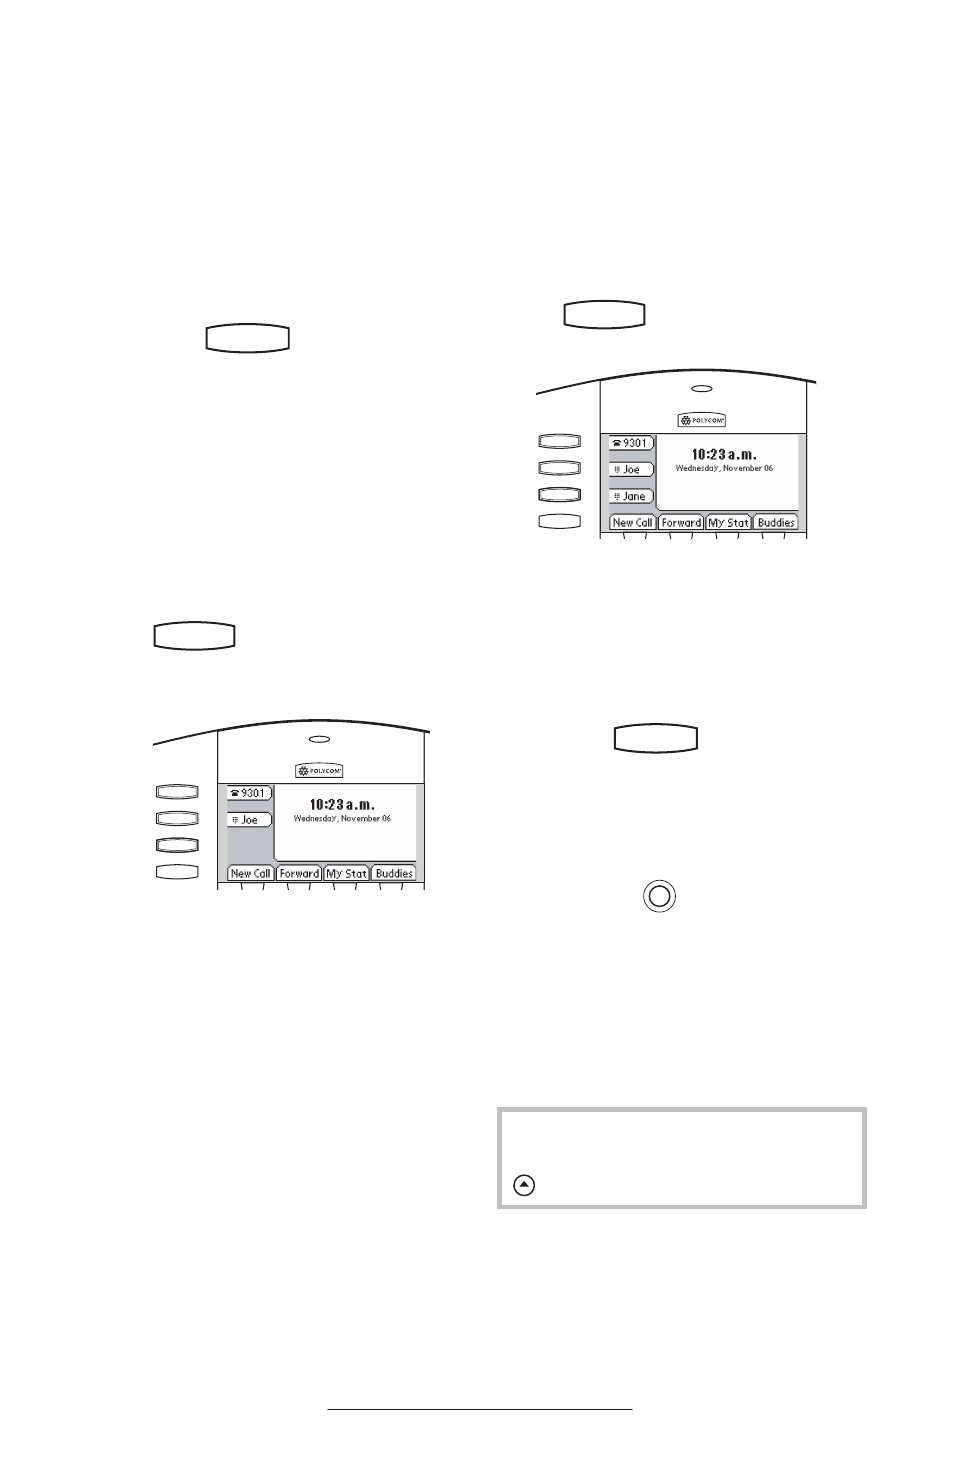
to return to the idle dis-
play. Idle screen is as shown (single
line case):
An additional speed dial key for Jane can be
added to the previous example as follows:
5. Repeat steps 1-3 above for Jane’s
contact details.
6. Enter Speed Dial Index as “2”.
7. Press
Submit to confirm and Exit or
Hold
Del
Sel
Conference
1
3
DEF
5
JKL
4
GHI
6
MNO
8
TUV
7
PQRS
9
WXYZ
0
OPER
*
#
2
ABC
Hold
Del
Sel
Directories
Services
Call Lists
Buddy Status
My Status
Redial
Menu
Messages
Do Not Disturb
ABC
2
1
DEF
3
5
4
MNO
JKL
GHI
6
TUV
8
7
WXYZ
9
OPER
PQRS
0
to return to the idle dis-
play. Idle screen is now as shown:
To dial a number assigned to a Line
Feature Key, simply press the line key di-
rectly opposite the number on the display.
To remove a Speed Dial entry:
1. Press
Hold
Del
Sel
Conference
1
3
DEF
5
JKL
4
GHI
6
MNO
8
TUV
7
PQRS
9
WXYZ
0
OPER
*
#
2
ABC
Hold
Del
Sel
Directories
Services
Call Lists
Buddy Status
My Status
Redial
Menu
Messages
Do Not Disturb
ABC
2
1
DEF
3
5
4
MNO
JKL
GHI
6
TUV
8
7
WXYZ
9
OPER
PQRS
0
and select Contact
Directories.
2.
Scroll to the desired entry and press
Edit
.
3. Delete the Speed Dial Index number
using the
Hold
Del
Sel
Conference
1
3
DEF
5
JKL
4
GHI
6
MNO
8
TUV
7
PQRS
9
WXYZ
0
OPER
*
#
2
ABC
Hold
Del
Sel
Directories
Services
Call Lists
Buddy Status
My Status
Redial
Menu
Messages
Do Not Disturb
ABC
2
1
DEF
3
5
4
MNO
JKL
GHI
6
TUV
8
7
WXYZ
9
OPER
PQRS
0
key.
4. Press
Save
and
Exit
twice to return to
the idle display.
The Speed Dial index for that contact is
removed from view.
On a default configuration of the Sound-
Point IP 500 SIP telephone, there could be
one or two line keys available for speed
dial. Extra line or feature keys may be
configured for Speed Dial use as required.
Contact your System Administrator or con-
sult the Administrator Guide SoundPoint
IP SIP
for more details.
To quickly view a complete list of assigned
speed dial entries, press the up arrow key
Hold
Del
Sel
Conference
1
3
DEF
5
JKL
4
GHI
6
MNO
8
TUV
7
PQRS
9
WXYZ
0
OPER
*
#
2
ABC
Hold
Del
Sel
Directories
Services
Call Lists
Buddy Status
My Status
Redial
Menu
Messages
Do Not Disturb
ABC
2
1
DEF
3
5
4
MNO
JKL
GHI
6
TUV
8
7
WXYZ
9
OPER
PQRS
0
. Dial directly from a selected number.
Hold
Del
Sel
1
3
DEF
5
JKL
4
GHI
6
MNO
8
TUV
7
PQRS
9
WXYZ
0
OPER
*
#
2
ABC
Hold
Del
Sel
Menu
Messages
Do Not Disturb
ABC
2
1
DEF
3
5
4
MNO
JKL
GHI
6
TUV
8
7
WXYZ
9
OPER
PQRS
0
Directories
Services
Call Lists
Conference
Transfer
Redial
Hold
Del
Sel
1
3
DEF
5
JKL
4
GHI
6
MNO
8
TUV
7
PQRS
9
WXYZ
0
OPER
*
#
2
ABC
Hold
Del
Sel
Menu
Messages
Do Not Disturb
ABC
2
1
DEF
3
5
4
MNO
JKL
GHI
6
TUV
8
7
WXYZ
9
OPER
PQRS
0
Directories
Services
Call Lists
Conference
Transfer
Redial