Premier Mounts PP-FCTA-QL User Manual
Page 4
Page 4
Installation Instructions
Plate Assembly
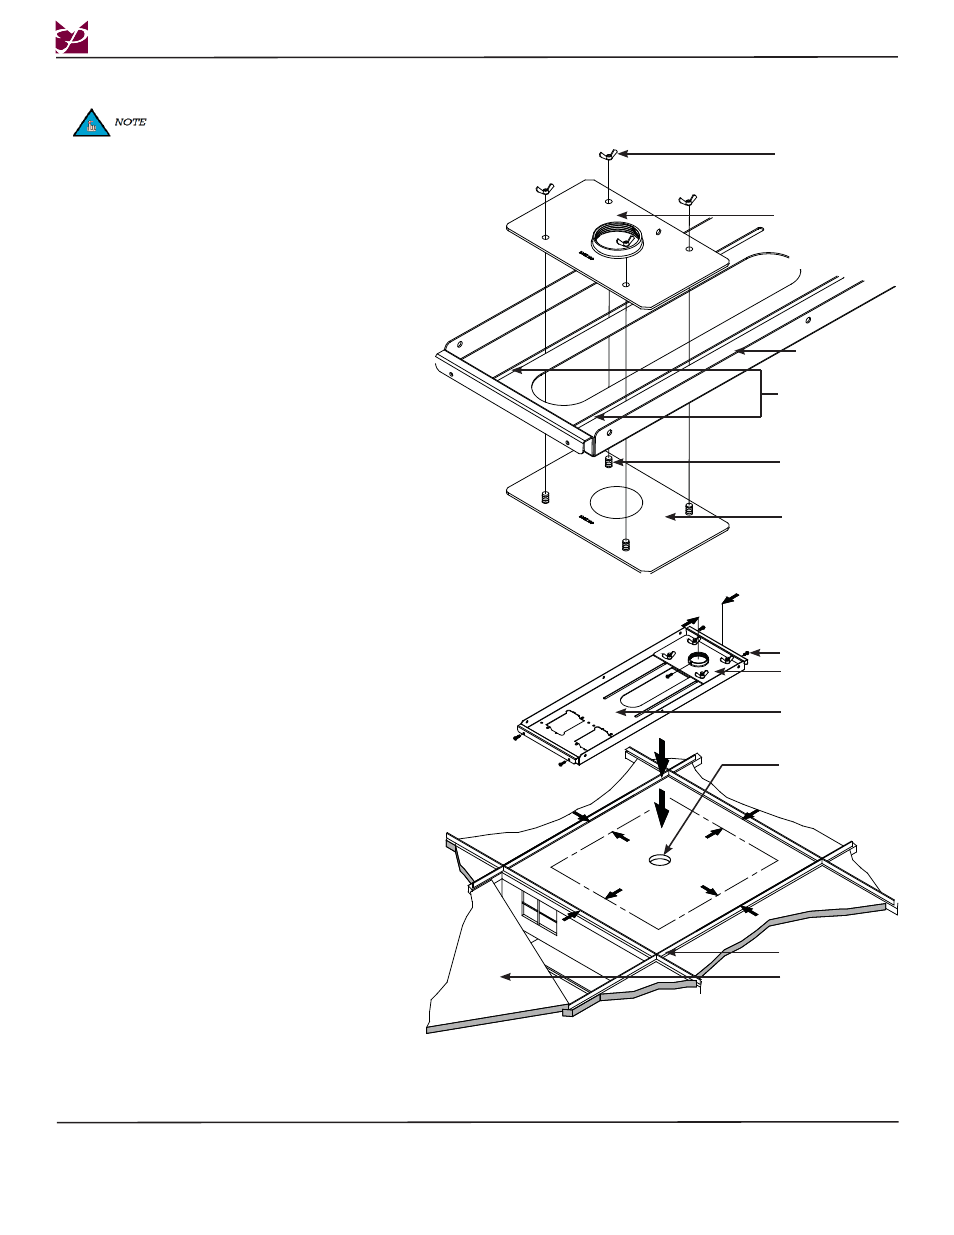
Step 1. Assemble the plate.
Step 2. Place the lower adapter plate with the threaded
studs on it up through mounting plate.
Step 3. The threaded studs will align with the
adjustable slide on the mount.
Step 4. Once the two pieces are together, align the
mounting holes on the upper adapter plate with
the threaded shafts of the lower adapter plate.
Step 5. Place the three units together and loosely attach
four (4) 1/4-20 wing nuts onto the threaded
shafts.
Read all cautions and warnings before continuing.
PP-FCTA-QL
3"
3"
3"
3"
3"
1/4-20 Wing Nuts
Upper Adapter
Plate
Lower Adapter
Plate
Wing Nut Threaded
Studs
Adjustable Slide
Step 6. Pre-set the M5 x 16 Phillips screws (two on
each outer ends) of the plate and one (1) on the
1½” NPT coupler.
Step 7. Observe the room and the ceiling; find the most
appropriate location for the projector placement
and lightly mark the bottom of the tile.
Step 8. Remove any of the 24” x 24” or 24” x 48” tiles
that are surrounding the marked tile.
Step 9. Measure 3” from the edge of the t-bar to the
inside of the tile (do this for all four edges of the
ceiling
tile).
Step 10. The mounting hole should be located in the
center-most location of the ceiling tile.
Step 11. Once the mounting hole has been cut, place the
ceiling plate assembly on the t-bar rails.
Mount
M5 x 16mm
Screws
Slider Plate
Ceiling Plate
Assembly
Mounting Hole
T-Bar Frame
Ceiling Tile