Troubleshooting – Philips Video Camera User Manual
Page 29
28
29
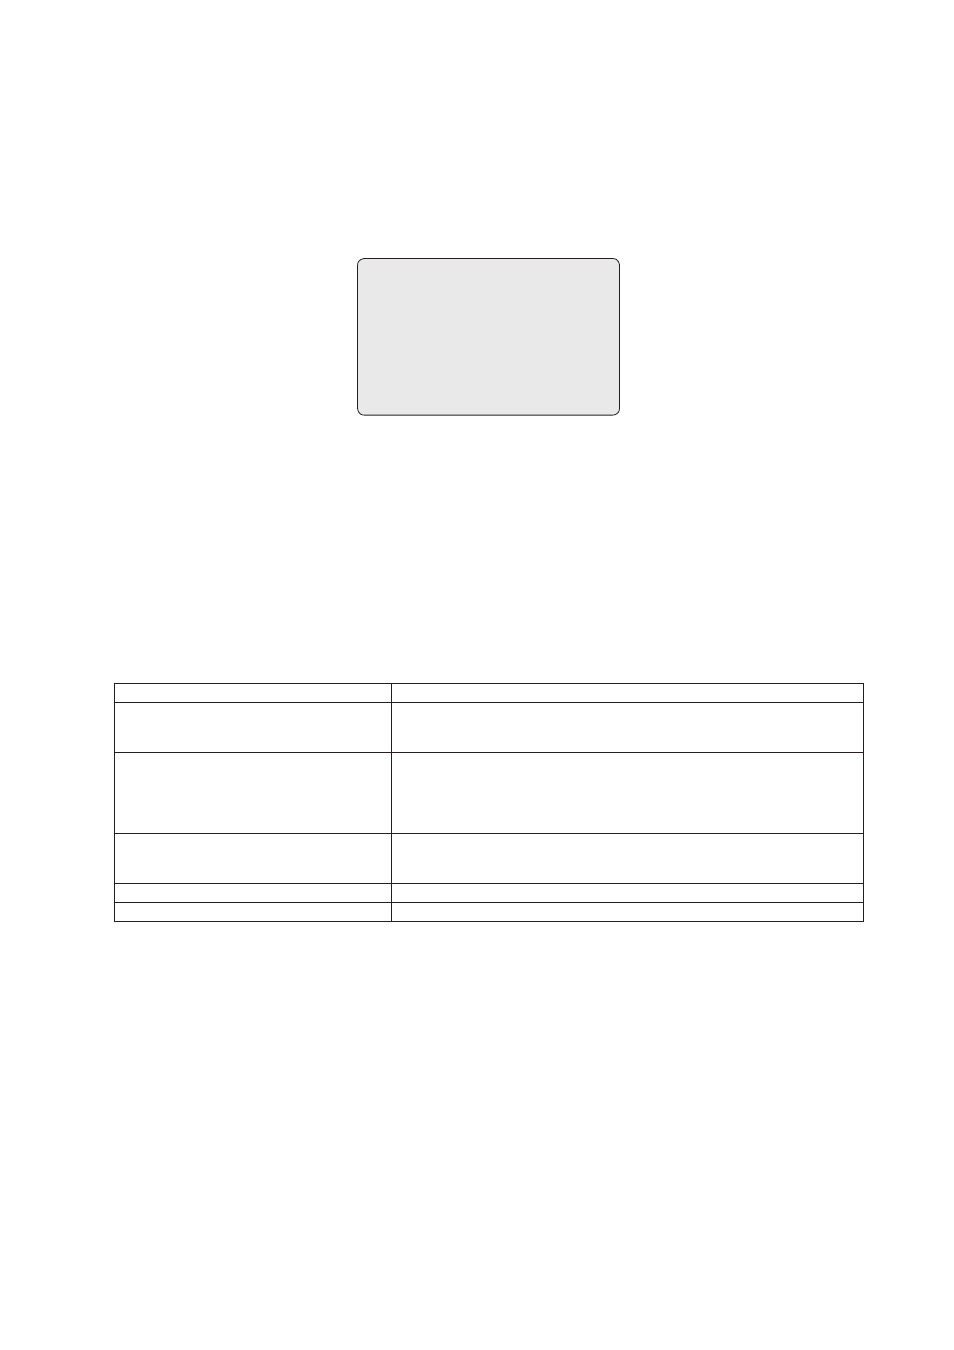
SYSTEM INFORMATION
CAMERA TYPE : XXXXXXX
H/W VERSION : V2.1
ROM VERSION : V2.11
PROTOCOL : F2E
BAUDRATE : 9600BPS
EXIT (ESC TO EXIT)
A Dome camera’s Setup menu provides essential information about the dome camera when service is required. When you view this screen, you can
determine the camera type, ROM version. The information on this screen cannot be modified.
4. Troubleshooting
If problems occur, verify the installation of the camera with the instructions in this manual and with other operating equipment. Isolate the problem to the
specific piece of equipment in the system and refer to the equipment manual for further information.
Problem
Possible Solution
No video
Verify that power is connected to all pieces of equipment in the system.
Verify that the power switches are in the ON position.
Check the video connections (see Figures 4).
Poor video quality
Check that the BNC connectors are inserted properly.
Check the voltage level of the dome camera.
Check that 8 pin cable is connected to the Keyboard. Check 8 pin cable for Keyboard is
proprietary. (Cable for video is shielded.)
Check termination of Video.
Dome cameras lose their positions.
Reset the cameras using the Dome configuration menus.
Check that the dome cameras are inserted properly in the base.
Check the voltage level of the dome camera.
Camera number does not match the multiplexer number. Check the camera ID and insert the BNC cable into the proper input of the multiplexer.
Picture is torn when switching
Check Line Lock setting and adjust phase of L/L (see page 25).
• DOME RESET
This feature is used to re-calibrate the orientation of a selected dome camera. Origin offset value is not affected by this function.
(Offset is still valid after origin set)
• SYSTEM INFORMATION