To show the jpeg menu, Using the tree screen to find a group, L 23 – Panasonic DMR-ES40V User Manual
Page 23: L 23), Playback, Menu, Press
Playback
23
[1]
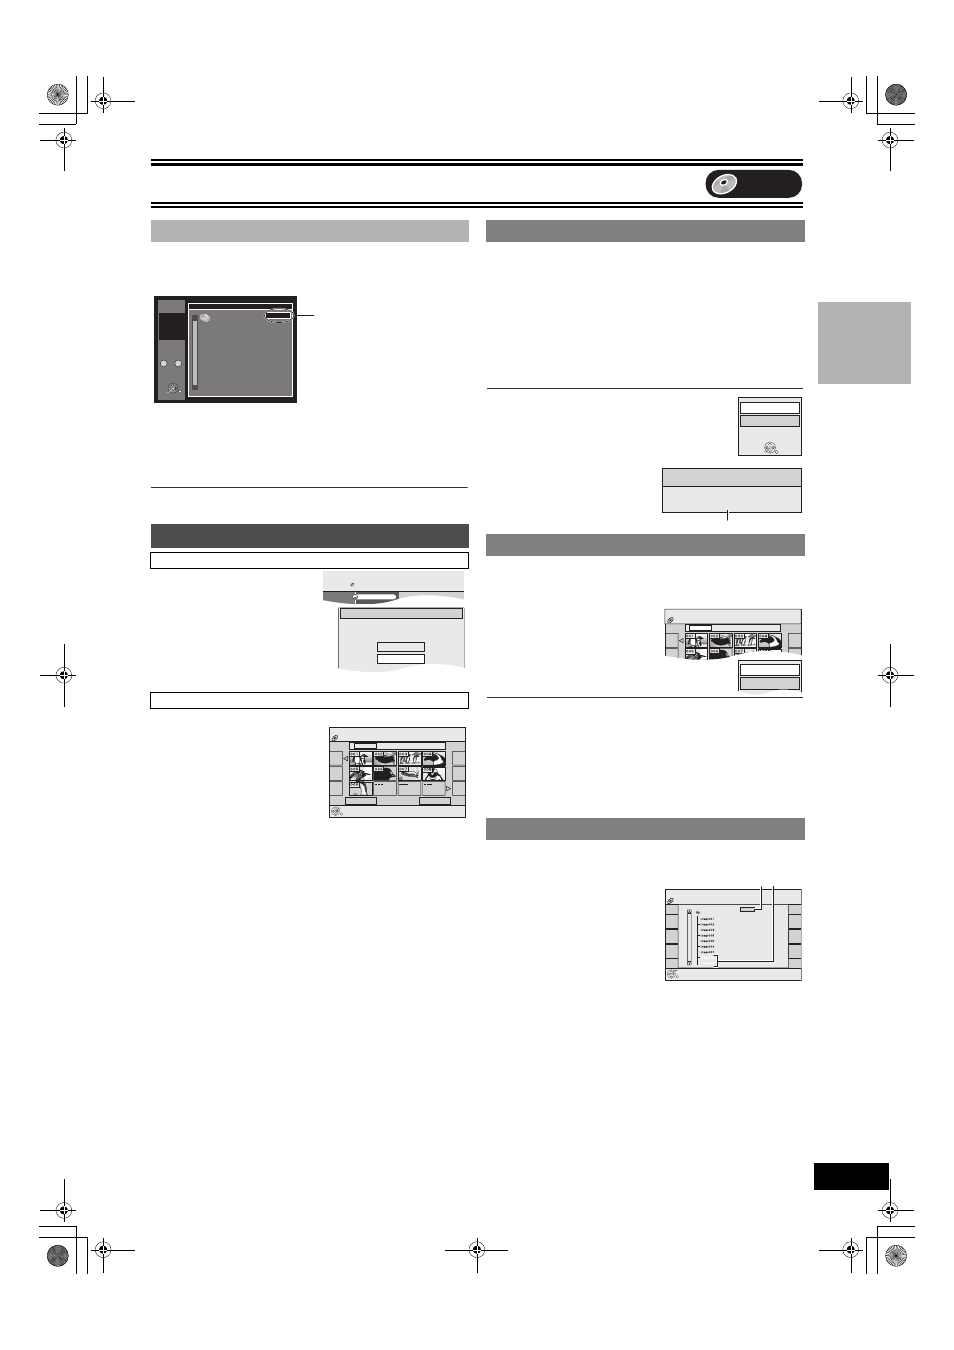
While the file list is displayed (
Press
[
1] while a track is highlighted to display
the tree screen.
≥You cannot select groups with no MP3 files.
≥Press [2, 1] to jump layers in the tree screen.
[2]
Press [
3, 4] to select a group and press
[ENTER].
≥The file list for the selected group appears.
∫ To return to the file list
Press [RETURN].
[1]
While stopped
Press [FUNCTIONS].
[2]
Select “MENU” with [
3,
4] and press [ENTER].
[3]
Select “JPEG Menu”
with [
3, 4] and press
[ENTER].
Press [TOP MENU].
≥Depending on the JPEG file size,
the thumbnail may not be shown
correctly.
≥Except for 4:3 JPEG thumbnails,
the thumbnail may not be shown
correctly.
∫ To show other pages
Press [
:] (Previous) or [9] (Next) to show other pages.
≥You can also press [3, 4, 2, 1] to select “Previous” or “Next” and
press [ENTER] to show other pages.
∫ To exit the JPEG Menu
Press [TOP MENU] or [RETURN].
≥Make sure that the JPEG Menu screen appears by following the
steps in “To show the JPEG Menu”.
Use [
3, 4, 2, 1] to select a still picture you want
to watch and press [ENTER].
≥You can also select a still picture by entering a 3-digit with the
numbered buttons.
e.g.:
“5”:
[0]
)[0] )[5]
“15”:
[0]
)[1] )[5]
≥You can watch the still pictures in order by pressing [2]
(previous) or [
1] (next).
To rotate a still picture
[1]
Press [SUB MENU].
[2]
Select “Rotate Right” or “Rotate Left” with [
3, 4]
and press [ENTER].
≥Rotation information will not be stored.
To show the picture properties
[1]
Press [STATUS] twice.
≥Press [STATUS] again, the
properties disappear.
≥Make sure that the JPEG Menu screen appears by following the
steps in “To show the JPEG Menu”.
You can display still pictures one by one with constant interval.
[1]
Select “Folder” with [
3]
and press [SUB MENU].
[2]
Select “Start Slide
Show” with [
3, 4] and
press [ENTER].
∫To exit the Slide Show
Press [TOP MENU].
To Change the display timing
[1]
Select “Slide Interval” with [
3, 4] in step 2 and press [ENTER].
[2]
Press [
2, 1] to select the desired timing (0 to 30 seconds) and
press [ENTER].
≥When the selected JPEG file size is large, the actual slide interval
may be longer than the selected timing.
≥Make sure that the JPEG Menu screen appears by following the
steps in “To show the JPEG Menu”.
[1]
Select “Folder” with [
3]
and press [ENTER].
[2]
Select the folder with
[
3, 4] and press
[ENTER].
ASelected folder no./Total folder no.
BYou cannot select folders that
contain no compatible files.
∫ Using the tree screen to find a group
To show the JPEG Menu
[CD] [with MP3 files and still pictures (JPEG)]
[CD] [with still pictures (JPEG) only]
Menu
0
–
9
No.
G 1
T 1
Total
1/
24
3
3
MP3 music
/My favorite/
/My favorite/Brazillian pops/
/My favorite/Chinese pops/
/My favorite/Czech pops/
/My favorite/Hungarian pops/
/My favorite/Liner notes/
/My favorite/Japanese pops/
/My favorite/Mexican pops
/My favorite/Philippine pops/
/My favorite/Swedish pops/
G 1/
15
Tree
ENTER
Selected Group Number/Total
Group Number
≥If the group has no track, “– –”
is displayed as group number.
FUNCTIONS
DVD
CD(MP3/JPEG)
Playback Mode: MP3
Playback
MENU
Menu
Select a playback mode from
the following menus.
Menus
MP3 Menu
JPEG Menu
JPEG Menu
CD (JPEG)
Folder
08 8 11/21 Mon
Play
Picture (JPEG) View
Page 01/01
Previous
Next
JPEG Menu screen
1 Playing a still picture
1 Start Slide Show/Slide Interval
1 To select the still pictures in another folder
Rotate Right
Rotate Left
ENTER
Date 11/23/2005 No. 100/123
11/24 10:15 PM
Shooting Date
JPEG Menu
CD (JPEG)
Folder
08 8 11/21 Mon
Picture (JPEG) View
Start Slide Show
Slide Interval
12_02_2005
ENTER
JPEG Menu
CD (JPEG)
Select Folder
F 1/1
A B
DVD
Pl
ay
ba
ck
ES40VP&PC.book 23 ページ 2005年9月6日 火曜日 午前10時23分