Recording television programmes – Panasonic DMR-E30 User Manual
Page 21
21
Recording television programmes
[RAM] [DVD-R]
Preparation
Switch [DVD, TV]
(15) to “DVD”.
1
Press [DVD,
Í] (1) to turn the unit on.
2
Press [
<, OPEN/CLOSE] (39) to open the tray and
insert a disc.
≥Insert one disc only within the tray’s guides.
≥Use a disc that can be recorded on and that has enough
space available.
≥Press [<, OPEN/CLOSE] (39) to close the tray.
≥When using a DVD-RAM for the first time with this unit,
format it to ensure accurate recording (page 34, “Format”).
Check the disc carefully to ensure it doesn’t contain
programmes you want to keep.
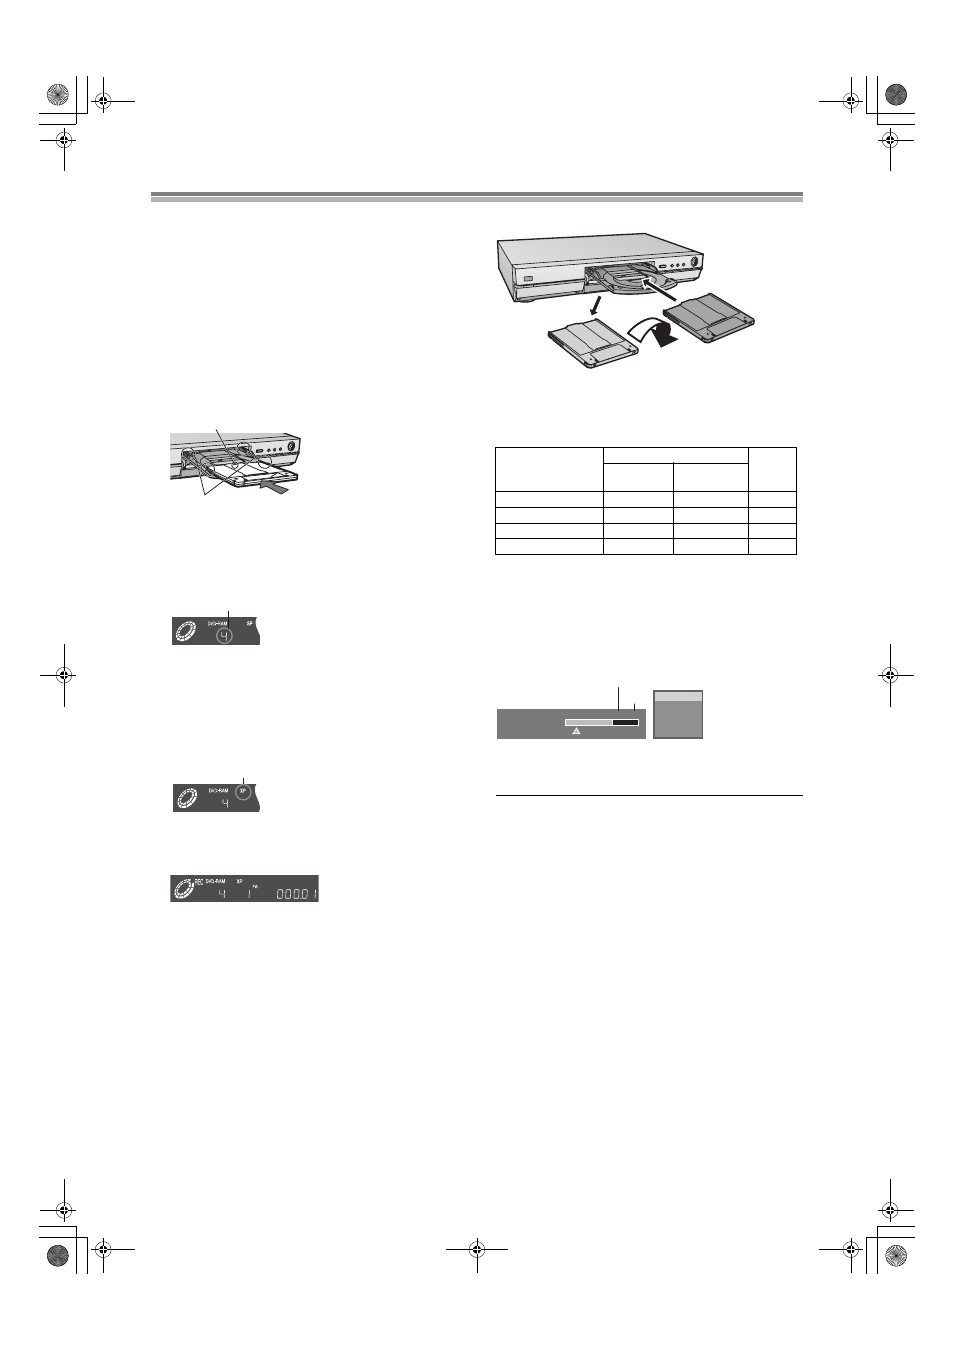
(1) Arrow pointing inwards.
(2) Align correctly.
≥Insert label-up with the arrow facing in. (with double-sided
discs, load so the label for the side you want to record is
facing up.)
3
Press [
W, X] (18) to select the channel.
(3) e.g.: When you have selected channel 4
4
Press [REC MODE]
(26) to select the recording
mode.
≥Select “XP”, “SP”, “LP”, or “EP”.
≥It is also possible to perform the flexible recording (FR).
≥To record sound using LPCM (possible only in XP mode), set
“Audio Mode for XP Recording” to “LPCM”. (page 56)
(4) e.g.: When you have selected “XP”
5
Press [
¥ REC] (16) to start recording.
≥The programme is recorded into the available space on the
disc.
ªTo pause recording
Press [
;] (8).
Press again to restart recording.
ªTo stop recording
Press [
∫] (7).
ªTo select channels with the remote control
Press the numeric buttons
(4).
ªConvenient features
≥Chasing play—playing from the beginning of the programme you
are recording (page 24).
≥Simultaneous recording and play—watching a programme you
recorded while recording another (page 24).
≥Time Slip-checking the images you are recording (page 25).
ªRe-inserting double-sided discs
You can get up to 12 hours recording when you use double-sided
discs and use the “EP” mode.
ªRecording modes and approximate recording times
in hours
* It is possible to use LPCM when recording in XP mode.
(page 56)
≥Flexible recording (FR) calculates a recording rate that will
enable the recording to fit in the remaining time on the disc.
ªTo check the remaining time and the current mode
during recording
Press [STATUS]
(28) several times.
(1) Available recording time
(e.g.: “2:34” indicates 2 hours and 34 minutes)
(2) Recording mode
Note
≥The message “Cannot record. Maximum amount of scenes
exceeded” is displayed if you try to start recording when there
are already 99 programmes on a disc. Erase unneeded
programmes (DVD-RAM/DVD-R) or use a new disc to continue
recording.
≥Check that disc can be recorded on (page 9).
≥Ensure the write protect tab is not set to “PROTECT” (page 70).
≥Ensure the disc is not write-protected with DISC INFORMATION
(page 33).
For your reference
≥You can record up to 99 programmes on one disc.
≥You cannot change the channel or recording mode during
recording. You can change them while recording is paused, but
the material is recorded as a separate programme.
≥An error message appears if you try to start recording when a
disc is full; the remaining time will be shown as “0:00”. To
continue recording, erase unneeded programmes (DVD-RAM
only (page 37), Erasing programmes) or use another disc.
≥There are limitations when recording to DVD-R (page 10).
≥The message “Can not record on the disc.” is displayed when
recording was not completed correctly. Check the discs for dirt or
scratches.
≥Recording cannot be performed correctly if you try to record PAL
system to a disc that already contains recordings using NTSC.
(1)
(2)
(3)
(4)
DVD-RAM
DVD-R
(4.7 GB)
Single-sided
(4.7 GB)
Double-sided
(9.4 GB)
XP (High quality)*
1
2
1
SP (Normal)
2
4
2
LP (Long play)
4
8
4
EP (Extra long play)
6
12
6
1
2
3
Turn over
Reverse
Front
π
Remain 2:34 XP
10:15:00 6.8
π
PRG2 1:12.12 XP
π
PRG1 0:00.04 SP
REC
PLAY
DVD-RAM
(1)
(2)
LR