Connecting to audio equipment, Installation, 13 (g) (optional) – Philips LC4242 User Manual
Page 13
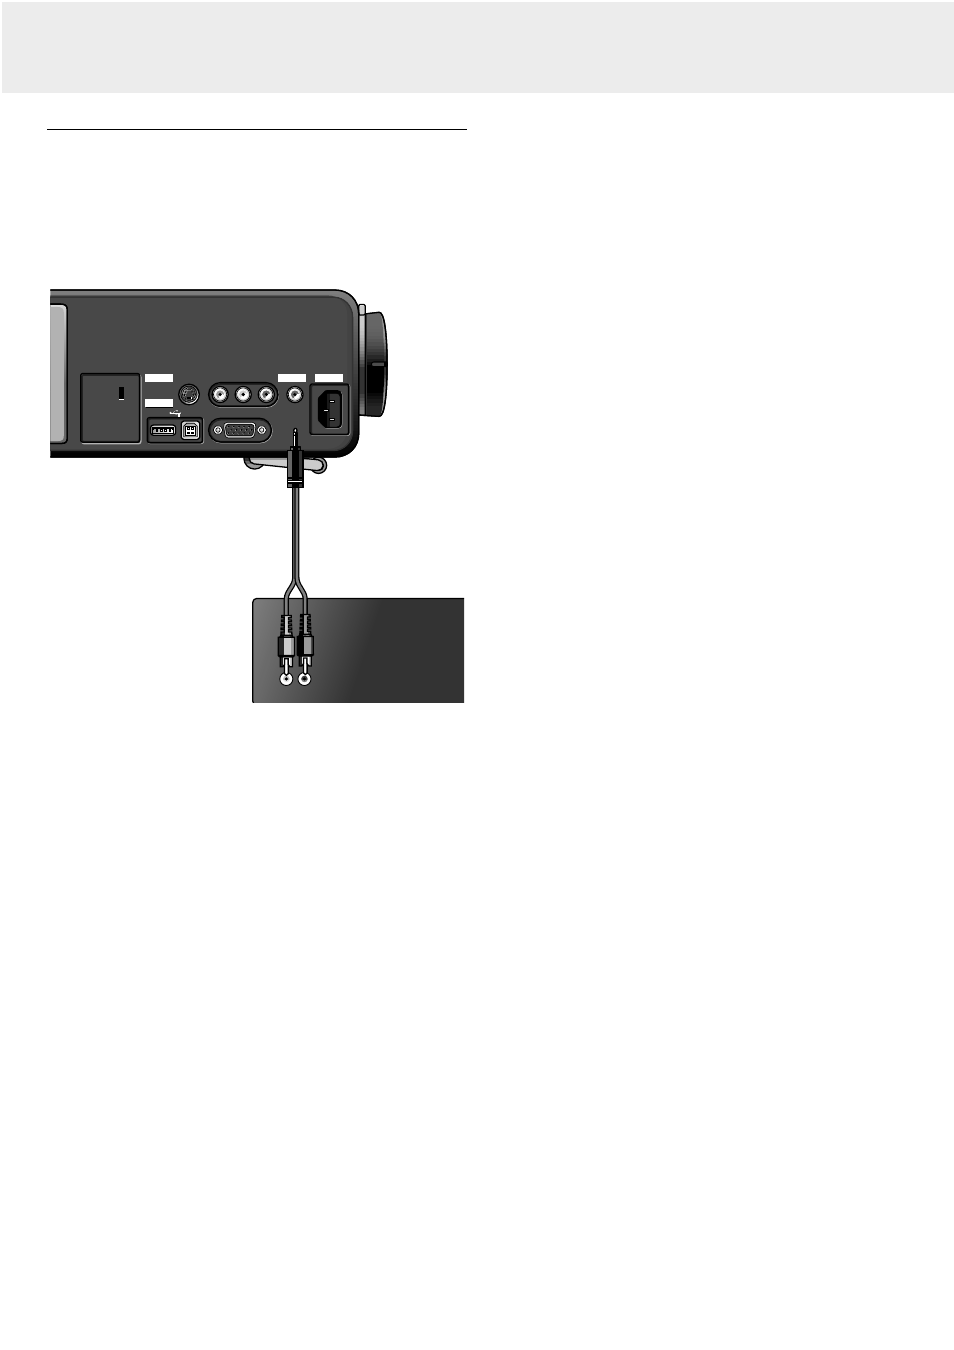
Connecting to audio equipment
General
–
The characters in brackets (a) correspond to the characters in
fig. 2 of ‘Controls and connections’.
Caution!
Always switch off the projector before making any connections.
Always turn down the volume control of the connected amplifier
before switching it on, to prevent damage to the speakers.
•
Connect the AUDIO IN L/R sockets of an amplifier or stereo
system to the AUDIO OUT socket
(g) of the projector.
Insert the white plug into the L socket and the red plug into
the R socket.
Note: When the projector is connected to an external audio
amplifier, you cannot control the volume via the projector
or the remote control. However, the sound can still be
muted via the projector or the remote control.
Data in
S-Video in
Video in
Audio
Audio
L
R
Data in
S-Video in
Video in
Audio
Audio
L
R
Power
Data
Audio
Video
out
out
Projector
Amplifier
L Audio R
in
L Audio R
in
Data
USB in USB out
USB in USB out
7. Installation
13
(g)
(optional)
Connecting to audio equipment