Video adjustments [picture 1, Color, Contrast – PLUS Vision PLUS Piano HE-3200 User Manual
Page 33: Brightness, E – 33, Adjusting the color, Adjusting the contrast, Adjusting the brightness
E – 33
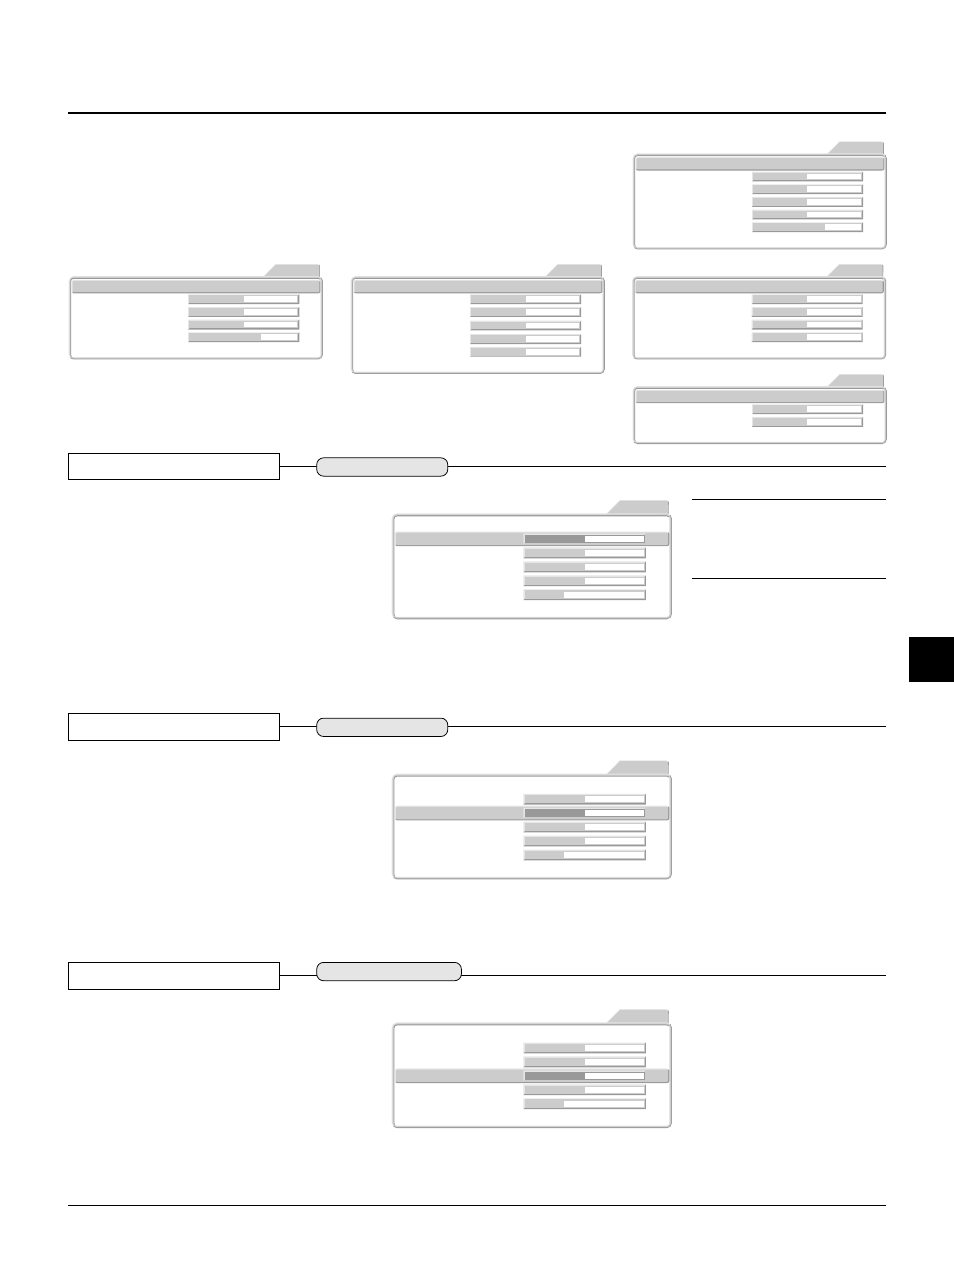
Video Adjustments [Picture 1]
These are picture-related adjustments.
For information about performing menu operations, see
→ Page E-28
"Using the On-Screen Menus."
Picture1
Brightness
0
Contrast
0
Tint
0
Clock frequency
0
Phase
0
Color Temp.
Low
Normal
High Custom
Picture2
Setup
Info.
YPbPr
Option
Picture1
Brightness
0
Contrast
0
Clock frequency
0
Phase
0
Color Temp.
Low
Normal
High Custom
Picture2
Setup
Info.
RGB
Option
Picture1
Brightness
0
Contrast
0
Color
0
Tint
0
Sharpness
2
Color Temp.
Low
Normal
High Custom
Picture2
Setup
Info.
VIDEO
Option
Picture1
Brightness
0
Contrast
0
Color
0
Sharpness
2
Color Temp.
Low
Normal
High Custom
Picture2
Setup
Info.
YCbCr
Option
Picture1
Brightness
0
Contrast
0
Color Temp.
Low
Normal
High Custom
Picture2
Setup
Info.
DVI
Option
Preparation
* Project the image.
* Press the MENU button to display the menu, then select [Picture 1].
[VIDEO and S-VIDEO Input Selection]
[YCbCr Input Selection]
[RGB Input Selection]
Color
Adjusting the color
This is used in the adjustment of powerful col-
ors and natural colors.
Press the cursor button (
̆̄) and align the cur-
sor with "Color", then adjust with the cursor
(
̇ ̈) button.
Cursor (
̇) Button: Lighter color
Cursor (
̈) Button: Deeper color
Picture1
Brightness
0
0
Contrast
0
Color
Tint
0
Sharpness
1
Color Temp.
Low
Normal
High Custom
Picture2
Setup
Info.
VIDEO
Option
Contrast
Adjusting the Contrast
This is used in the adjustment of powerful im-
ages and natural images.
Press the cursor button (
̆̄) and align the cur-
sor with "Contrast", then adjust with the cursor
(
̇ ̈) button.
Cursor (
̇) Button: Less dense picture
Cursor (
̈) Button: Denser picture
Picture1
Brightness
0
0
Contrast
Color
0
Tint
0
Sharpness
1
Color Temp.
Low
Normal
High Custom
Picture2
Setup
Info.
VIDEO
Option
Brightness
Adjusting the Brightness
The brightness of the image will differ depend-
ing on whether the room is bright or dark. Make
adjustments to suit your preference.
Press the cursor button (
̆̄) and align the cur-
sor with "Brightness", then adjust with the cur-
sor (
̇ ̈) button.
Cursor (
̇) Button: Darker
Cursor (
̈) Button: Brighter
Picture1
Brightness
0
Contrast
0
Color
0
Tint
0
Sharpness
1
Color Temp.
Low
Normal
High Custom
Picture2
Setup
Info.
VIDEO
Option
Note: The adjustment values of the im-
age can be stored and called according
to the various inputs.
→
Page E-42 "Saving and Loading of
Video Adjustments"
Various inputs allowed
Various inputs allowed
VIDEO, S-VIDEO and YCbCr
[DVI Input Selection]
[YPbPr Input Selection]