Connecting without a scart cable, Connecting a decoder or other equipment – Philips VR200/07 User Manual
Page 8
f
Insert one end of the mains cable into the mains socket
4
at the back of the video recorder and the other end
into the wall socket.
g
If your TV set automatically switches to programme
number e.g.: ’EXT’, ’0’, or ’AV’, this text will appear on the
TV screen:
CONGRATULATIONS ON THE
PURCHASE OF YOUR NEW
PHILIPS VIDEO RECORDER
TO CONTINUE PRESS OK
D If your TV set does not switch to programme number
e.g.: ’EXT’, ’0’, or ’AV’ automatically, select the
programme number for the video recorder manually
(see instruction manual TV set).
h
Then read ’Initial installation’ in chapter ’INSTALLING
YOUR VIDEO RECORDER’.
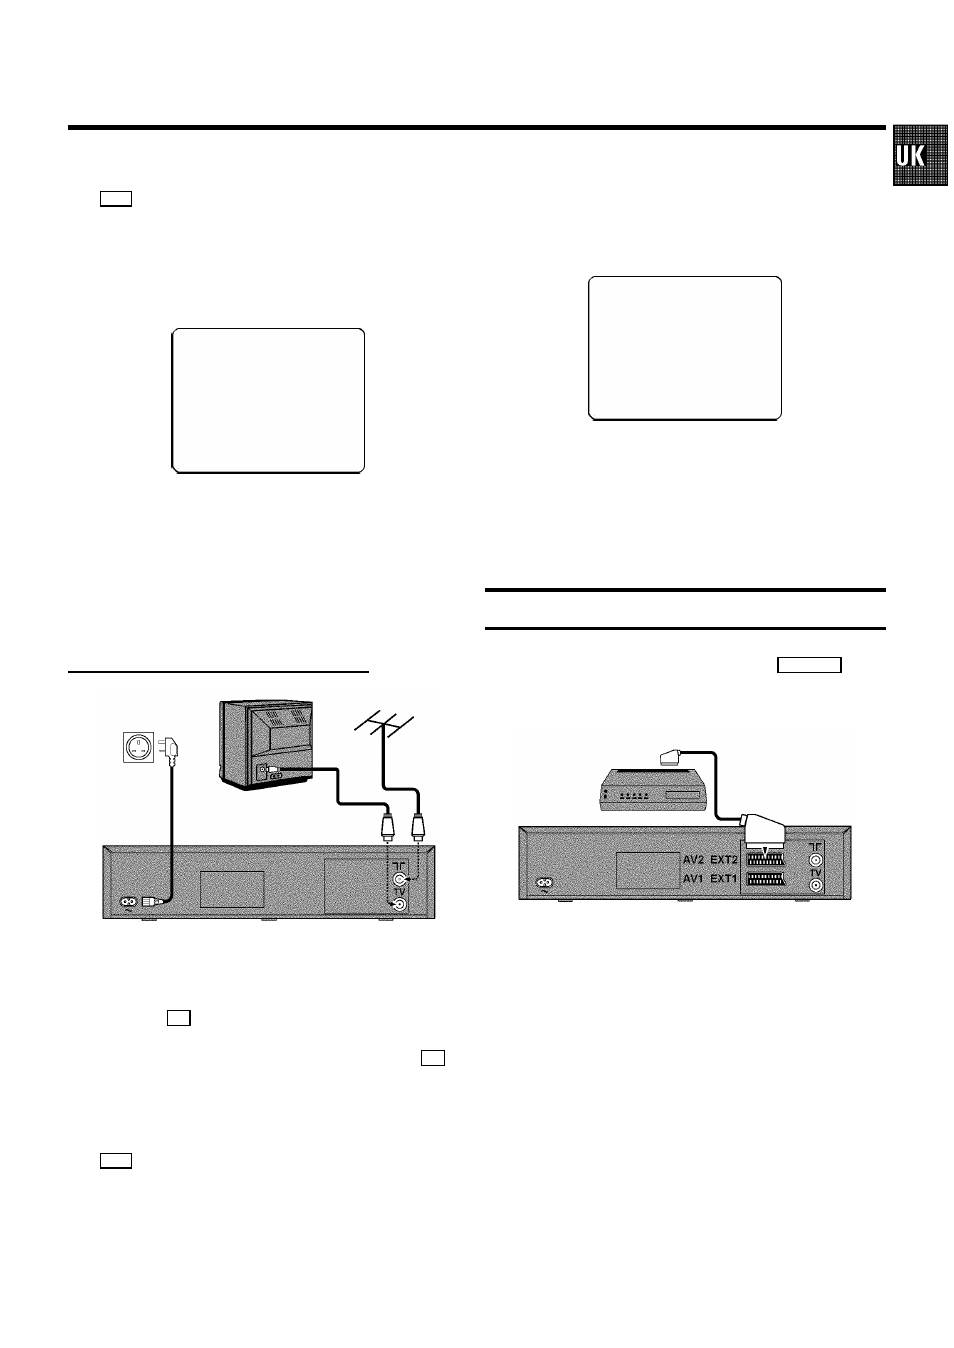
Connecting without a scart cable
a
Switch off the TV set.
b
Remove the aerial cable plug from your TV set and insert
it into the
2
socket at the back of the video recorder.
c
Plug one end of the aerial cable provided into the
3
socket on the video recorder and the other end into the
aerial input socket on your TV set.
d
Insert one end of the mains cable into the mains socket
4
at the back of the video recorder and plug the other
end into the wall socket.
e
Switch on your TV set and select the programme number
that you have chosen for video playback (see instruction
manual TV set).
f
Tune in the TV set in the UHF wave band until the
following picture appears.
D The video recorder will now be sending a
welcoming text on channel 35 or 583MHz:
CONGRATULATIONS ON THE
PURCHASE OF YOUR NEW
PHILIPS VIDEO RECORDER
TO CONTINUE PRESS OK
D If you were using a video recorder before, you will
probably need to retue the ’video channel’ on your
TV to obtain this picture.
g
When the TV has been tuned read the paragraph ’Initial
installation’ in the next chapter.
Connecting a decoder or other equipment
You can connect additional equipment to the
EXT.2 AV 2
socket. For example: a decoder, a satellite receiver or a
camera recorder.
5