Using the mixer controls, Using headphones, Connecting the mixer inputs (cont.) – PYLE Audio 1020 User Manual
Page 5: Connecting the lamp, Turning on the mixer, Monitoring (”cueing”) the inputs
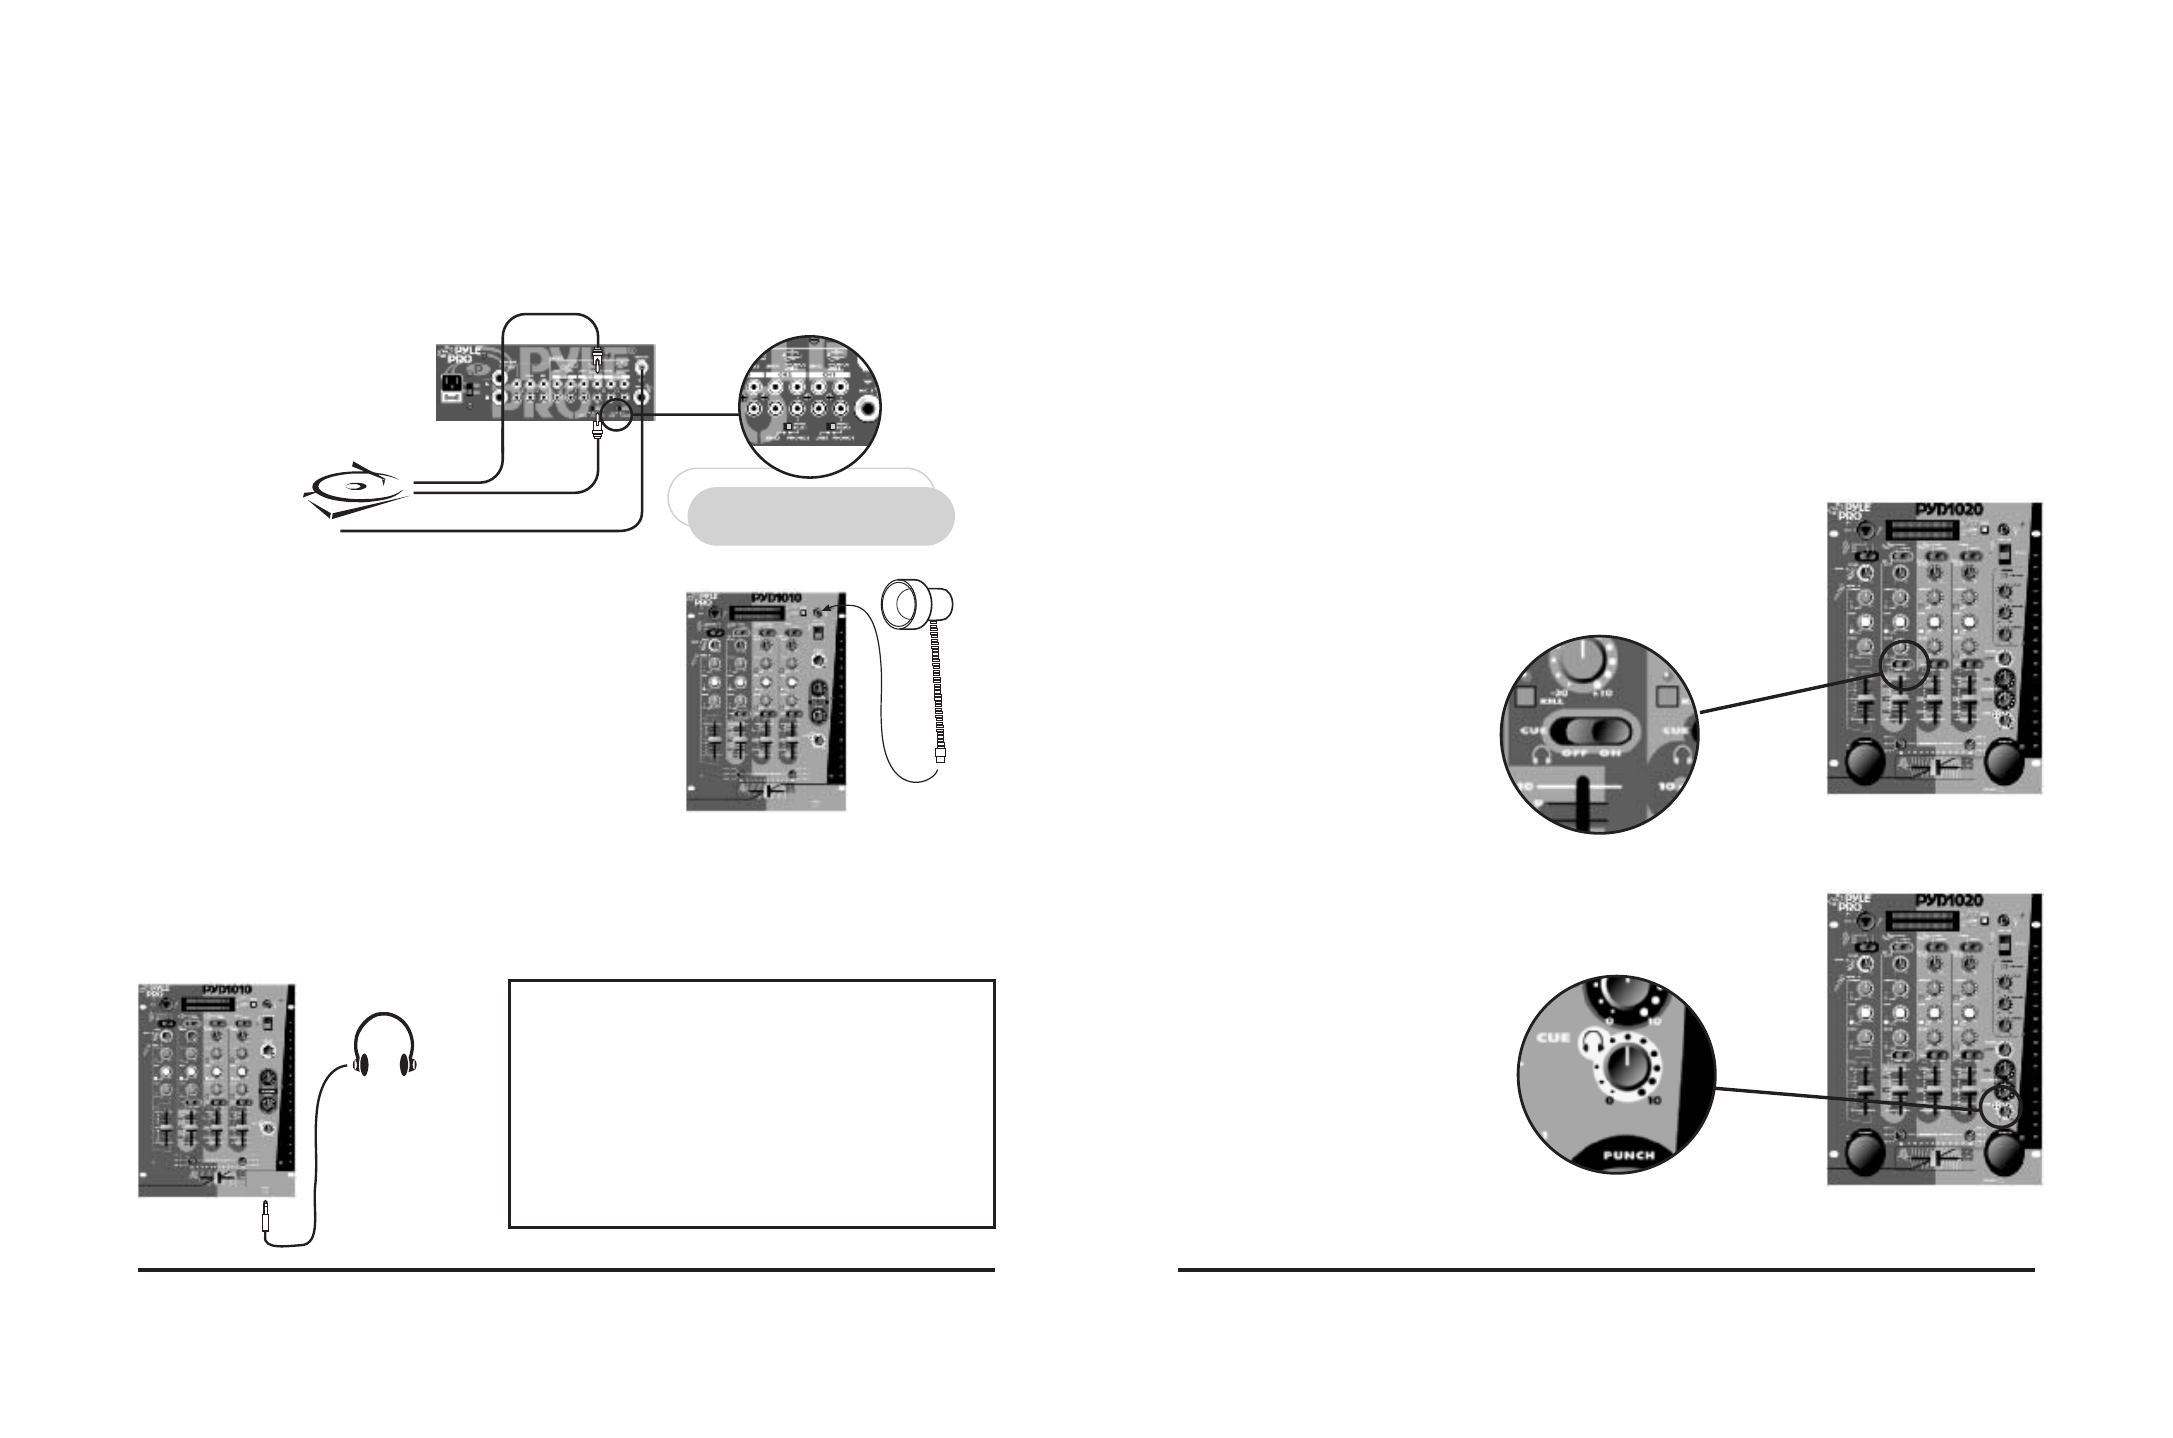
If you use a Turntable(s) in the Phono1/Line1
(and/or Phono2/Line3) input jacks, be sure
to place the Input Select switch in the PHONO1
(and/or PHONO2) position(s)!
NOTE!
Pyle Pro Mixer Owner’s Manual – 7
6 – Pyle Pro Mixer Owner’s Manual
Using the Mixer Controls
Turning on the Mixer
1. Turn on the output amplifier and temporarily set its volume to the minimum setting.
2. On the mixer, turn ON the power switch. The adjacent power LED will illuminate.
3. Turn on the audio input sources you wish to mix, and set them to play (or talk continuously into
the microphone).
4. To monitor the audio input sources so that you can decide when to mix in each input, see “Monitoring
‘Cueing’ the Inputs.”
5. To mix the audio input sources so that you can play them through your amplifier system or record
them on your tape deck, see “Mixing the Inputs.”
Monitoring (”Cueing”) the Inputs
Follow these steps to monitor the audio input sources.
1. Perform Steps 1 and 2 of “Turning on the Mixer” and put headphones
on.
2. Set the CUE switch of the input source (CH1, CH2 or CH3) to the ON
position.
3. Set the desired audio input source’s volume to its minimum setting,
turn it on, and set it to play (or speak continuosly into the microphone).
4. Slowly turn the CUE LEVEL control clockwise until you hear the signal
through the headphones at the desired volume level.
5. Repeat Steps 2-4 to select and adjust the volume level of the other
audio input sources, one at a time.
CUE switch
CUE Level
Control
Plug a pair of stereo headphones (not supplied) with a 1/4” plug into the Phones output. Using
headphones not only affords you the opportunity to listen privately, but also enables you to monitor
the incoming audio sources so you can locate an exact passage or section before mixing it in. It
also gives you the opportunity to set up the relative volume level of the upcoming passage before
it joins the mix.
Using Headphones
Do not listen at extremely high volume levels. Extended,
high-volume listening can lead to permanent hearing loss.
Follow these guidelines to protect your hearing, especially
when using headphones.
Always start by setting the volume level to the lowest
possible level before listening.
Put headphones on, and then gradually increase the
volume as necessary.
Once you set the volume level do not increase it. Over
a period of time, your ears adapt to a volume level and there
is a temptation to increase it. Even though such an increase
may not cause discomfort, it might still damage your hearing.
Listen Safely! Please observe the following:
Stereo Headphones
3. Turntables. Connect up to 2 turntables to the Phono 1 and Phono 2 input jacks. Please note that
Phone 1 and Line 1 (as well as Phono 2 and Line 3) use the same jacks. The selector switch below
the jacks should be set to Phono position if the jacks are used for phono inputs.
When using a turntable, you should also securely connect its ground wire (usually green or black)
to the Ground screw on the input panel of the mixer.
Connecting the Mixer Inputs (cont.)
Use RCA type
patch cables
LEFT output
RIGHT output
Magnetic cartridge turntable
GROUND wire from turntable
If you wish to intall a console lamp (not supplied), simply
insert the plug end of an appropriate 12V/3W gooseneck
style or similar lamp into the lampsocket provided in the
upper right corner of the mixer control panel. Power is
supplied to this lamp when the mixer power switch is turned
on.
Connecting the Lamp
12V/3W lamp