Figure 19, Figure 20 – ParaBody 426103 User Manual
Page 45
45
STEP 20
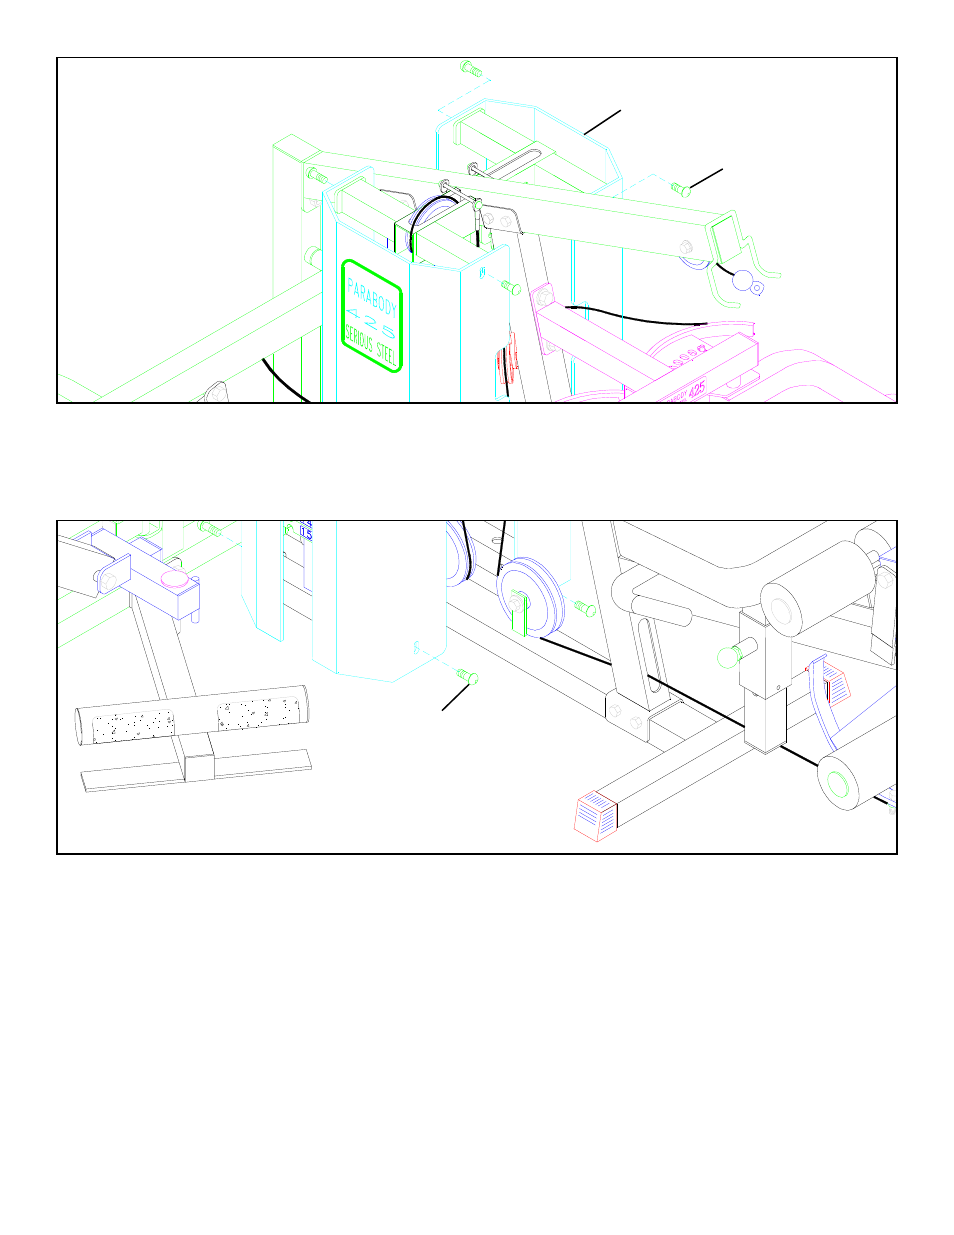
FIGURE 19
STEP 19
3/8” X 1” BUTTON
HEAD CAP SCREW
3/8” X 1” BUTTON
HEAD CAP SCREW
SHROUD
FIGURE 20
• SECURELY attach the bottom of the front SHROUD (with label) & rear SHROUD to the TOP BOOM using the four previously removed
3/8” X 1” BUTTON HEAD CAP SCREWS. See FIGURE 20.
• SECURELY attach the top of the front SHROUD (with label) & rear SHROUD to the TOP BOOM using the four previously removed
3/8” X 1” BUTTON HEAD CAP SCREWS. See FIGURE 19.
The installation of the 426103 Elastic Cord Conversion Kit is complete. If unsure of proper use of
equipment, call your local Parabody distributor or call the Parabody customer service department at
(800) 328-9714.
See also other documents in the category ParaBody Sports and recreation:
- Free Weight Systems (5 pages)
- 886101 (3 pages)
- 425/660 (2 pages)
- 822 (9 pages)
- 848101 (14 pages)
- 881 (26 pages)
- Free Weight Smith System (5 pages)
- Leg Press 100101 (14 pages)
- 360101 (11 pages)
- 777 (5 pages)
- 832102 (14 pages)
- Leg Press 100 (11 pages)
- 205101 (1 page)
- 425 (2 pages)
- 440 (33 pages)
- Hip Sled System (24 pages)
- 824 (8 pages)
- 425103 (40 pages)
- GS2 (24 pages)
- 826 (8 pages)
- 856 (6 pages)
- 400101 (27 pages)
- 829 (14 pages)
- 435104 (13 pages)
- GS6 (8 pages)
- 842 (6 pages)
- 778 (13 pages)
- 375101 (22 pages)
- Leg Press 5 (15 pages)
- 838 (10 pages)
- 441101 440 (10 pages)
- LP5 (15 pages)
- Home Guide (9 pages)
- 888 (15 pages)
- cm3 (8 pages)
- 870 (4 pages)
- 893103 (20 pages)
- 890 (10 pages)
- 250101 (18 pages)
- 843 (12 pages)
- GS4 (1 page)
- 849 (7 pages)
- 855 AB (9 pages)
- 883 (31 pages)