Pella CLAD HINGED PATIO DOOR (INCLUDES STANDARD User Manual
Page 8
F.
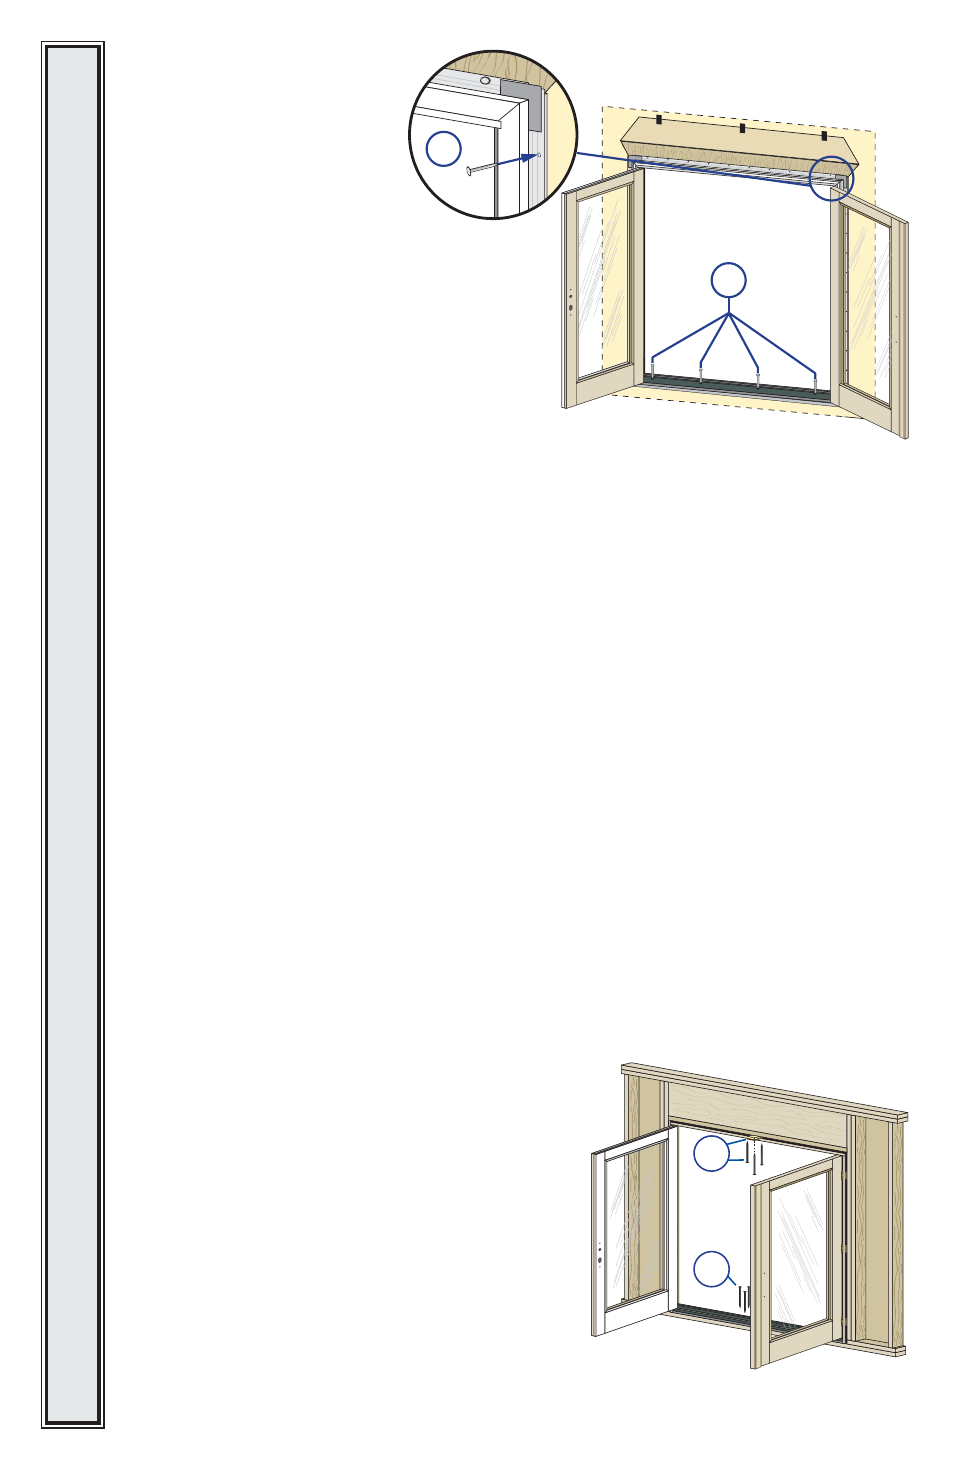
Fasten the door to opening
by driving 2” galvanized
roofing nails into each
pre-punched hole in the
nailing fin.
Note: Make sure the fin
corner is lying as flat as
possible.
Exterior
3H
3F
Interior
3K
3J
G. carefully open the door(s) and remove all
shipping spacers.
Note: Be sure to remove the spacers from the
bottom edge of the door panel.
Double doors with center latch:
Designer Series only:
Use the construction
handle to operate the active door handle.
Operate the flushbolts per the instructions on
the label on the strike located on the astragal.
architect Series only:
Use the construction handle to operate both the active and passive
door panels.
H.
For Designer Series only:
Install sill screws. Place a dab of sealant in each of the pre-
drilled holes in the bottom of the unit (sill). Then insert a #8 x 2” corrosion resistant screw
(provided) into each hole. For masonry floors us a 3/16” masonry screw in place of the
provided screw, pilot drill per screw manufacturer’s recommendations.
For architect Series Standard Installation applications only: Install sill screws. Remove
the threshold screws and insert a #8 x 3” stainless steel screw (provided) into each hole. For
masonry floors use a 3/16 masonry screw in place of the provided screw, pilot drill per screw
manufacturer’s recommendations.
SILL ScREWS FOR ARcHITEcT SERIES PERFORMANcE UPgRADE AND
DOORS WITH HURRIcANESHIELD IMPAcT-RESISTANT gLASS ARE
INSTALLED IN STEP 5.
I. For Low profile Sills: through each installation
screw hole drill a 1/8” pilot
; and install a #8 x 3”
corrosion resistant screw (provided) into the pilot
hole into the floor. For doors including a standard
lock install tubs per instruction included with the
sill strike package.
Note: For concrete floors use masonry screws that
are a minimum size of 3/16” diameter x 2” and
pilot per manufacturer’s recommendations for
the screw.
J. remove sill strike screws from the sill strike
located on the door sill.
Place a dab of sealant
into the three sill strike holes and install the three
#8 x 3” flat head stainless steel screws (provided)
into the holes.
DOORS
• ALL
DOORS
• ALL
DOORS
• ALL
DOORS
• ALL
DOORS
• ALL
DOORS
• ALL
DOORS
Note: On In-Swing Door Standard Installation, sill screws are not needed.