Prepare the door for installation – Pella CLAD HINGED PATIO DOOR (INCLUDES STANDARD User Manual
Page 5
2
PREPARE THE DOOR fOR INSTALLATION
TWO OR MORE PEOPLE WILL BE REQUIRED TO HANDLE THE PANEL AND
FRAME SAFELY.
A. remove plastic wrap and cardboard packaging from door. Do not remove plastic shipping
spacers. The shipping spacers will help keep the door square during installation. Do not unlock
or open the door until it is fully fastened.
Designer Series only:
DO NOT cut the strap that goes from the lock holes to the sill of the door.
Note: If grilles or hardware are removed from the door at this time, label them and store
them in a protected area.
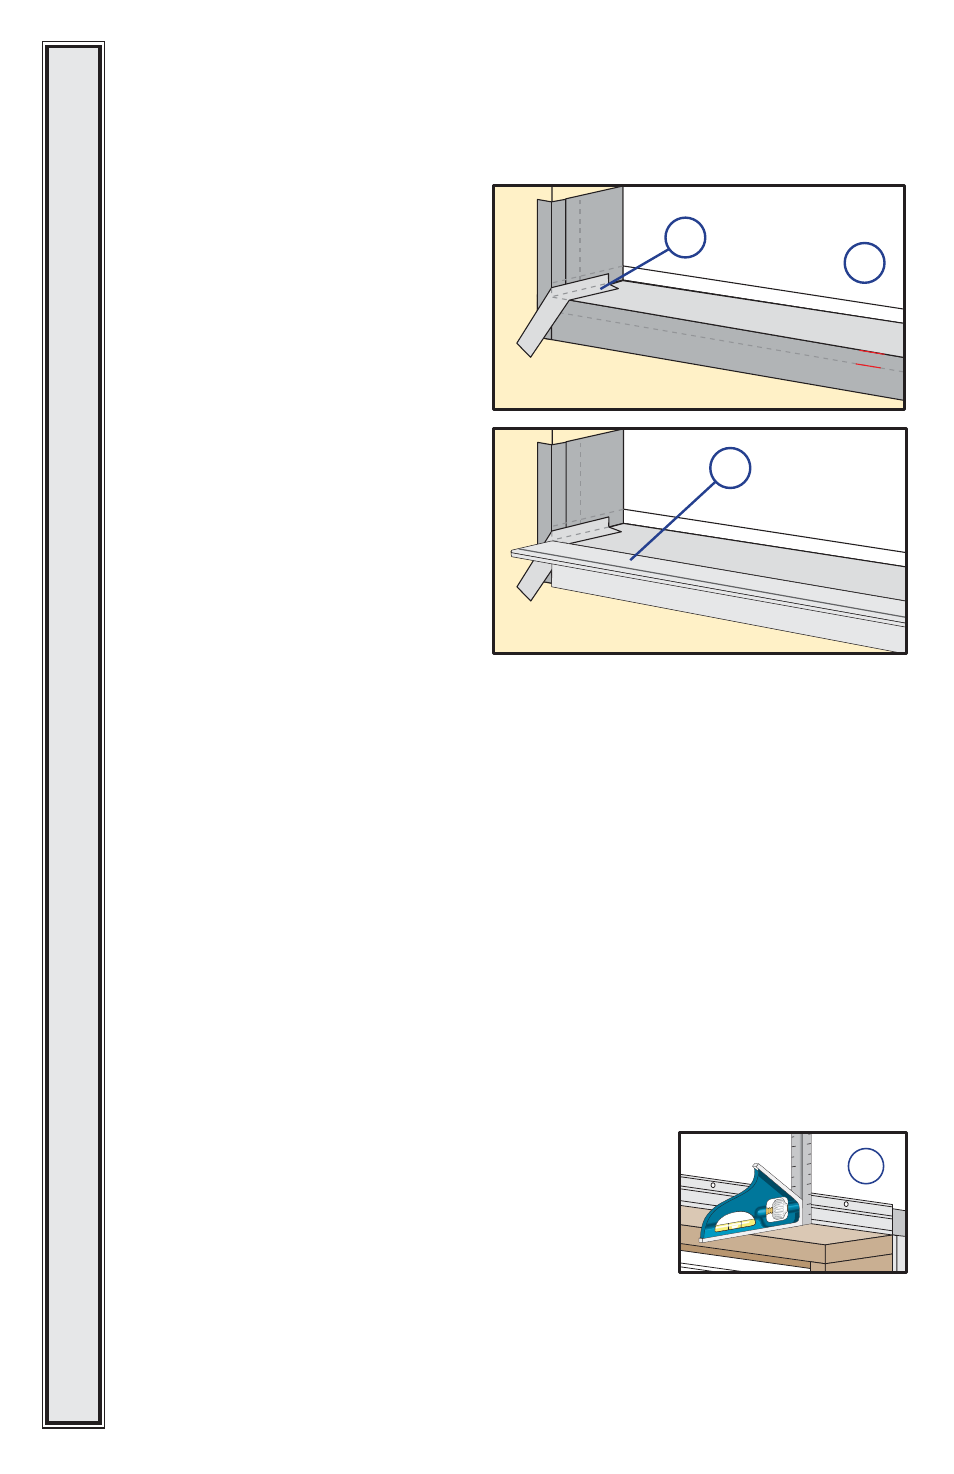
R. cut a piece of flashing tape to the width of the opening. Install to the flanges of the sill pan
and overlap the tape from step 1N by 1”. If needed add a second or third piece of flashing tape
until the sill pan is covered to the interior sill pan lip.
Note: The purpose of this tape is to seal the sill screws when installing the door.
S. cut two pieces of flashing tape 1-1/2”
x 6”
and apply to the bottom corners of
the opening by beginning in the corner of
the sill pan, with 3/4” of the tape applied
to the sill pan and 3/4” of the tape
applied to the side flange. The remainder
of the tape is to be at a 45 degree angle
onto the exterior.
EXTERIOR SILL P
AN LIP
INTERIOR SILL P
AN LIP
1R
1S
1"
EXTERIOR SILL P
AN LIP
INTERIOR SILL P
AN LIP
1T
T. attach the aluminum sill support or
wood blocking
to the exterior of the
box plate to support the edge of the door
sill. Place the sill support flush with the
subfloor.
B. Fold out installation fin to 90°. Be careful not to remove or
tear the fin corners
Note: If the fin corner is not at 90°, the door will not line
up correctly on the interior.
StanDarD FIn appLIcatIon go to Step 3
Applications for Performance Upgrade and
HurricaneShield product requires additional clip
installation or screw installation. Clip installation prep is
included in Step 2C. Screw installation steps are included
in Step 5.
2B
DOORS
• ALL
DOORS
• ALL
DOORS
• ALL
DOORS
• ALL
DOORS
• ALL
DOORS
• ALL
DOORS