Step 1 - mounting the monitor – Planar LX1201PTI User Manual
Page 11
LX0801PTI/ LX1201PTI/ LX1501PTI - IP-65 Touch Monitors User’s Guide (020-0512-01A)
11
Step 1 - Mounting the Monitor
The back and sides of the monitor include mounting points that you can use to
mount the monitor as your installation requires.
Mounting holes on the LX0801PTI, LX1201PTI and LX1501PTI allow the monitor
to be mounted :
Front mounted using corner mounting holes
•
Rear mounted using either VESA or edge mounting holes
•
Side mounted using variegated bosses
•
Mounting monitor to be mounted :
Rear using rear peripheral mounting bosses
•
Side points
•
Side bosses
•
Panel points
•
Use the proper M4 screws for attaching the monitor to the mounting fi xture.
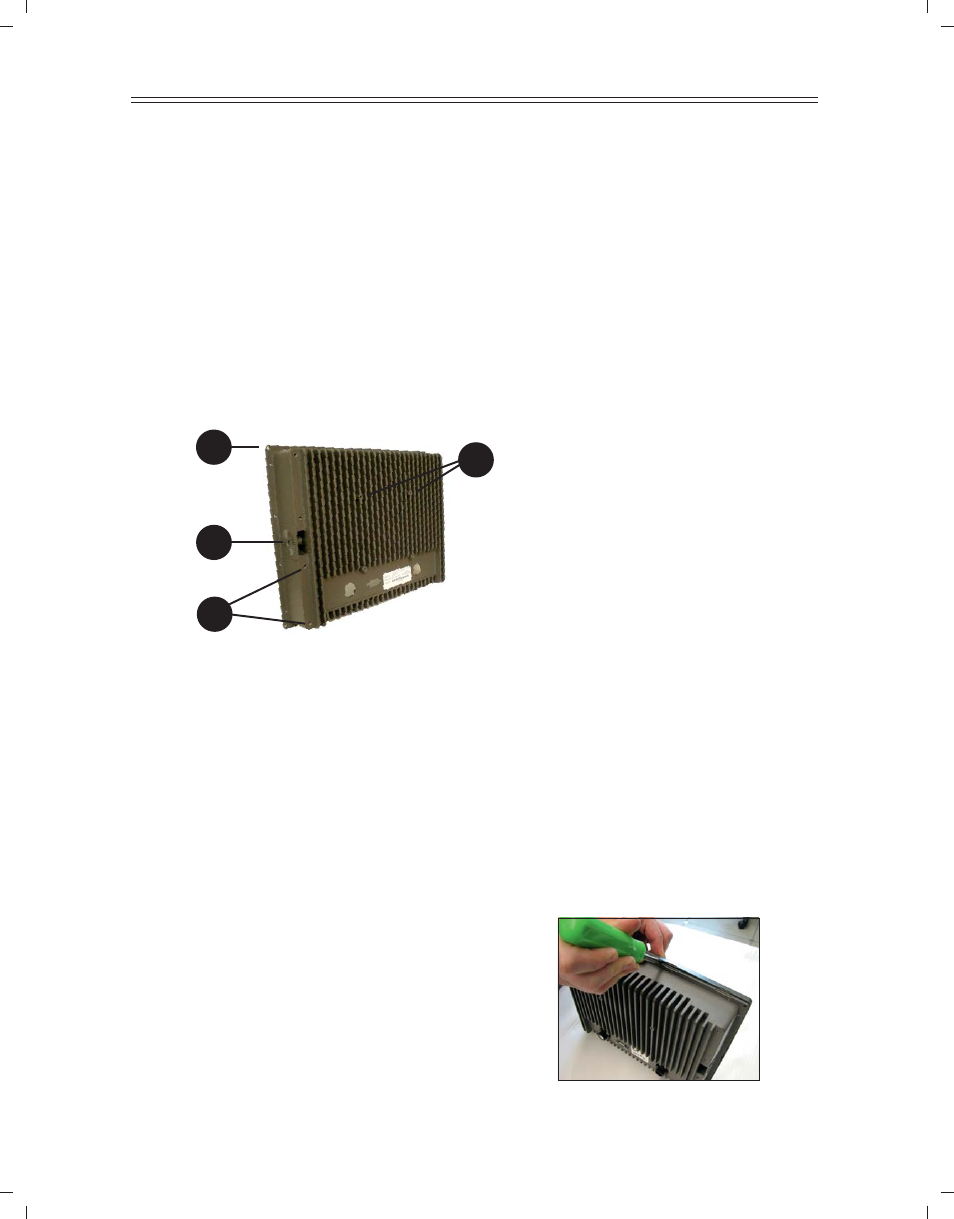
1
2
3
4
Mounting from front:
4 corner mounting non-tapped holes in
1.
fl ange (clearance for M4 fastener).
Mounting from rear:
100mm VESA (4 hole pattern). Accepts
2.
M4x0.7 up to 8mm depth.
Edge casting holes (8 hole pattern)
3.
Accepts M4x0.7 up to 8mm depth.
Mounting from side:
Variegated mounting bosses Accepts
4.
M8x1.25 up to 8mm depth.
Removing Bezel:
If you are fl ange mounting the monitor, it
•
will be necessary to remove the decorative
bezel from the enclosure. As shown, insert a
narrow straight blade screw driver between
the bezel and enclosure near one of the
friction points. Pry upwards gently.