Quickdraw, Steam heater – PVI Industries PV500-25 User Manual
Page 11
QUICKDRAW
Steam Heater
11
PV500-25 06/12
7.4 Tank
Scale will normally form in the tank during operation and will accumulate on the bottom of the tank. The natural
chemicals in the water forms scale which precipitate out during the heating cycles. Some water supplies contain
more of these chemicals than others do, and the scale buildup will occur more rapidly. Other factors affecting the
scale buildup are the amount of hot water used and the temperature of the water. The more hot water used the
more fresh water containing the scale-forming chemicals enter into the tank. As the temperature of the water
increases, the rate of scale deposited also increases. The frequency of inspections will be determined by the rate of
scale buildup. Until the appropriate inspection and cleaning frequency is established, initially inspect the tank every
six months or more frequently if higher scaling conditions are present.
Flush the tank at two or three-month intervals depending on water conditions in your location to help prevent the
accumulation of scale. To flush: turn off electrical disconnect switch to prevent the unit from operating. Open the
drain valve and allow water to flow through the tank until it runs clear. Close the drain valve and turn the electrical
switch back on.
NOTICE:
Since PVI cannot control the use of the water heater, water conditions, or maintenance, the warranty on
the water heater does not cover poor performance, structural failure, or leaking due to an excessive accumulation
of scale.
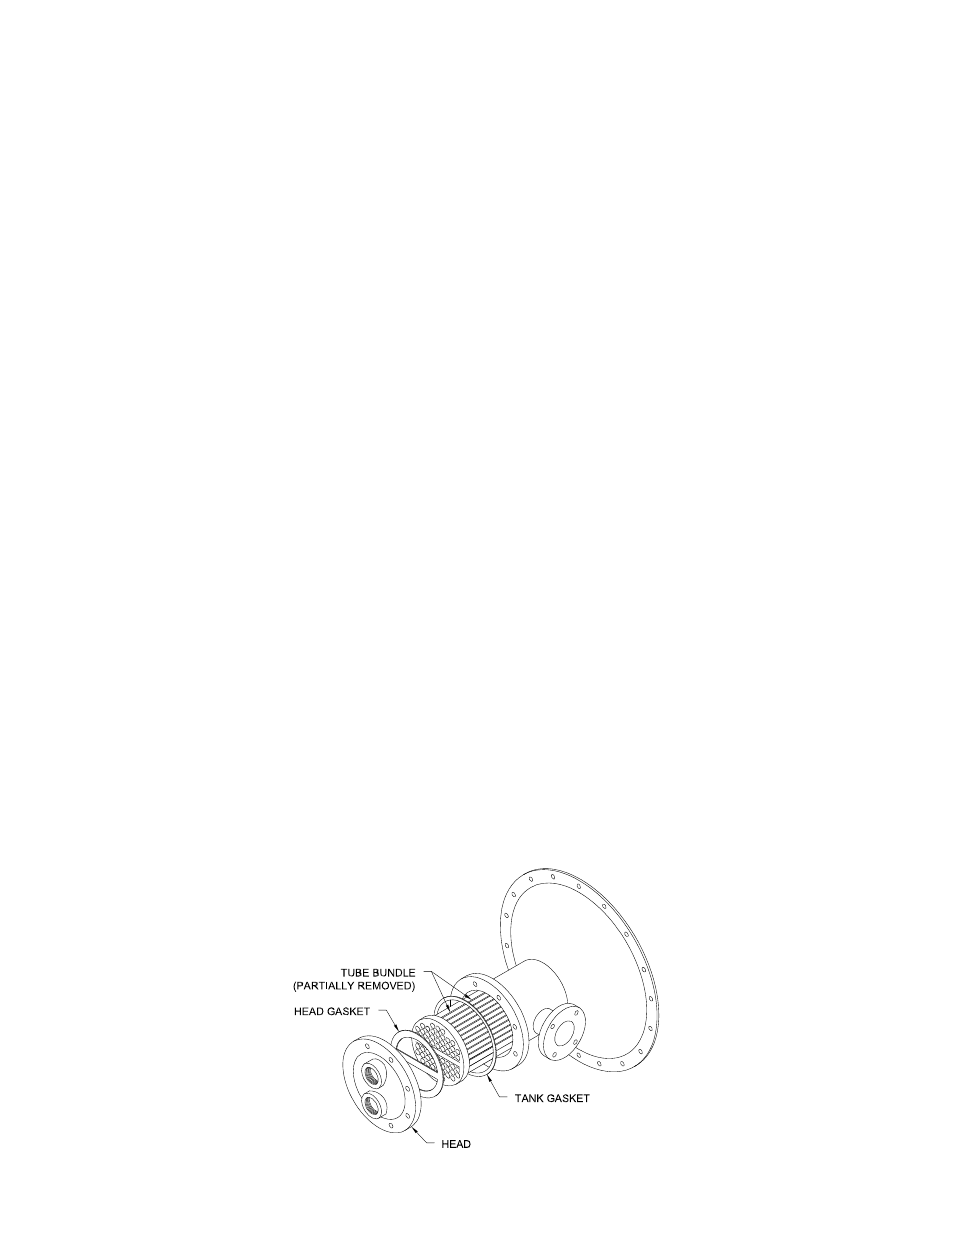
7.5
Cleaning the Heat Exchanger (refer to figure on page 11)
1. Do not open until all pressure is removed, the unit is drained and the equipment surfaces cooled to ambient
temperature.
2. Heat exchangers subject to fouling or scaling should be cleaned periodically. A light sludge or scale coating on
the tube greatly reduces its effectiveness. A marked increase in pressure drop and/or reduction in performance
usually indicate cleaning is necessary.
3. Tube bundle removal:
a. When practical, leave tube bundle attached to collar assembly and remove by unbolting collar assembly
from tank.
b. During bundle removal, the dead weight of the bundle should never be supported on individual tubes or
contact any lined interior tank surface. Following removal, rest the bundle on the tube sheet, support plates,
or wood blocks cut to fit periphery of the bundle.
c. Tube bundles may be raised using slings formed by bending light sheet metal into a “U” form and attaching
lifting lugs to the ends of the sheets. Baffles can be easily bent and damaged if dragged over rough
surfaces.
d. Before reinserting the tube bundle into the unit, place the ring/tank gasket over the end of the tube bundle
and bring forward to the backside of the tube sheet.
CAUTION: When cleaning a tube bundle, tubes should not be hammered on with any metallic tool and, in case it is
necessary to use scrapers, care should be exercised that the scraper is not sharp enough to cut the metal of the
tubes.