Advanced timer recording, Ard 01, No. name – Panasonic DMR-EX78 User Manual
Page 24: Press [g-code, Press the numbered buttons to enter the g, Number, Press [ok, Press [prog/check, Using g, Manually programming timer recordings
24
RQT9088
Advanced timer recording
[HDD] [RAM] [-R] [-RW‹V›] [+R] [+RW]
≥You can enter up to 32 programmes up to a month in advance.
(Each daily or weekly programme is counted as one programme.)
[RAM] [-RW‹V›] [+R] [+RW]
≥To use a new disc, formatting is necessary.
Preparation
≥Turn on the television and select the appropriate AV input to suit
the connections to this unit.
≥If recording to DVD, insert a disc that you can use for recording
(
➡ 14).
≥Make sure that the clock settings are correct (
➡ 65).
Entering G-
CODE
numbers is an easy way of timer recording. You can
find these numbers in TV listings in newspapers and magazines.
1
Press [G-Code].
2
Press the numbered buttons to enter
the G-
CODE
number.
Press [
2] to move back to correct a digit.
3
Press [OK].
≥Confirm the programme (start and end time) by using a TV
magazine, etc. and make corrections if necessary using
[
3, 4, 2, 1] (
➡ right, step 3).
≥When “-- ---” appears in the “Name” column, you cannot set
timer recording. Press [
3, 4] to select desired programme
position. After you have entered the information of a TV
station, it is kept in the unit’s memory.
4
Press [OK].
The timer programme is stored and the timer icon is
displayed.
“
F” lights on the unit’s display to indicate timer recording
standby has been activated.
Repeat steps 1–4 to programme other recordings.
Press [
DVD] to turn the unit off.
1
Press [PROG/CHECK].
2
Press [
3, 4] to select “New Timer
Programme” and press [OK].
3
Press [
1] to move through the items
and change the items with [
3, 4].
≥When “Name” is selected, you can press the “Blue” button to
change the group [e.g., TV, Radio, Edit Favourites screen
(
➡ 59)] and then press [3, 4] to select the channel you
want to record.
≥Press and hold [3, 4] to alter the Start (Start time) and
Stop (Finish time) in 30-minute increments.
≥You can also set Name (Programme position/TV Station
Name), Date, Start (Start time), and Stop (Finish time) with
the numbered buttons.
≥Date
Titles recorded using the same daily or weekly timer are
bundled and displayed as a “group” in the Direct Navigator
screen (
➡ 29) except when using Auto Renewal Recording.
≥You can also press [DRIVE SELECT] to select the recording
drive.
When the recording drive is “DVD” and there is not enough
remaining space, recording automatically switches to the
“HDD” (
➡ 26, Relief Recording).
≥You can also press [REC MODE] to change the recording
mode.
≥[HDD] RENEW (Auto Renewal Recording) (
➡ 26)
ON
!)OFF
≥Programme Name
Press [
2, 1] to select “Programme Name” and press [OK].
(
➡ 44, Entering text)
4
Press [OK].
The timer programme is stored and the timer icon is
displayed.
“
F” lights on the unit’s display to indicate timer recording
standby has been activated.
Repeat steps 2–4 to programme other recordings.
Press [
DVD] to turn the unit off.
Using G-
CODE
system to make timer
recordings (Analogue broadcast only)
G-
CODE
is a registered trademark of
Gemstar Development Corporation. The
G-
CODE
system is manufactured under
license from Gemstar Development
Corporation.
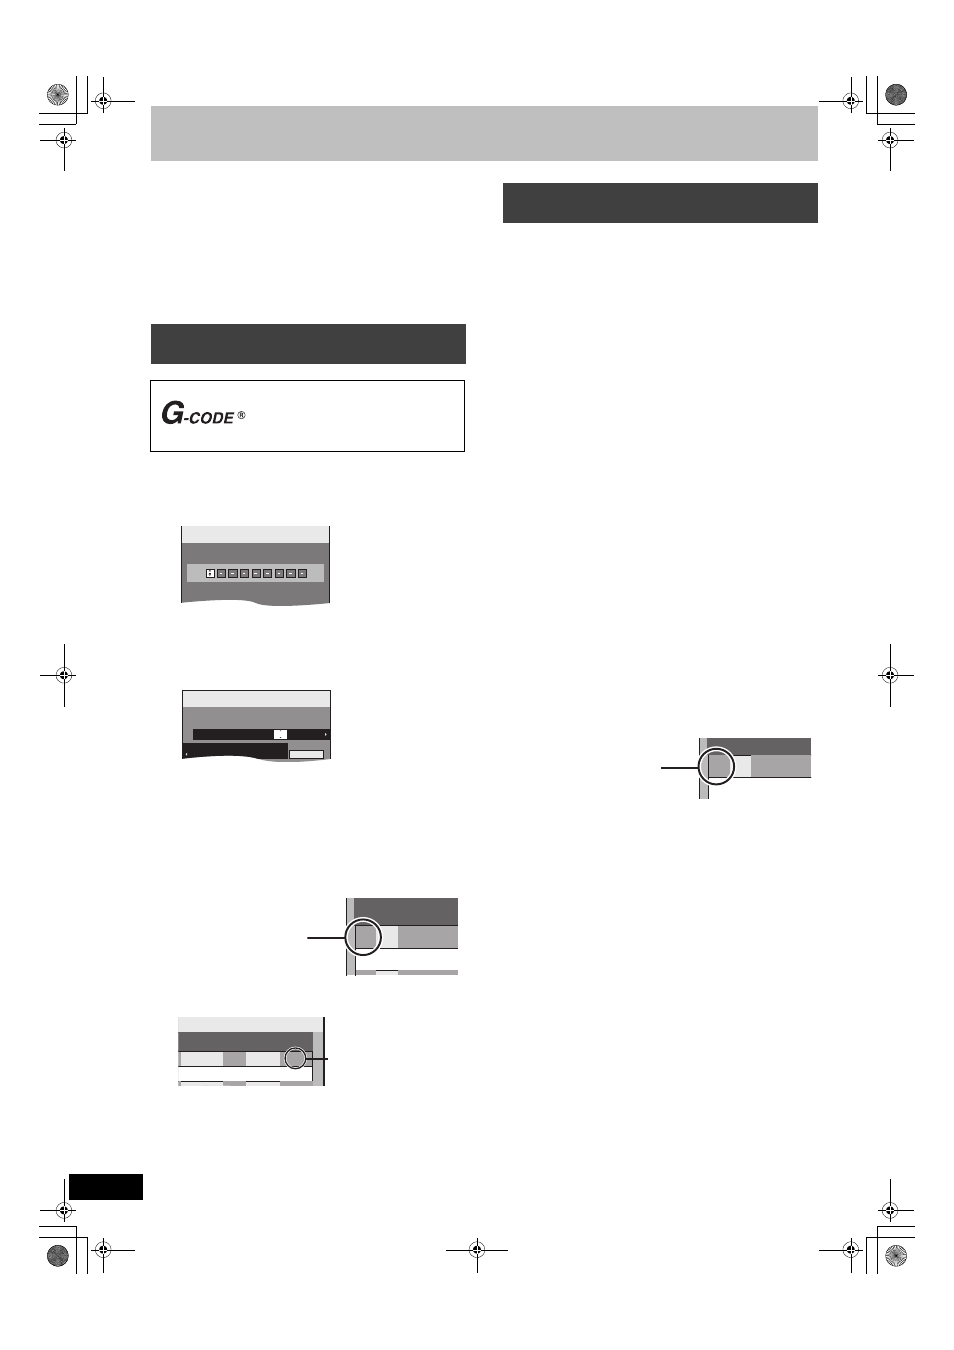
G-Code
Record
1:58 SP
DVD
30:24 SP
HDD
Remain
TUE 14.10.08. 12:53:00
Input G-Code Number 0-9, and press OK.
Timer
Recording
1:58 SP
DVD
30:24 SP
HDD
Remain
TUE 14.10.08. 12:54:00
Mode
Stop
Start
Name
Date
HDD
DVD
22:30
22:00
15. 10. WED
2A ARD
SP
Programme Name
All Services : ARD
HDD
No. Name
ARD
01
&
Timer icon
TUE 14.10.08. 12:56:00
Mode
Stop
HDD
DVD
HDD
Drive
space
SP
OK
20:00
Programme
Check to make sure “OK”
is displayed (
➡ 25).
Manually programming timer
recordings
[.
l
l
l
l
a.
Date:
Current date up to one month later minus
one day
;:
Daily timer:
SUN-SAT
>MON-SAT>MON-FRI
;:
Weekly timer: SUN
>--->SAT
No. Name
ARD
01
&
Timer icon
DMREX78&88GN-RQT9088-L_eng.book 24 ページ 2008年4月1日 火曜日 午後6時38分