3 install the car audio system, Connect wires – Philips CE132 User Manual
Page 9
7
EN
3 Install the car
audio system
Caution
•
Use the controls only as stated in this user manual.
Always follow the instructions in this chapter in
sequence.
These instructions are for a typical installation.
However, if your car has different requirements,
make the adjustment accordingly. If you have
any question regarding installation kits, consult
your local retailer.
Note
•
This system is designed for negative ground (earth) 12V
DC operation only.
•
Always install this system in the car dashboard. Other
locations can be dangerous as the rear of the system
heats up during use.
•
To avoid short-circuit: before you connect, make sure
that the ignition is off.
•
Make sure that you connect the yellow and red power
supply leads after all other leads are connected.
•
Make sure that all loose leads are insulated with
electrical tape.
•
Make sure that the leads do not get caught under
screws iron parts that will move (e.g. seat rail).
•
Make sure that all ground (earth) leads are run to a
common ground (earth) point.
•
Use only the supplied mounting hardware for a safe
and secure installation.
•
Improper fuses can cause damage or fire. When you
need to change the fuse, consult a professional.
•
When you connect other devices to this system, make
sure that the rating of the car circuit is higher than the
total fuse value of all the connected devices.
•
Never connect speaker wires to the metal body or
chassis of the car.
•
Never connect speaker wires with stripes to one
another.
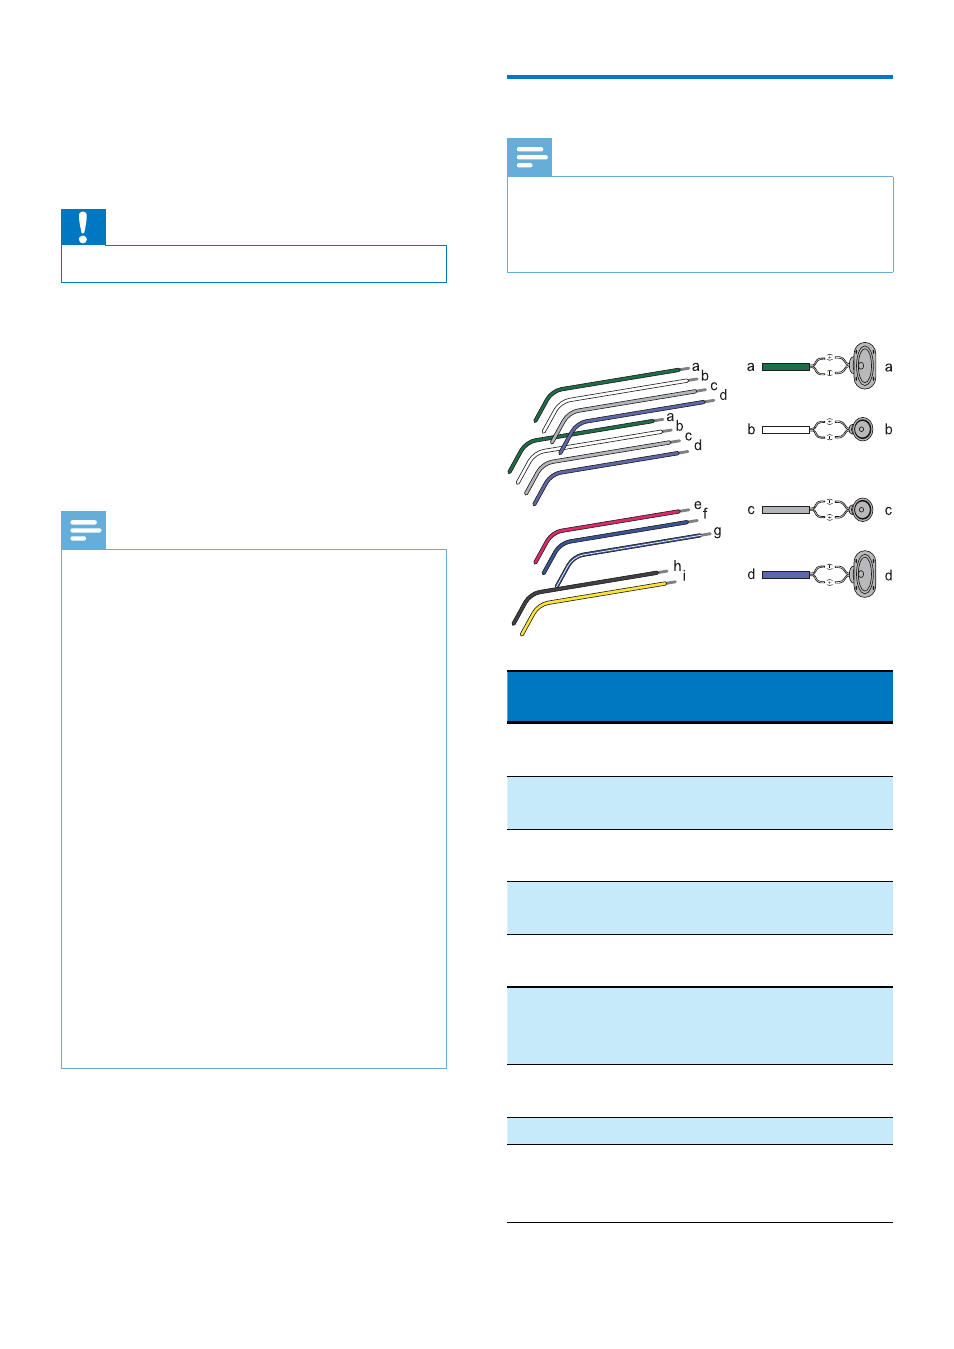
Connect wires
Note
•
The ISO male connectors are not supplied.
•
Make sure that all loose leads are insulated with
electrical tape.
•
Consult a professional to connect wires as instructed below.
1
Check the car's wiring carefully and connect
them to the the ISO male connectors.
ISO male
connectors
Connect to
a
Green strip, black-
edged green strip
Rear left speaker
b
White strip, black-
edged white strip
Front left speaker
c
Gray strip, black-
edged gray strip
Front right speaker
d
Purple strip, black-
edged purple strip
Rear right speaker
e
Red strip
Ignition key +12V
DC when ON/ACC
f
Blue strip
Motor/electric
antenna relay control
lead
g
White-edged blue
strip
Amplifier relay
control lead
h
Black strip
Ground
i
Yellow strip
To the +12V car
battery which is
energized at all times