Door replacement in siding without nail fin – Pella 81DU0100 User Manual
Page 10
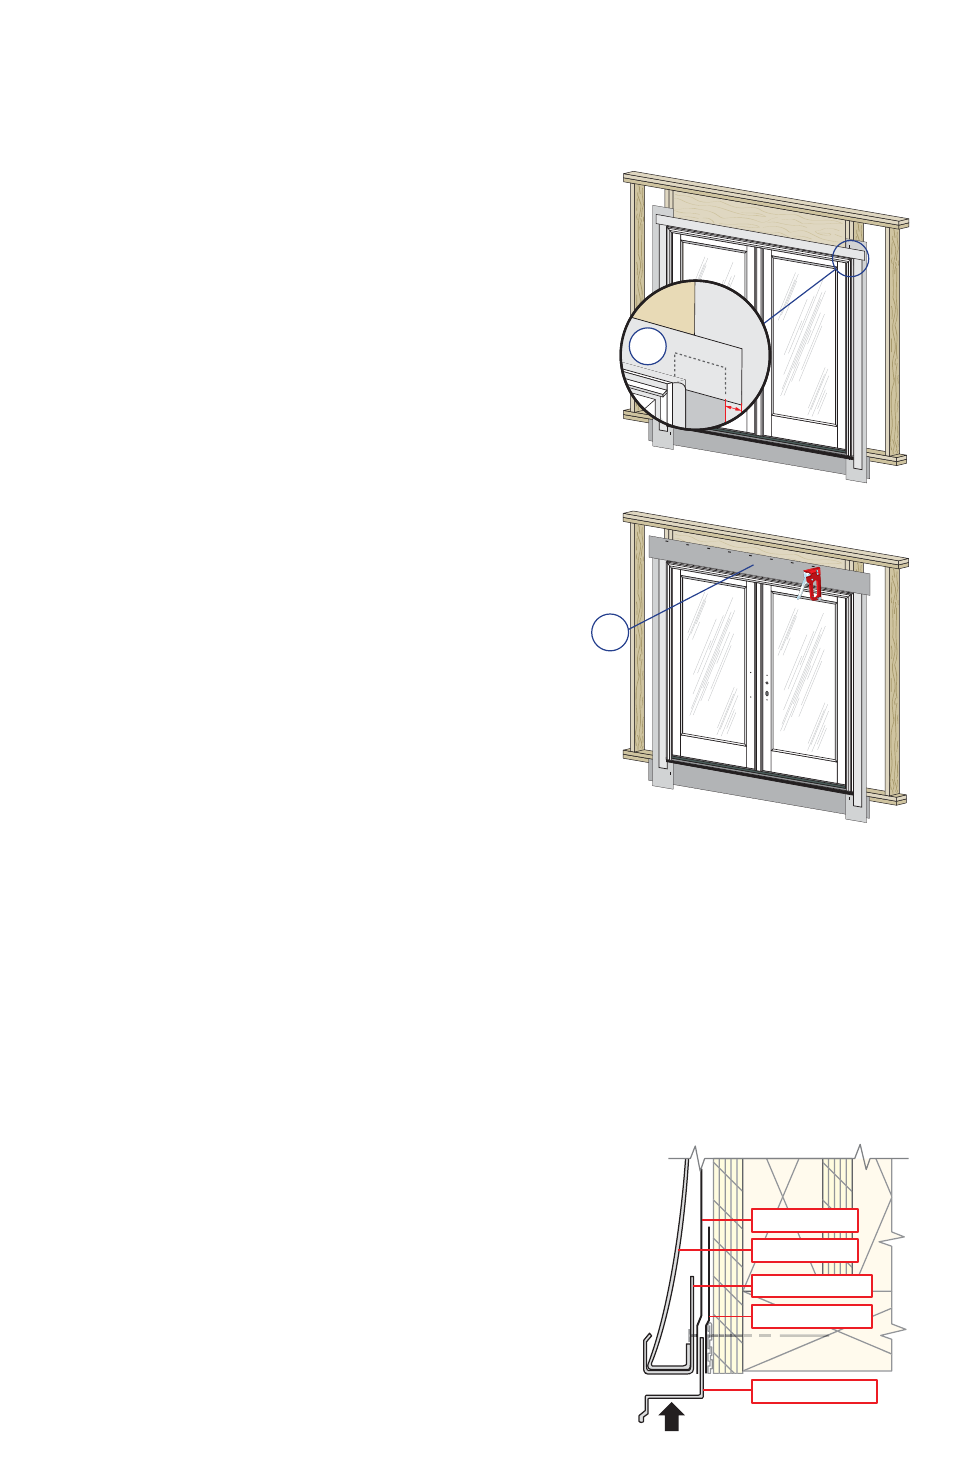
B. Apply top flashing tape. Cut a piece of flashing
tape long enough to go across the top of the door
DQGH[WHQGDWOHDVWSDVWWKHVLGHŶDVKLQJWDSH
RQERWKVLGHV$SSO\WKHWDSHRQWRWKHIUDPH
cladding, over the top nailing fin as shown. Fold
the overlapping tape down, and press all tape
down firmly.
Note: The top flashing tape must overlap the side
flashing tape to prevent water from getting behind it.
C. Apply the top flashing paper. Cut one piece of
ŶDVKLQJSDSHUDWOHDVWORQJHUWKDQWKHZLGWKRI
the rough opening. Position the bottom edge of the
flashing paper flush with the frame of the door and
center the flashing paper with the door. Staple the
flashing paper to the header.
Note: When applying the first layer of building felt,
ensure the sill flashing paper overlaps the building
felt. This will tie the door system into the building
water management system.
As required by local code (such as Florida product approval system), additional anchors
may be required. Install them at this time.
5
DOOR REPLACEMENT IN SIDING
WITHOUT NAIL FIN:
&YUFSJPS
Î
4B
Î
4C
4
INTEGRATING THE DOOR TO THE
WATER RESISTIVE BARRIER (continued):
Head Flashing Instruction and Rough Opening Preparation
A. Prepare the head flashing by cutting it the same width
as the j-channel/siding opening.
B. Pry the top (head) j-channel/siding away from the
sheathing
enough so the head flashing can be slid
under the house wrap.
C. Insert the head flashing behind the j-channel/
siding
and behind the house wrap (if present).
HEAD FLASHING
HOUSE WRAP
SIDING
FLASHING TAPE
J-CHANNEL
Note: Pella Recommends and some codes require the use of a head drip flashing. If there
is a functioning, existing flashing, proceed to step 5D.