Skid shoes, End plates, Skid shoes end plates – Land Pride Rear Blades RBT4096 User Manual
Page 18: Table of contents end plates
16
Section 3: Set-Up of Accessories
RBT4084, RBT4096 & RBT40108 Rear Blades 301-206M
6/12/13
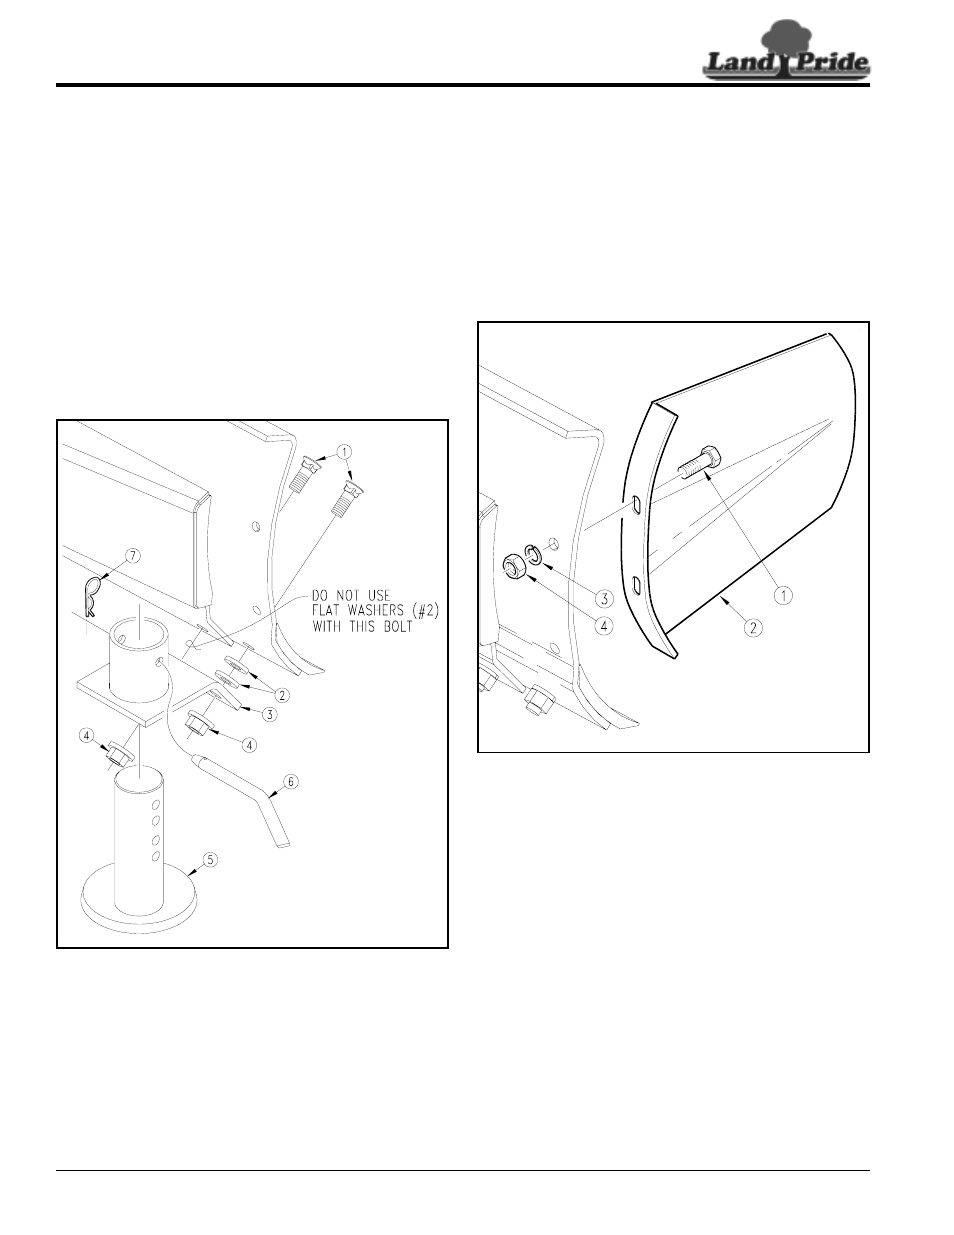
End Plates
Kit Bundle (Pair of End Plates)
301-010A . . . . . . . . . . . . . . . . . . . . . . . . . END PLATES
Refer to Figure 3-4:
1.
Attach right-hand side plate (#1) to the moldboard as
shown with two 1/2"-13 x 1 1/2" GR5 hex head cap
screws (#2), spring lock washer (#3) & hex nuts (#4).
Tighten hardware to the correct torque.
2.
Repeat step 1 for the left-hand side plate.
Side Plate Assembly
Figure 3-4
17688
Skid Shoes
Kit Bundle (Pair of skid shoes)
301-333A. . . . . . . . . . . . . . . . .SKID SHOE ASSEMBLY
Refer to Figure 3-3:
1.
Remove two 5/8"-11 x 1 3/4" GR5 plow bolts (#1)
from the end of the blade. Keep hardware for
installation of skid shoes.
2.
Attach skid shoe bracket (#3) with 5/8"-11 x 1 3/4"
GR5 plow bolts (#1), flat washers (#2), and hex
flange lock nuts (#4). Tighten hardware to the correct
torque.
3.
Insert skid shoe (#5) into skid shoe bracket (#3).
Secure with bent pin (#6) and hairpin cotter (#7).
4.
Repeat steps 1 through 3 for the other side.
Skid Shoe Assembly
Figure 3-3
25535