Creating corridor map borders – Lowrance electronic 6 User Manual
Page 56
50
Creating Corridor Map Borders
A corridor map lets you twist and turn your borders to enclose irregu-
larly shaped geographic features. Here's how: (Refer as needed to the
"Toolbars" section, beginning on page 35.)
1. Center the Master Map display on the area you want to include in
your map. Click the
C
ENTER
M
AP
cross-hair button
, and then
click the cross-hair mouse pointer on the area you want centered.
2. If needed, click the
Z
OOM
I
N
or
Z
OOM
O
UT
buttons
so you can see the entire area that you want to draw a map border
around.
3. Click the
D
RAW
C
ORRIDOR
M
AP
B
ORDERS
button
, and
your mouse pointer becomes a pencil.
4. Move the mouse pointer to where you want your corridor map to be-
gin.
5. Click and release the left mouse button to set the first anchor point.
(The anchor point is represented by a handle box, which can also be
grabbed later to relocate the border if you wish.)
6. As you move your mouse, you'll see a magenta border box appear.
Move the mouse pointer in a straight line along your corridor's path
until you need to change direction to follow the terrain. Click to set a
second anchor point.
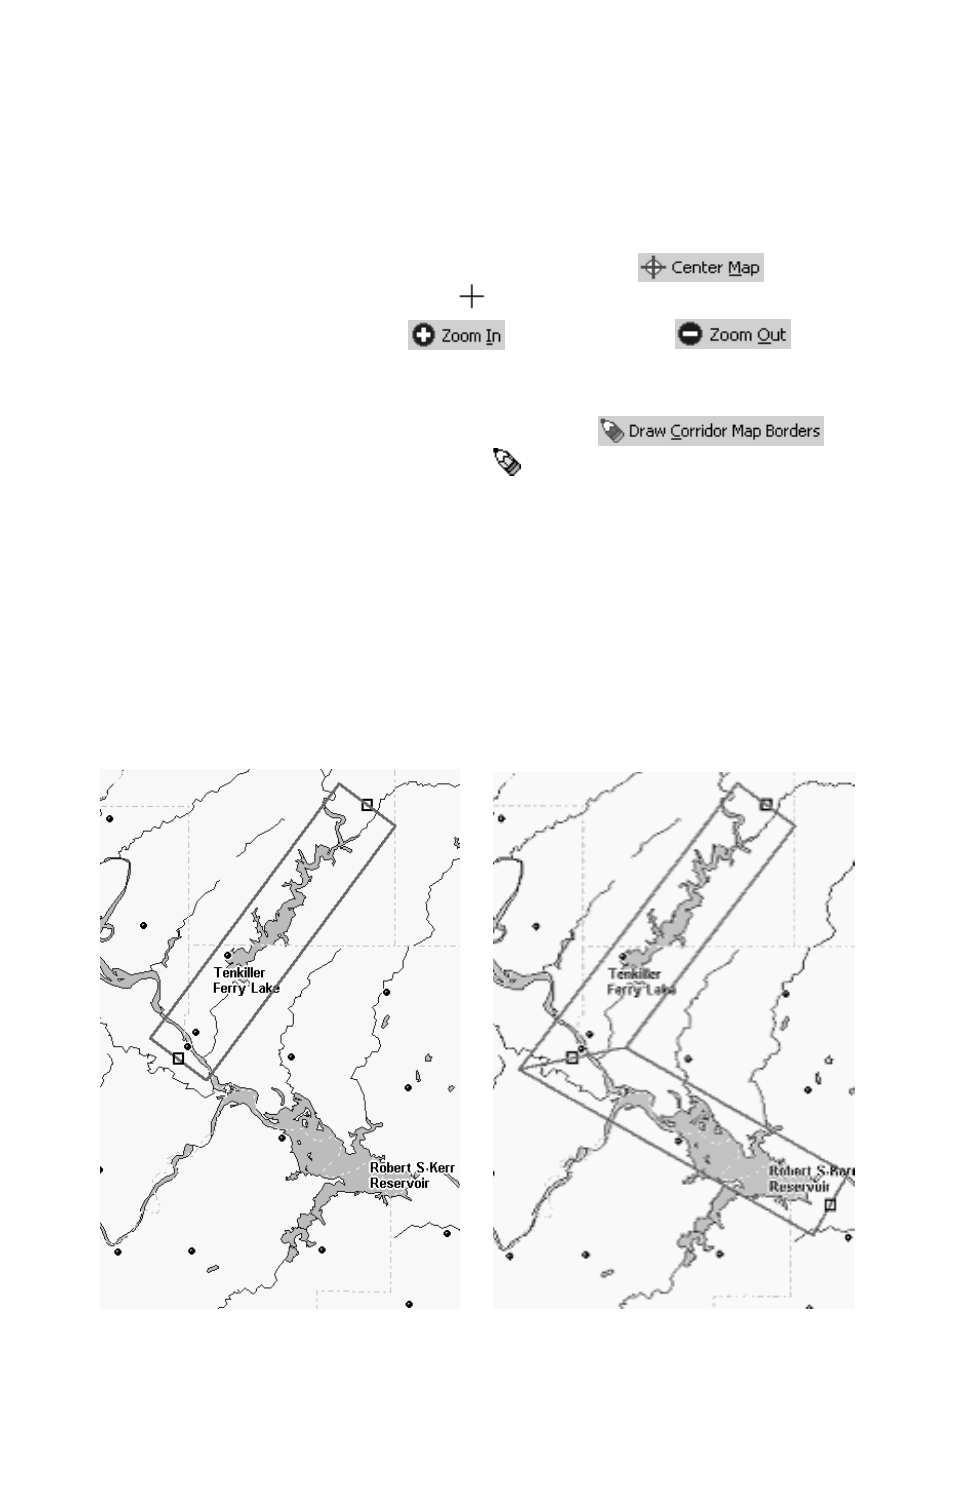
Corridor with first and second anchor points set, left.
Add a second segment to the corridor with a third point, right.
Point 1
Point 2
Point 3