Creating rectangle map borders – Lowrance electronic 6 User Manual
Page 53
47
NOTE:
You can always use the Zoom-In or Zoom-Out buttons, no matter
what other commands may be activated.
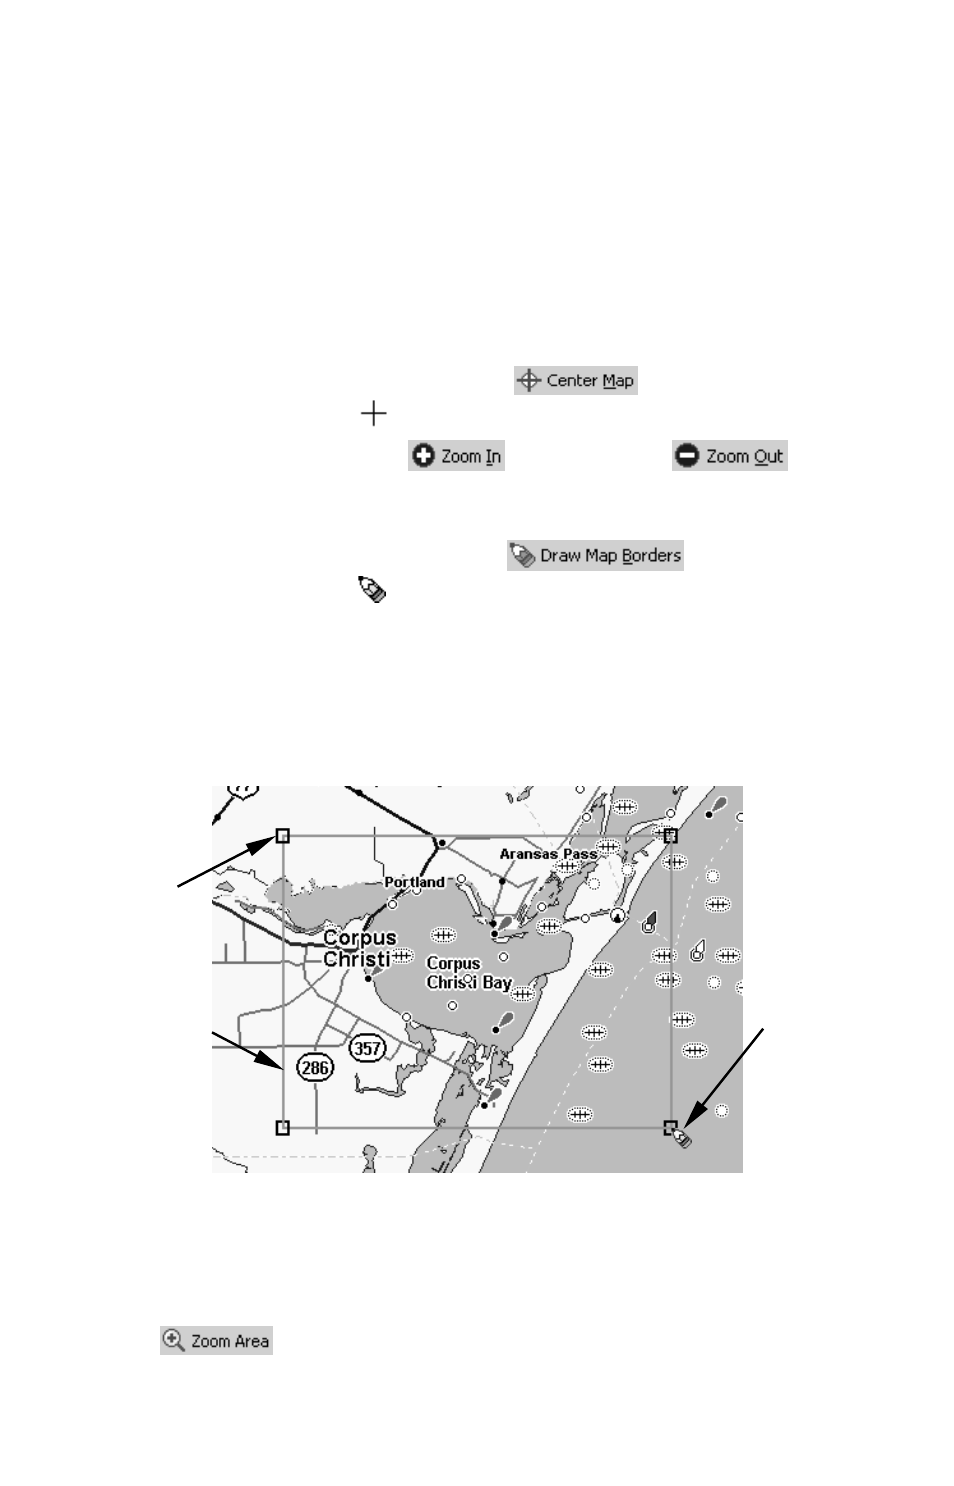
Creating Rectangle Map Borders
Making a Map Border is the first step in creating a map for your
Lowrance or Eagle GPS unit. Here's how: (Refer as needed to the Tool-
bar section on page 35.)
1. Center the Master Map display on the area you want to include in
your map. Click the
C
ENTER
M
AP
button
, and then click the
cross-hair mouse pointer
on the area you want centered.
2. If needed, click the
Z
OOM
I
N
or
Z
OOM
O
UT
buttons
so you can see the entire area that you want to draw a map border
around.
3. Click the
D
RAW
M
AP
B
ORDERS
button
, and your mouse
pointer becomes a pencil.
4. Move the mouse pointer above and to the left of the desired area.
5. Click and hold down the mouse button. While holding down the but-
ton, drag the pointer diagonally, down and to the right. A green border
box appears. The size of the border box changes as you move your
mouse.
Click and drag to draw a Map Border around Corpus Christi Bay area.
6. When the green border surrounds the desired area, release the
mouse button.
7. To stop the command, click the
C
ENTER
M
AP
button or the
Z
OOM
A
REA
button.
Map Border
shown in
green on
screen.
Handle Box
Mouse Pointer