Nstallation, Attaching the kitchen cabinet doors – Liebherr HC1050 User Manual
Page 23
A delight in freshness
HC 1001 / HC 1050
18
I
NSTALLATION
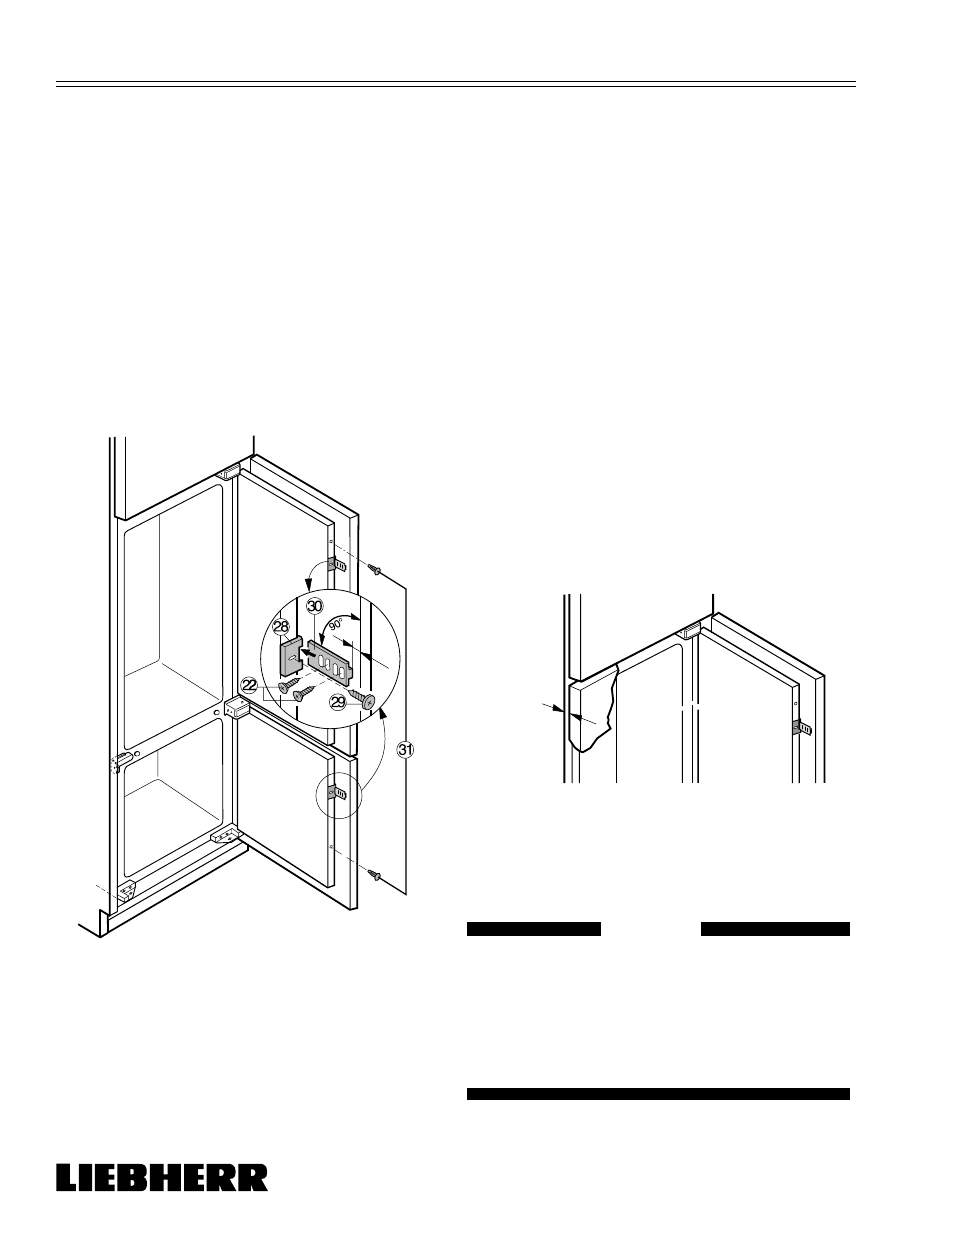
2. Open the kitchen cabinet door completely.
a) Slide one connecting rail
(Fig. 25, 30) into
each connecting element
(Fig. 25, 28).
b) Attach the connecting rails
(Fig. 25, 30)
to the kitchen cabinet doors using the
screws
(Fig. 25, 22) provided.
i) Make sure the front edge of each
connecting rail is recessed (dimension
“D” in Figure 25) from the edge of the
kitchen cabinet door.
D = thickness of kitchen cabinet
wall + 1/8 in. (3 mm)
ii) Make sure the connecting rails
(Fig. 25, 30) are parallel to the bottom
edge of the kitchen cabinet doors.
3. Adjust the connecting elements
(Fig. 25, 28)
so there is a 1/32 in. (1 mm) gap
(Figure 26)
between the door of the kitchen cabinet and the
handle side of the kitchen cabinet wall when the
door is closed.
MIN 1/32"
(1 mm)
KIKB016
Figure 26
4. Use an awl to open the remaining holes on the
front edge of each appliance door. Insert plugs
(Fig. 25, 31) into each hole.
CAUTION
To protect the appliance from possible
damage, allow the appliance to stand
30 minutes to 1 hour in place before
turning the electricity on. This allows the
refrigerant and system lubrication to reach
equilibrium.
Attaching the Kitchen
Cabinet Doors
- Figures 25, 26
1. Attach at least one connecting element
(Fig. 25, 28) to each appliance door using the
screws
(Fig. 25, 29) provided. Some large doors
may need two connecting elements
(Fig. 25, 28)
and connecting rails
(Fig. 25, 30).
a) Use the pre-drilled hole(s) in each appliance
door to attach the connecting element(s)
(Fig. 25, 28) to the door of the appliance.
b) Make sure the connecting elements
(Fig. 25, 28) and connecting rails
(Fig. 25, 30) do not interfere with the kitchen
cabinet door handles.
D
Figure 25