Figure 6, Figure 7 step 7 – Life Fitness 841101 User Manual
Page 7
7
0
1
2
3
4
5
6
1/2
1/2
1/2
1/2
1/2
1/2
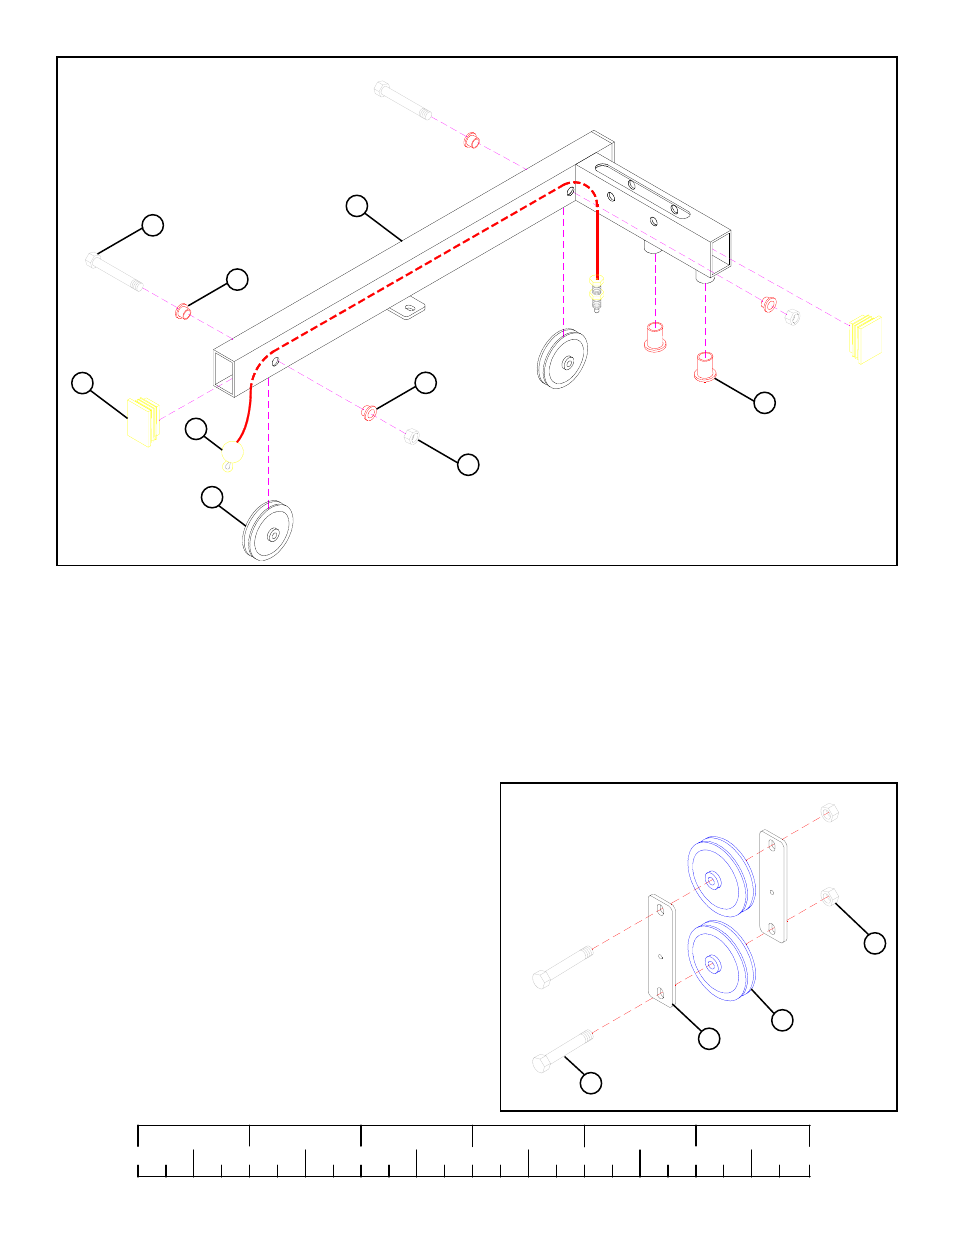
• SECURELY assemble two 3-1/2” PULLEYS (12) to the TOP BOOM (2) using two 3/8 X 2-3/4” BOLTS (25), four 3/8”
FLANGE SPACERS (33), and two 3/8” LOCK NUTS (32). See FIGURE 6. (NOTE: BEFORE TIGHTENING, MAKE SURE
CABLE (15) IS IN THE GROOVES OF THE PULLEYS.)
STEP 6:
• Insert two 2 X 3” END CAPS (34) into the TOP BOOM (2) as shown in FIGURE 6.
• Route threaded end of the LAT CABLE (15) through the TOP BOOM (2) as shown in FIGURE 6.
FIGURE 6
• Insert two GUIDE ROD BUSHINGS (20) into the BUSHINGS of the TOP BOOM (2) as shown in FIGURE 6.
2
FIGURE 7
STEP 7
• LOOSELY assemble two 3-1/2” PULLEYS (12) to two 1-3/4” X
5-1/4” PLATES (17) using two 3/8 X 2” BOLTS (24) and two 3/8”
LOCK NUTS (32) as shown in FIGURE 7.
24 3/8 X 2”
12
17
34
15
12
32
20
32
33
33
25 3/8 X 2-3/4”
- T3 Treadmill (6 pages)
- F3 Folding Treadmill (12 pages)
- T7 Treadmill (8 pages)
- T3 Treadmill (19 pages)
- T5 Treadmill (1 page)
- Platinum Club Series Treadmill (21 pages)
- Arctic Silver T3.5 Treadmill (9 pages)
- FZTP (17 pages)
- MTSLE (18 pages)
- Sport and Essential Consumer Treadmills (3 pages)
- CTSX30-0102-01 (8 pages)
- Cable Motion 8352100 REV. B (26 pages)
- Cable Motion 39721 (24 pages)
- Pro 2 Series PSPD (11 pages)
- 91Xi (83 pages)
- 91TW (22 pages)
- Utility Bench (8 pages)
- Hammer Strength OHDRacks (6 pages)
- 8216 (7 pages)
- GS5 (11 pages)
- TR-7500 (3 pages)
- Parabody 805 (11 pages)
- HDCR9 (13 pages)
- 18 \ 90 Series (8 pages)
- OHD-MIP (10 pages)
- Pro 2 Series PSFLY (10 pages)
- Hammer Strength OHDMR (15 pages)
- GS6 (1 page)
- UPRIGHT LIFECYCLE 95C (1 page)
- LIFECYCLE R3 (2 pages)
- GS4 (12 pages)
- FZHAD (13 pages)
- FIT 3 (1 page)
- 889 (16 pages)
- MTSRL (21 pages)
- 887 (16 pages)
- GK53-00002-0012 (2 pages)
- C3 (2 pages)
- Pro 2 Series PSSLPSE (22 pages)
- T7i (8 pages)
- Arctic Silver 93XW-0XXX-03 (17 pages)
- 874 (12 pages)
- Classic Series Cross-Trainer CLSXH (8 pages)
- Exercise Bike Inspire Console 97C Lifecycle (42 pages)
- Hammer Strength MTS (6 pages)