Chapter 1: product overview, Leds, Back panel – Linksys WAG325N User Manual
Page 5: Leds back panel, Chapter 1: product overvew, Product overview
Chapter1
Product Overview
Wreless-N ADSL2+ Gateway
Chapter 1:
Product Overvew
Thank you for choosing the Linksys Wireless-N ADSL2+
Gateway. The Gateway lets you access the Internet via a
wireless connection or through one of its four switched
ports. You can also use the Gateway to share resources
such as computers, printers and files. A variety of security
features help to protect your data and your privacy while
online. Security features include WPA2 security, a Stateful
Packet Inspection (SPI) firewall and NAT technology.
Configuring the Gateway is easy using the provided
browser-based utility.
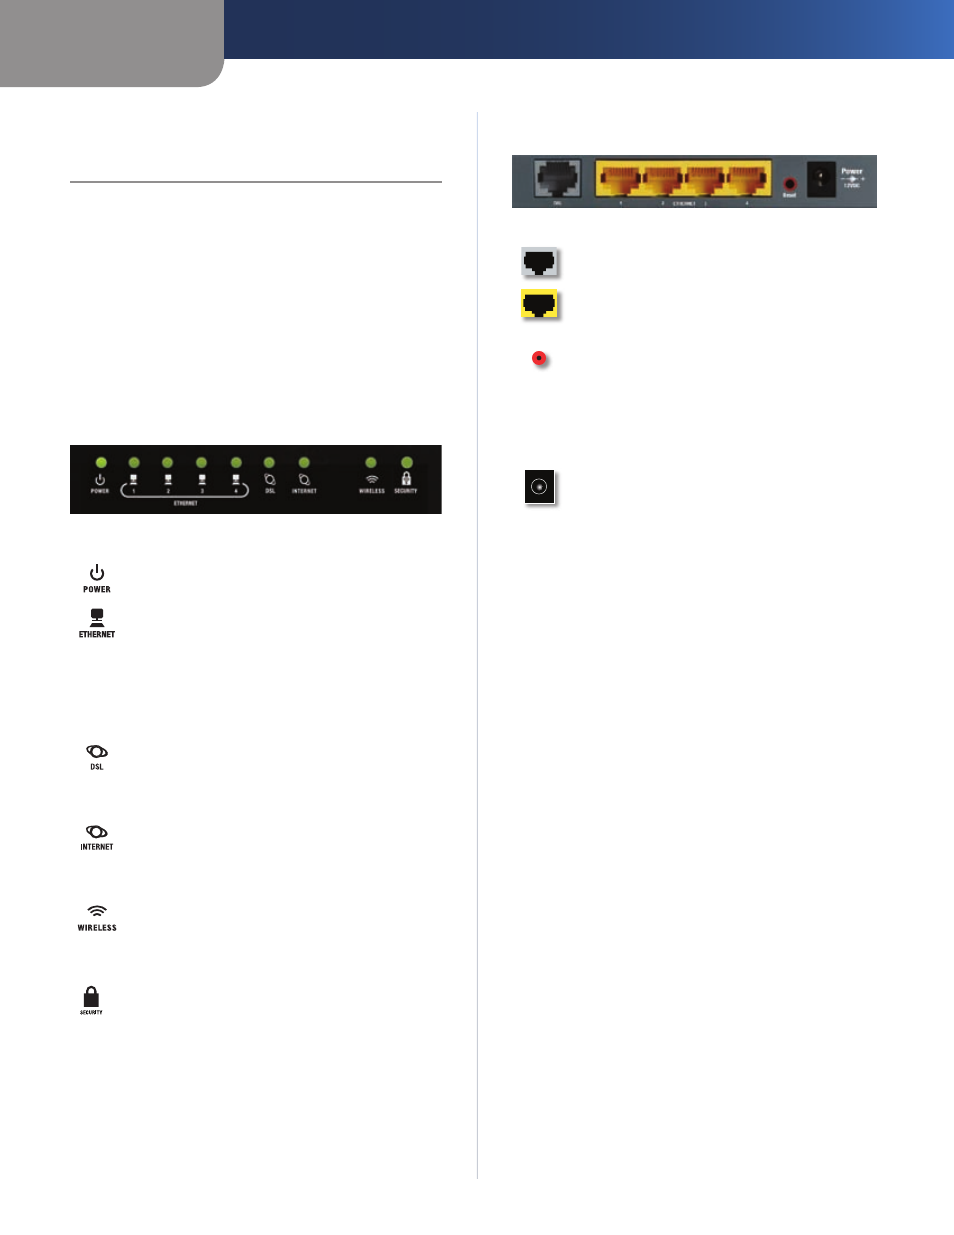
LEDs
Power
(Green) The Power LED lights up and
stays on while the Gateway is powered on.
Ethernet 1-
(Green) These numbered LEDs,
corresponding with the numbered ports on
the Gateway’s back panel, serve two purposes.
If the LED is continuously lit, the Gateway is
successfully connected to a device through that
port. It flashes to indicate network activity over
that port.
DSL
(Green) The DSL LED lights up whenever
there is a successful DSL connection. The LED
flashes while the Gateway is establishing the
ADSL connection.
Internet
(Green) The Internet LED lights up
and stays on when there is a connection made
through the Internet port. It flashes to indicate
network activity over the Internet port.
Wreless
(Green) The Wireless LED lights up
when the wireless feature is enabled. It flashes
when the Gateway is actively sending or
receiving data over the network.
Securty
(Green) The Security LED indicates
when wireless security is enabled.
Back Panel
DSL
The Internet port connects to the ADSL
line.
Ethernet 1, 2, 3,
These Ethernet ports (1, 2,
3, 4) connect the Gateway to wired computers
and other Ethernet network devices.
Reset
There are two ways to reset the Gateway’s
factory defaults. Either press and hold the Reset
button for approximately five seconds, or restore
the defaults from the Administration > Factory
Defaults screen of the Gateway’s web-based
utility.
Power
The Power port is where you will
connect the power adapter.