Maintenance, Oiled bearing circulators, Magnesium anode rod inspection – Lochinvar Shield SNR200-100 User Manual
Page 61: Check delta t
12
Maintenance
(continued)
Oiled bearing circulators
1. The circulator shipped with the Shield water heater is water-
lubricated. No oiling is required.
2. Check other circulators in the system. Oil any circulators
requiring oil, following circulator manufacturer’s
instructions. Over-oiling will damage the circulator.
Installation & Service Manual
TM
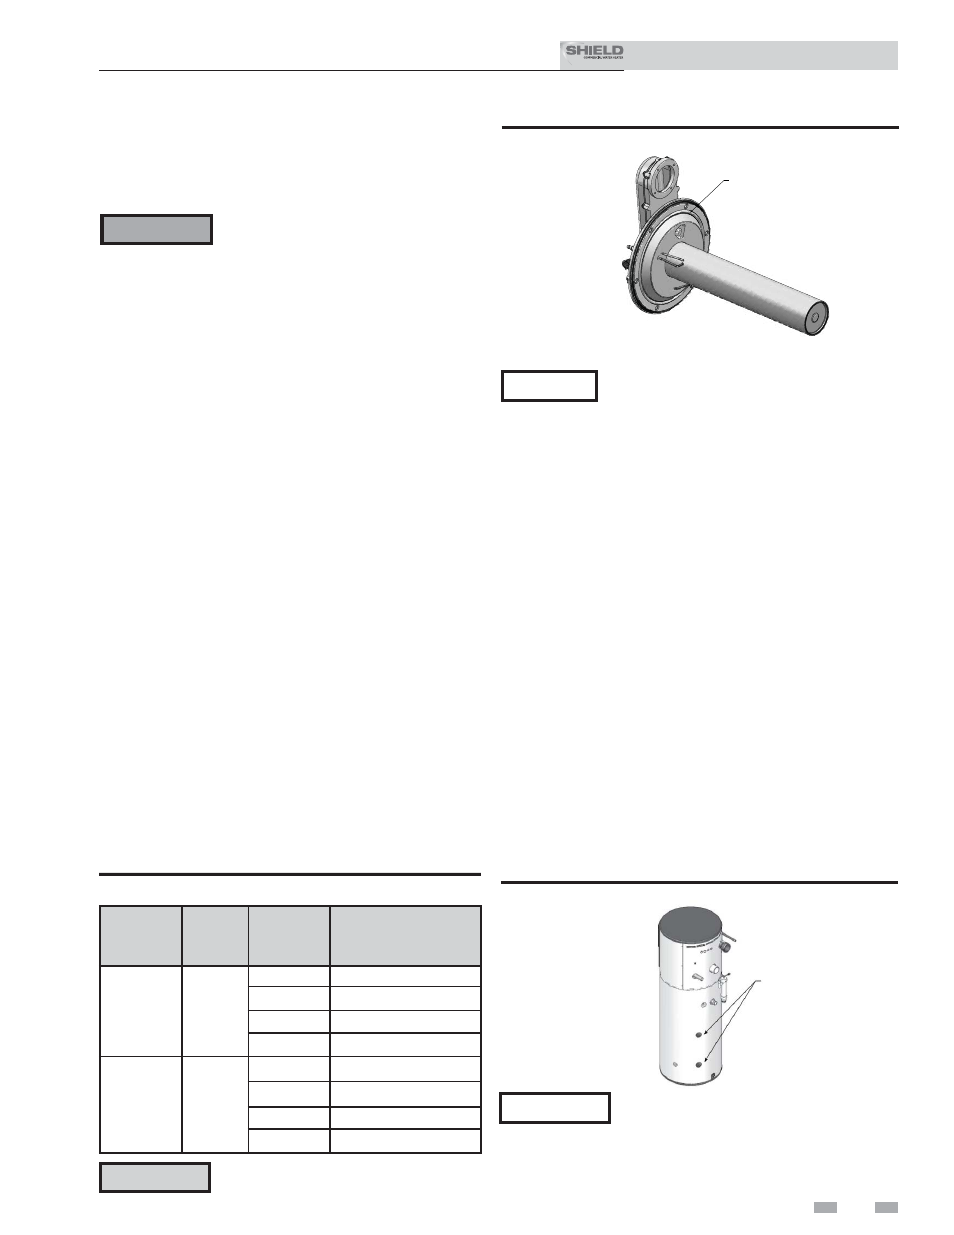
Magnesium anode rod inspection
Glass lined storage tanks have a magnesium anode(s) (FIG. 12-4)
to provide cathodical protection of the lining and minimize
corrosion. Aggressive water conditions in some areas of the
country may accelerate the deterioration of the anode(s). The
anode(s) should be periodically removed and inspected to
determine if replacement is necessary.
The heater must be valved off from the system and fully drained
to remove an anode for inspection. Anodes are supplied in
threaded fittings on the side of the tank. Adequate service
clearance is required to allow removal of an anode. The anode(s)
should be replaced when more than six inches of the core wire is
exposed at either end of the rod.
NOTICE
Anode rods showing excessive decomposition
may indicate electrolysis. An earth ground
should be attached to the vessel to divert
stray current and prevent tank damage.
Check Delta T
1. Ensure Delta T is less than 25°F.
The water heater contains ceramic fiber
materials. Use care when handling these
materials per instructions in this manual.
Failure to comply could result in severe
personal injury.
ƽ WARNING
5. Remove the condensate hose from the heat exchanger
end. Connect a field supplied 3/4" diameter hose to
a drain pan. Using field supplied means, cover the
refractory in the back of the combustion chamber of the
heat exchanger.
6. Use a vacuum cleaner to remove any accumulation on
the water heater heating surfaces. Do not use any solvent.
7. Brush the heat exchanger while dry using a nylon
bristle brush. Caution: DO NOT use a metal brush.
Re-vacuum the heat exchanger.
8. Finish cleaning using a clean cloth dampened with warm
water. Rinse out debris with a low pressure water supply.
9. Allow the heat exchanger to thoroughly dry.
10. Remove the field supplied rear refractory cover from the
back of the combustion chamber of the heat exchanger
and reassemble.
11. Close isolation valves on piping to isolate water heater
from system. Attach a hose to the water heater drain and
flush water heater thoroughly with clean water by using
purging valves to allow water to flow through the water
make-up line to the water heater.
12. Perform start-up and check-out procedures in the Check
Flame and Combustion - Section 10 - Startup on page 48
of this manual.
13. Replace the access cover and restore water heater to
operation.
Table 12B Heat Exchanger Cleaning Kits
Model
Kit
Number
Part
Number
Component
Description
SNR150-100
SNR200-100
SNA285-125
SNA400-125
KIT30063
CTN20005
Rear Refractory Cover
MSC20083*
Nylon 4" Wheel Brush*
MSC20084
3mm Allen Wrench
MSC20086
1/4" x 24" Drill Extension
SNA500-125
KIT30064
CTN20005
Rear Refractory Cover
MSC20083*
Nylon 4" Wheel Brush*
MSC20085
1/4" x 12" Drill Extension
MSC20086
1/4" x 24" Drill Extension
3. Remove the nuts securing the heat exchanger access cover
to the heat exchanger and set aside.
4. Remove the heat exchanger access cover, burner, and
gas/air arm assembly.
* Do NOT use a metal brush. Only use
the kit provided brush or an equivalent
replacement nylon brush.
ƽ CAUTION
NOTICE
Rope gasket is intended for sealing combustion
(FIG. 12-3). If damaged DO NOT reuse, the
heat exchanger door must be replaced. Consult
factory for replacement heat exchanger door
(kit WTR3080).
ROPE GASKET
CAUTION:
IF GASKET IS DAMAGED
DO NOT REUSE, THE HEAT EXCHANGER DOOR
MUST BE REPLACED.
61
Figure 12-3 Rope Gasket - Heat Exchanger Door
ANODE RODS
Figure 12-4 Anode Location