Lt-71: initial set-up, Lt-71: charging – LightSpeed Technologies CAT 860 User Manual
Page 38
74
75
1. Overview
2. Setup & Use
3. Optional
Accessories
2. Setup & Use
3. Optional
Accessories
4. T
roubleshooting
5. W
arranty
, Safety
& Specifications
1. Overview
4. T
roubleshooting
5. W
arranty
, Safety
& Specifications
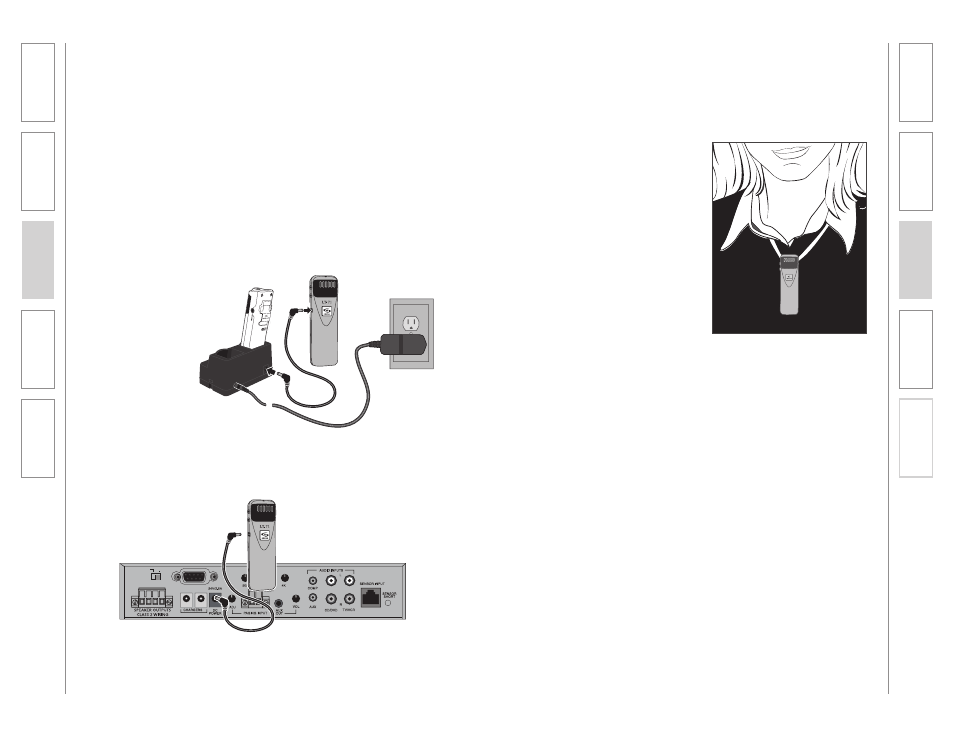
LT-71: Initial Set-up
Once the LT-71 is charged, follow these steps to set it up for use.
1. Turn the CAT 860 power switch to
the ON position. The RED LED on
the switch will glow.
2. Turn on the LT-71 and set the
operating channel to “B”.
3. Slip the LT-71 with lanyard around
the neck and position the top of
the microphone just below the
collarbone. NOTE: Positioning
of the LT-71 is critical for proper
volume adjustment.
4. While speaking in a normal voice
slowly increase the volume for
Channel B on the CAT 860 until
your voice is barely audible.
REMEMBER: This equipment
supplements the user’s voice
so they are able to speak in a
conversational tone. Having the
volume set too high will result in
feedback and listener fatigue.
LT-71
RS-232 IN
Front Panel
RS-232
Control Select
1
2
+
+
-
-
LT-71: Charging
1. Ensure that the LT-71 is turned OFF.
2. Make sure the cradle charger
is plugged into a wall outlet.
Connect one end of the charging
cable into the jack labeled
CHARGER on the side of the LT-71
and plug the other end into the
charging jack on the rear of the
REDMIKE cradle charger. The
LT-71’s rechargeable batteries are
factory installed. The LED on the
front of the LT-71 will glow RED
when charging.
3. Leave the LT-71 plugged in
overnight (8–10 hrs.) to obtain a
full charge.
NOTE: If the system was purchased
without a REDMIKE or REDMIKE VC,
the LT-71 will utilize a charging cable.
Simply connect the charging cables
to the jacks labeled CHARGER on
the back of the amplifier and connect
the opposite ends to the jacks on the
back of the
cradle charger.